Intro to Low-Poly Character Modelling with Blender
Last Updated: 10/30/2023
An exploration of my workflow for modelling low-poly characters in Blender 3.6

Matthew Piercey

Blender is an awesome program, and I wish I got into it sooner. But I can definitely recommend it for anybody interested in 3D modelling, animation (2D or 3D), video editing, visual effects, or rendering. It truly is one of the most versatile pieces of free, open-source software out there!
But now that I’ve had a few months of experience with Blender (I started learning it back in June 2023) I’d like to share my workflow for creating low-poly characters. This isn’t a complete tutorial or beginner’s guide. There are many better tutorials out there on YouTube and elsewhere for getting started with Blender (I should know, I’ve watched dozens of them at this point). But there are a few tips and tricks I picked up along the way, that I would really like to share.
I’m by no means an expert at any of this, but that’s the fun part - you don’t have to be a professional artist or 3D modeller to do some really cool things with Blender. This might be helpful for anybody interested in game development, as you can easily import models made in Blender into game engines like Godot or Unreal Engine. That’s why I got into it in the first place.
In this post, I’ll do my best to document my process of modelling a low-poly human character in Blender 3.6. This process works pretty well for me, although I recommend experimenting to see what works best for you. The character I’m creating will eventually be used with my game development projects, and I’ve released this character for free on Poly Pizza and OpenGameArt (see the links at the bottom of this post).
There’s still more of my Blender character creation process I’d like to document - including texturing, rigging, and importing into a game engine. Keep an eye out for more posts here on our blog. But this post will document my modelling workflow, which I’m pretty happy with.
The first step in my 3D modelling workflow is figuring out what to model. This may seem obvious, but you really need a solid vision of what you’re going to make, before you start. For this, you should seek out reference images. There are four types of reference images that I think are most useful, although generally the more the better. I recommend, if possible, at least a front view, a side view, a head close-up (or several), and other style/clothing/accessories references.
Now, if you’re an artist (unlike me) you can draw these yourself. By hand, or with some digital art program (like Krita, or even Blender, because it can do 2D too). Or, you might be able to find references online (sites like OpenGameArt can be invaluable resources in such situations). An interesting new option is to use tools like Stable Diffusion to generate references with AI. It’s a surprisingly viable option, especially if you use tools like ControlNet and OpenPose. But that’s a whole other ballgame. See my post on Stable Diffusion if you’re interested in reading more about my experiments with Stable Diffusion.
This time around, I chose another option. It might sound a little like a chicken-and-egg problem, but you can use an existing 3D model to create the reference images. OK, but isn’t that a bit of a paradox? If you already have a 3D model of the character or thing you want to model, what’s the point? Well, first of all, everyone needs practice. And sometimes the best way to practice is to see if you can replicate models that you or others have already made, based on 2D images of them. Also, maybe you want to recreate an existing model in a different style - like low-poly. Well, it might be easier to start from scratch, and use the existing model to make reference images, than to try to edit the existing model directly.
In this case, I created a model to use as a reference image with MakeHuman. MakeHuman (which has a Blender plugin MPFB - which I would highly recommend) is a free, open-source toolkit for creating 3D models of human characters. It may not be as flashy or photorealistic as something like Unreal Metahuman, and it’s a bit tricky to set up, but it has its uses. And there are many free assets (like clothing, hair, and accessories) available. Credit where credit’s due, the MakeHuman development team and the MakeHuman Community are dedicated to making it a powerful and useful piece of software.
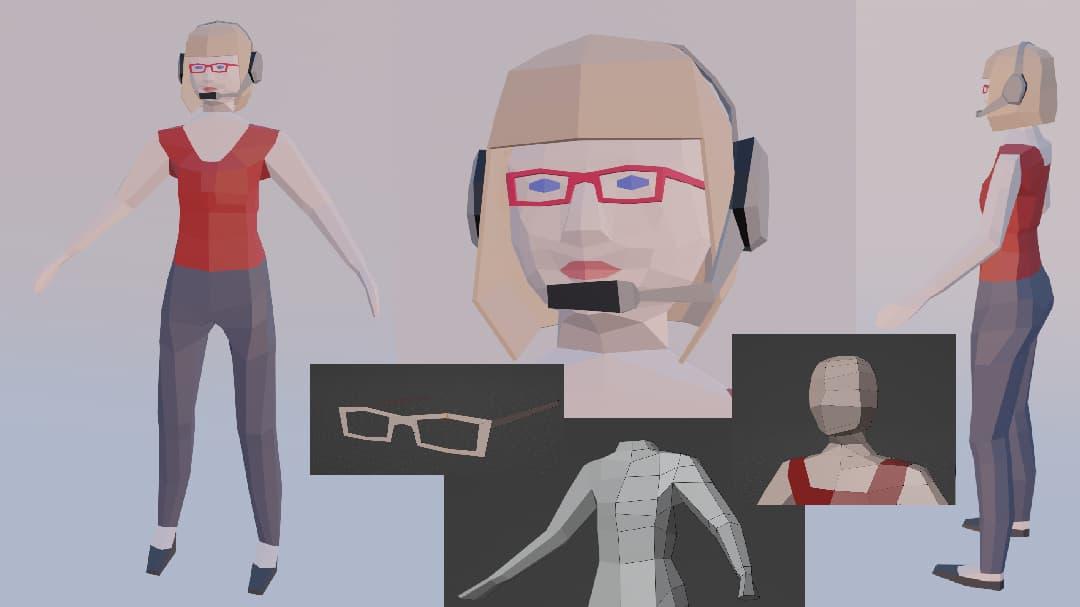
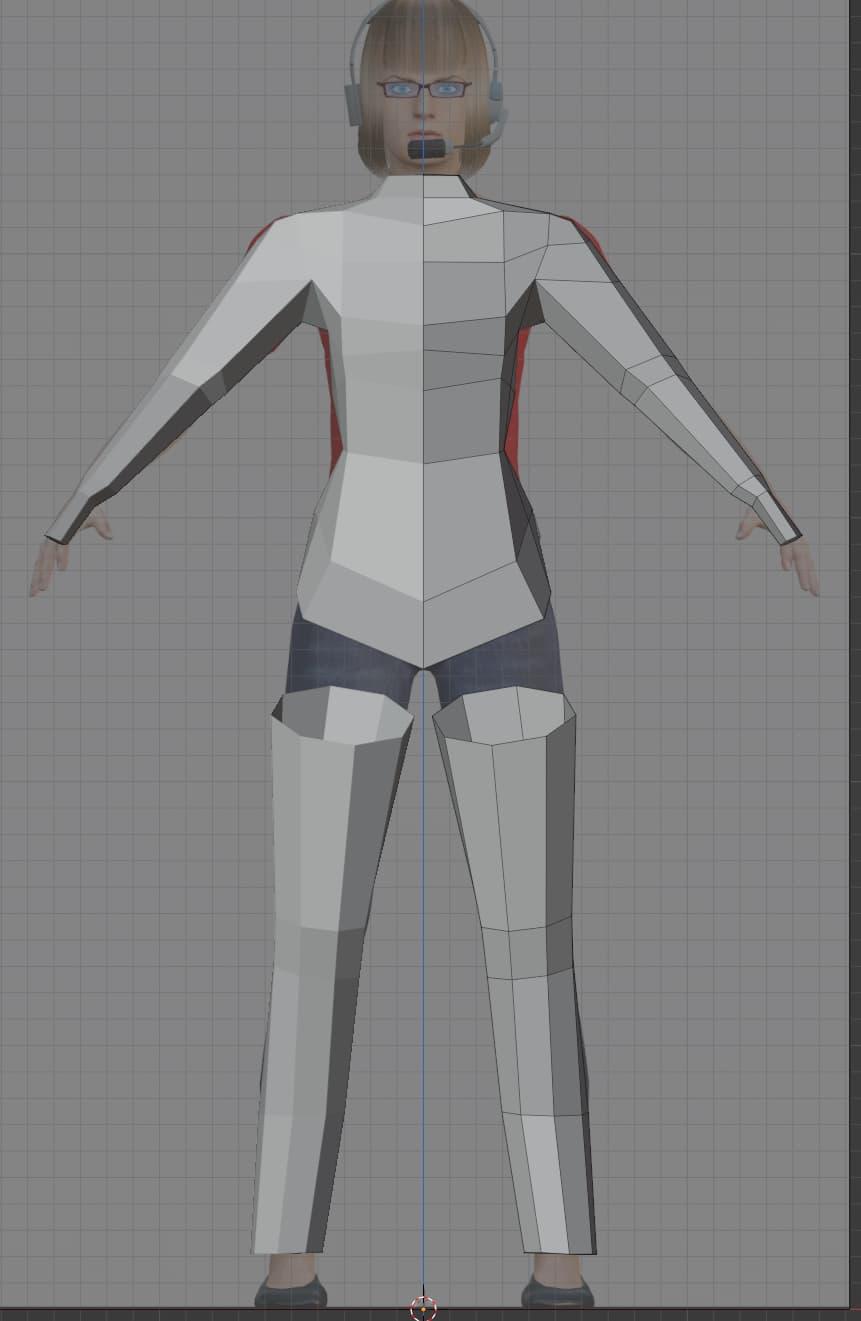
So, using MPFB and some freely-available assets (including those uploaded by MargaretToigo, spamrakuen, and punkduck on the MakeHuman forums) I made a basic 3D model that I wanted to use as a reference. There may be better ways of doing this, but I took screenshots of it from the front orthographic view and the side orthographic view in Blender. These were the results:
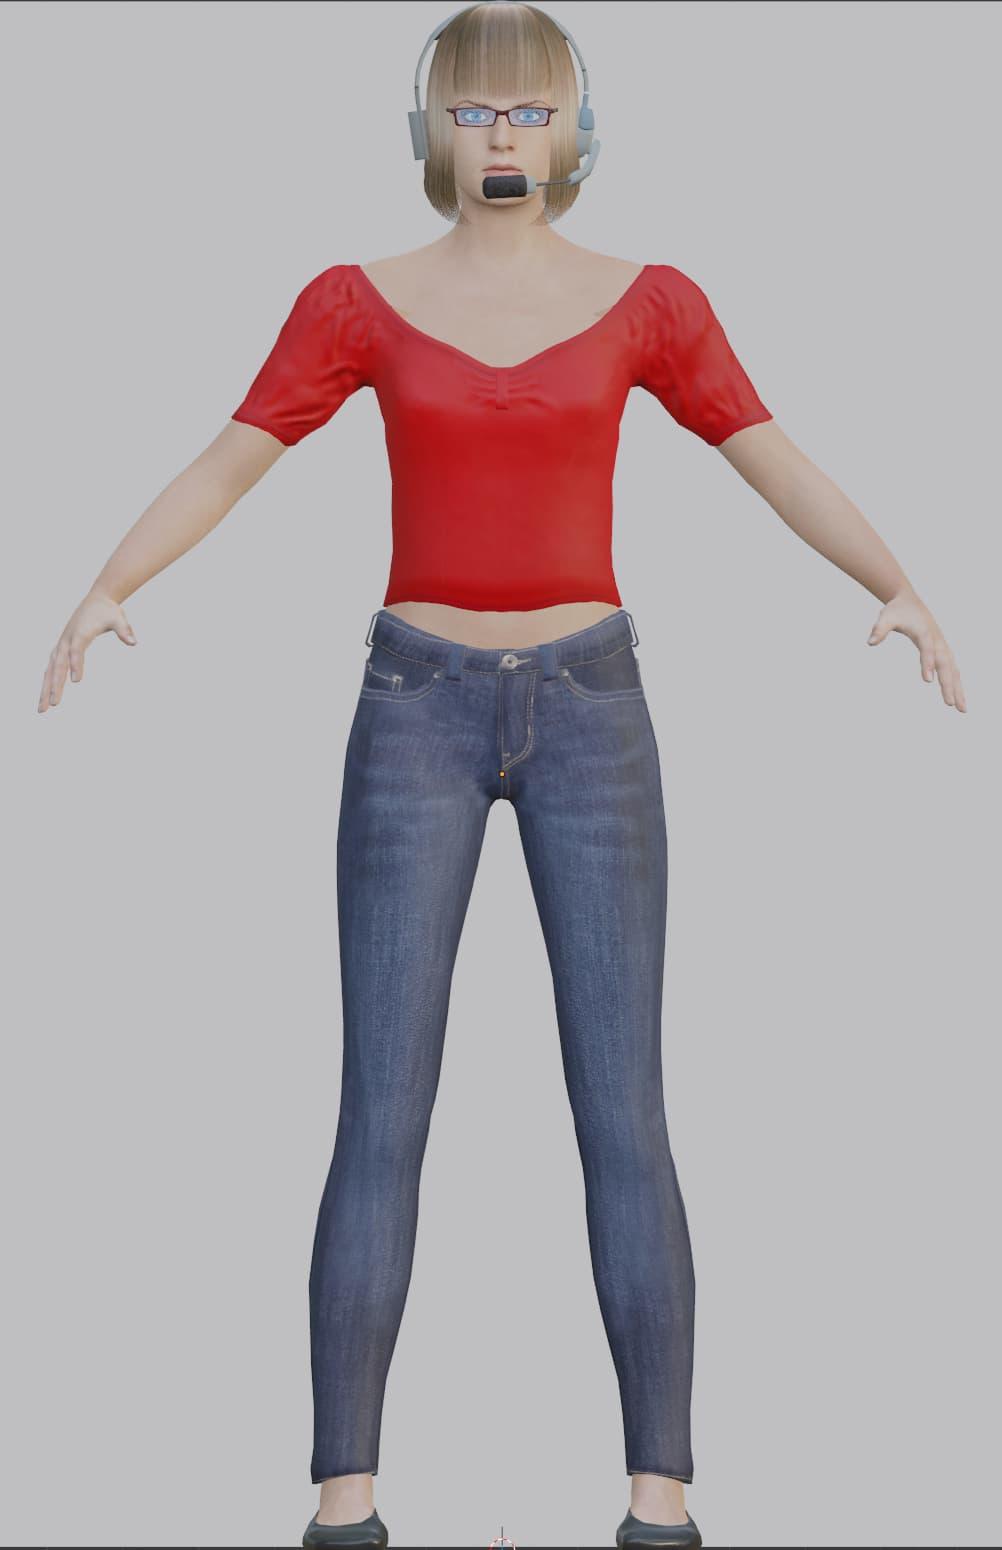
Front View
I think these references turned out pretty well. Because I wanted to start from a character with realistic proportions and clothing.
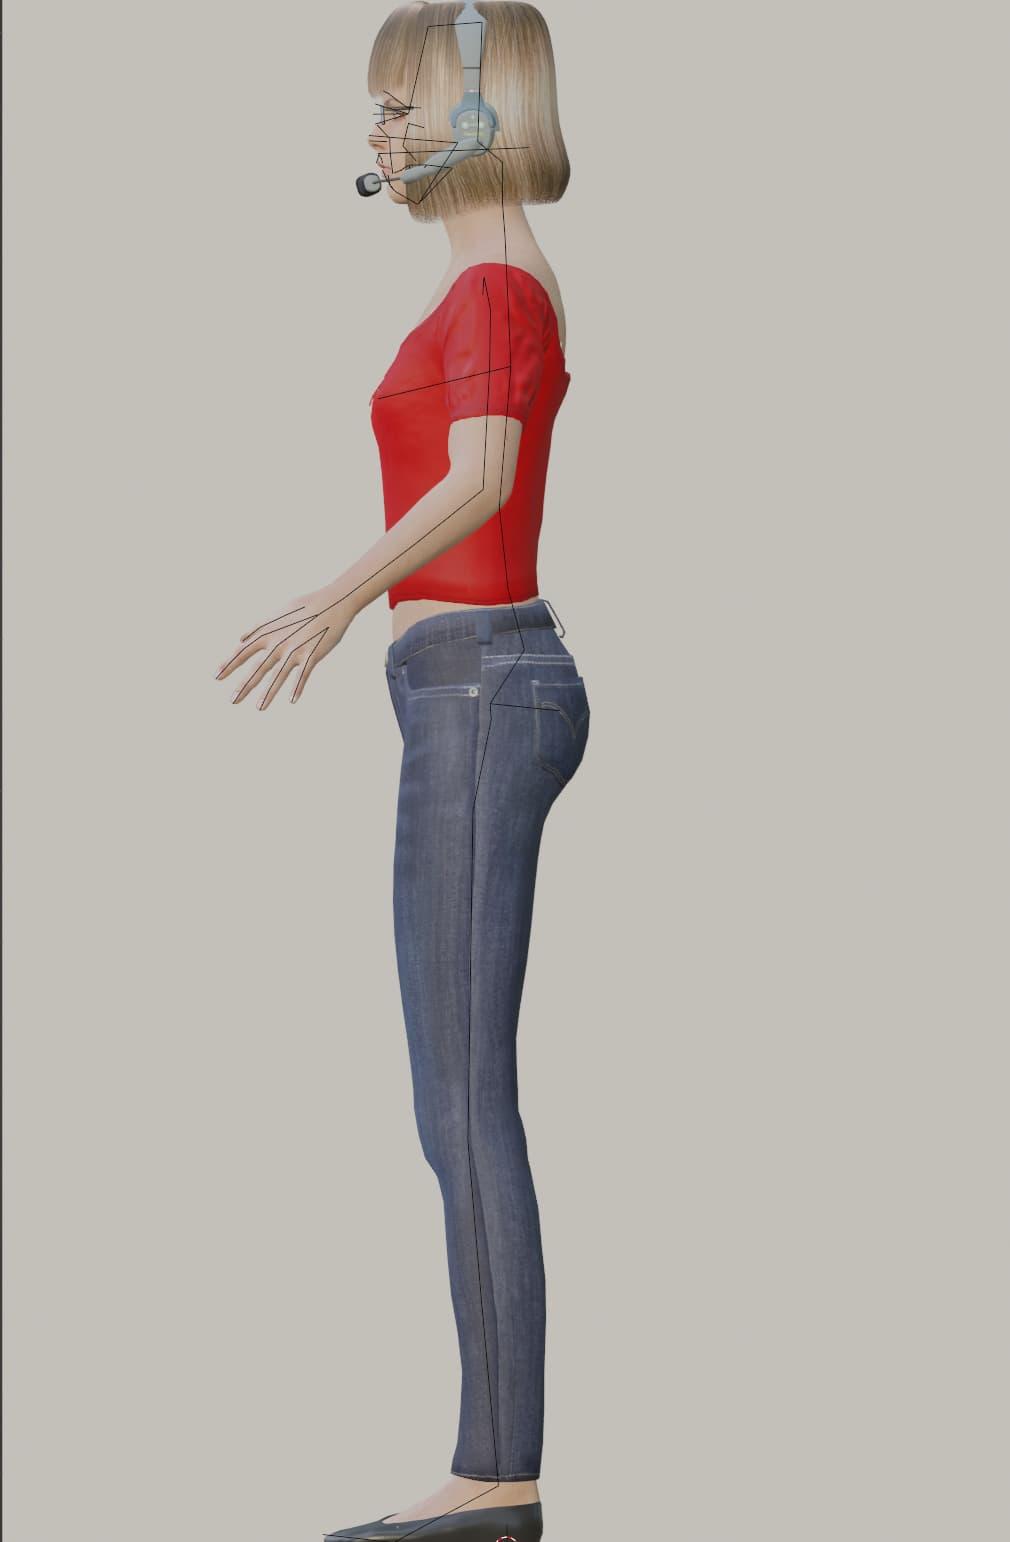
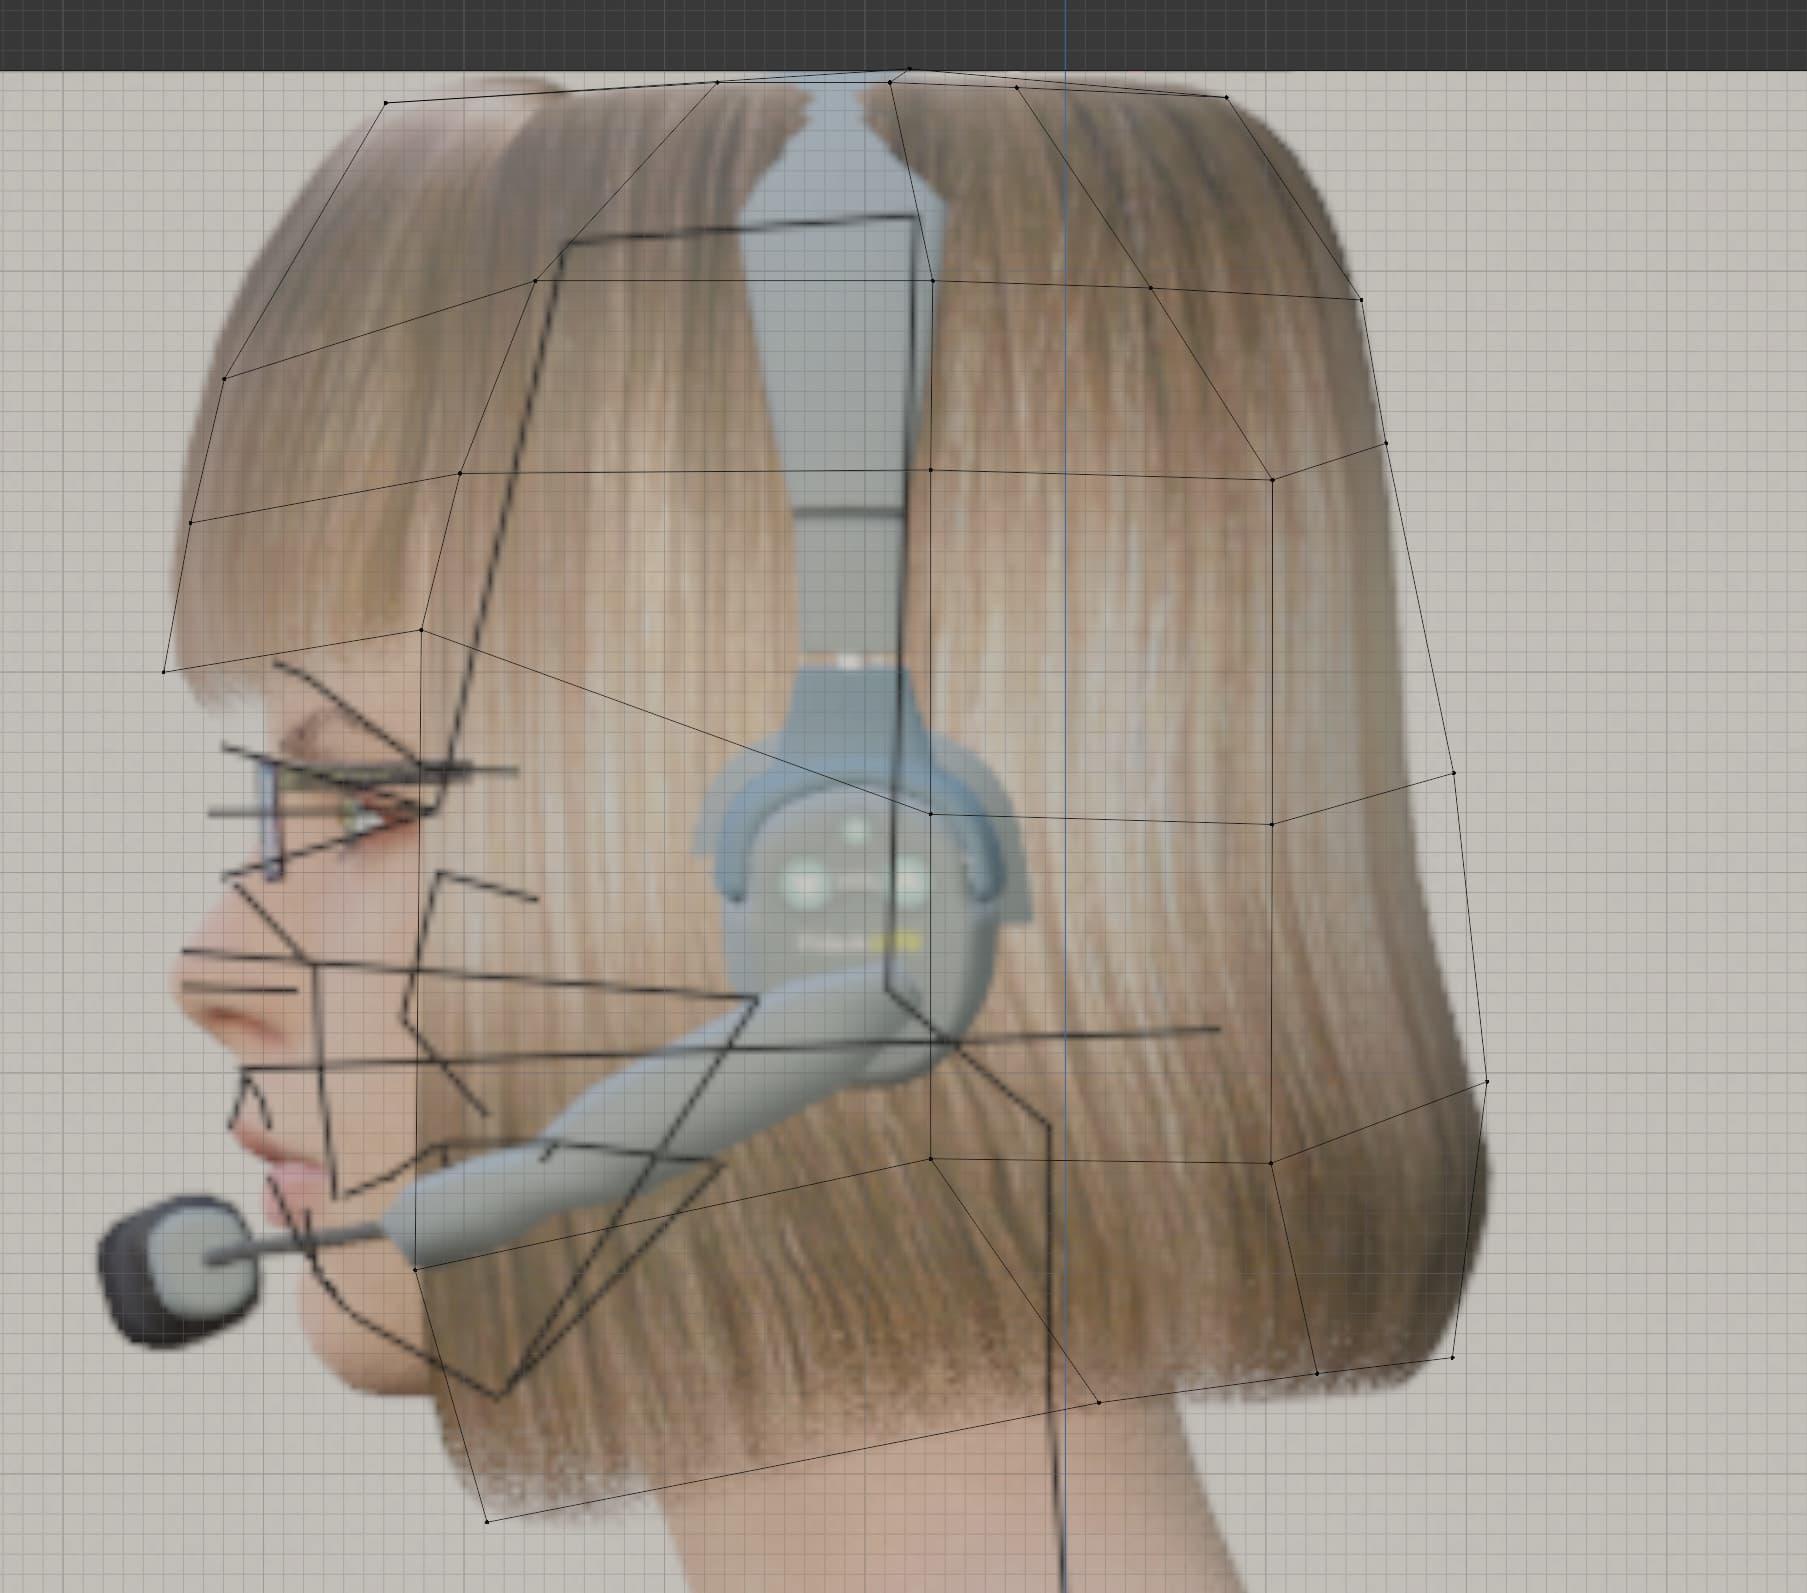
You’ll notice in the side view, there are some strange lines in places. That’s because I forgot to hide the model’s rig when taking the screenshot, but it didn’t end up being too much of an issue. I just wanted to have an idea of the basic body shape, and the placement of things like the eyes, nose, and mouth.
I imported my screenshots as reference images into a new Blender file, using SHIFT+A in Object mode, and looking for Image > Reference. I placed the front image along the Y axis, and moved it slightly back. And I placed the side image along the X axis, and moved it slightly back as well. I also set the opacity on both references images to 0.4, so I could see through them. There are many good tutorials for doing this sort of thing, so I won’t harp on the details. But the most important part is to make sure your reference images are the same size, and are lined up with each other. Because the last thing you want is to be following the references, only to realize one image is bigger or misaligned compared to the other. This can be tricky to get right, but it’s something that will come with practice.
So, with my references in place, I was off to the races!
A running joke in the Blenderverse is that every Blender project either starts by you deleting the default cube (that’s placed in the scene automatically when you create a new file) or by modifying it.
In this case, I took the default cube, and applied a subdivision surface modifier to it. Like I said, this isn’t a tutorial per se, so I’m sorry if it sounds like I’m skipping some steps here and there. Hopefully I can still impart a few of the tricks I picked up along the way, though.
So with this subdivided cube, I moved and scaled it into place, as the start of the body. Throughout the modelling process, I made extensive use of the front orthographic view (NUMPAD 1) and the side orthographic view (NUMPAD 3). When it comes to 3D modelling/CAD, orthographic view is great for ensuring that your geometry lines up and makes sense. Although you should always switch to perspective mode every now and then, and take a look at your model from many different angles, to make sure it looks right. Orbiting around by holding the mouse scroll wheel helps with this.
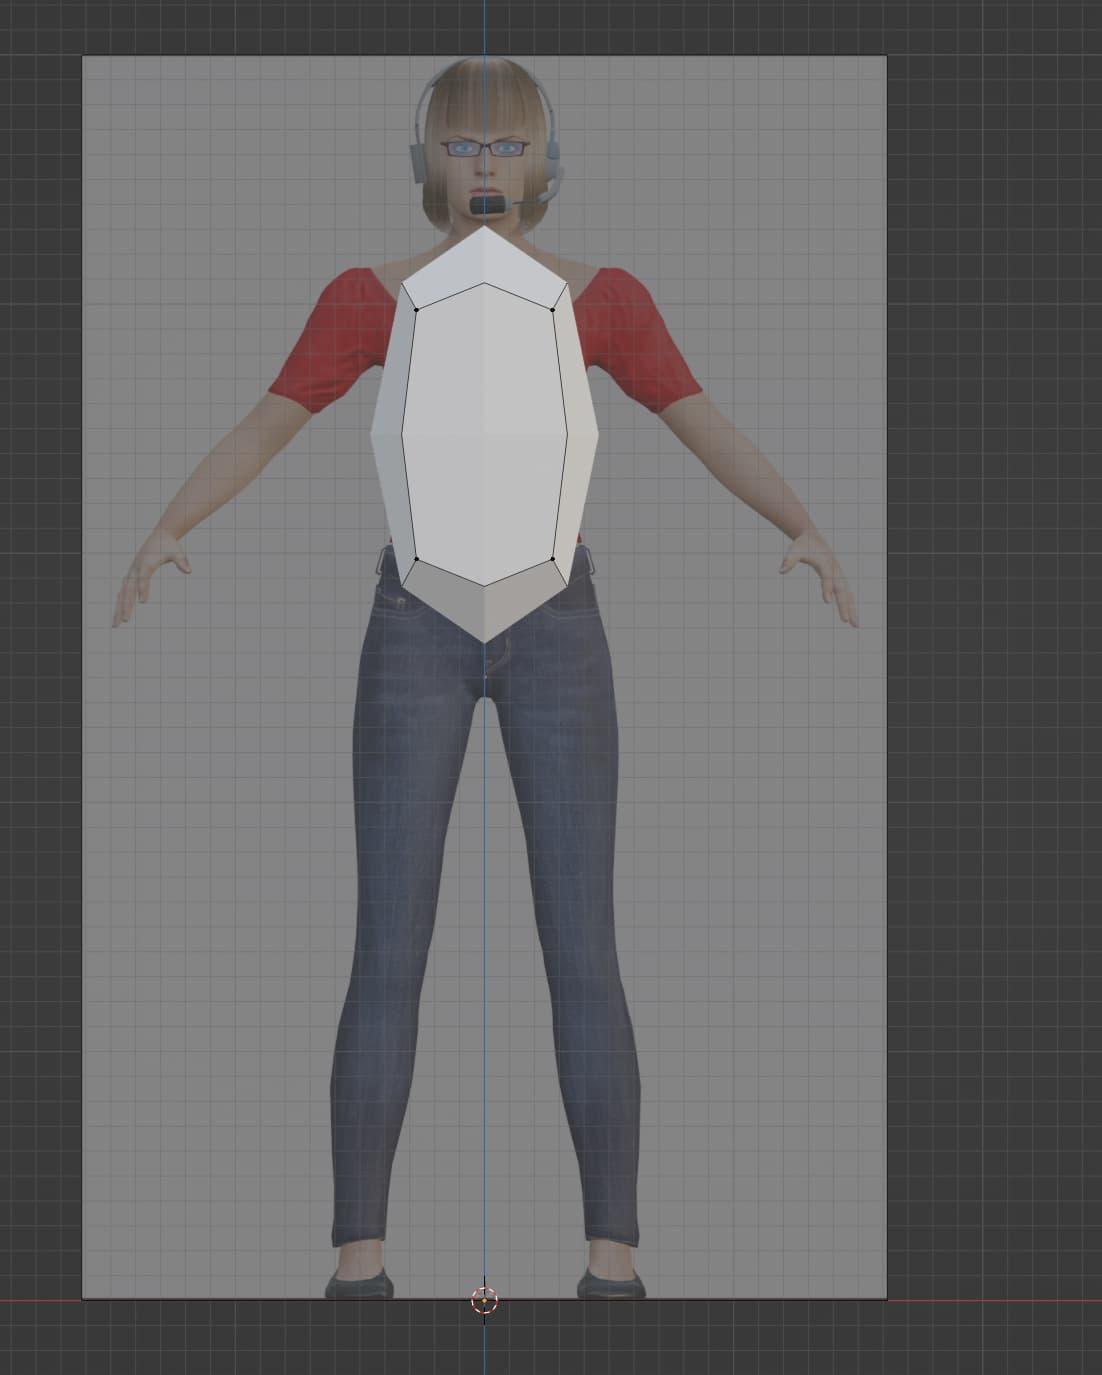
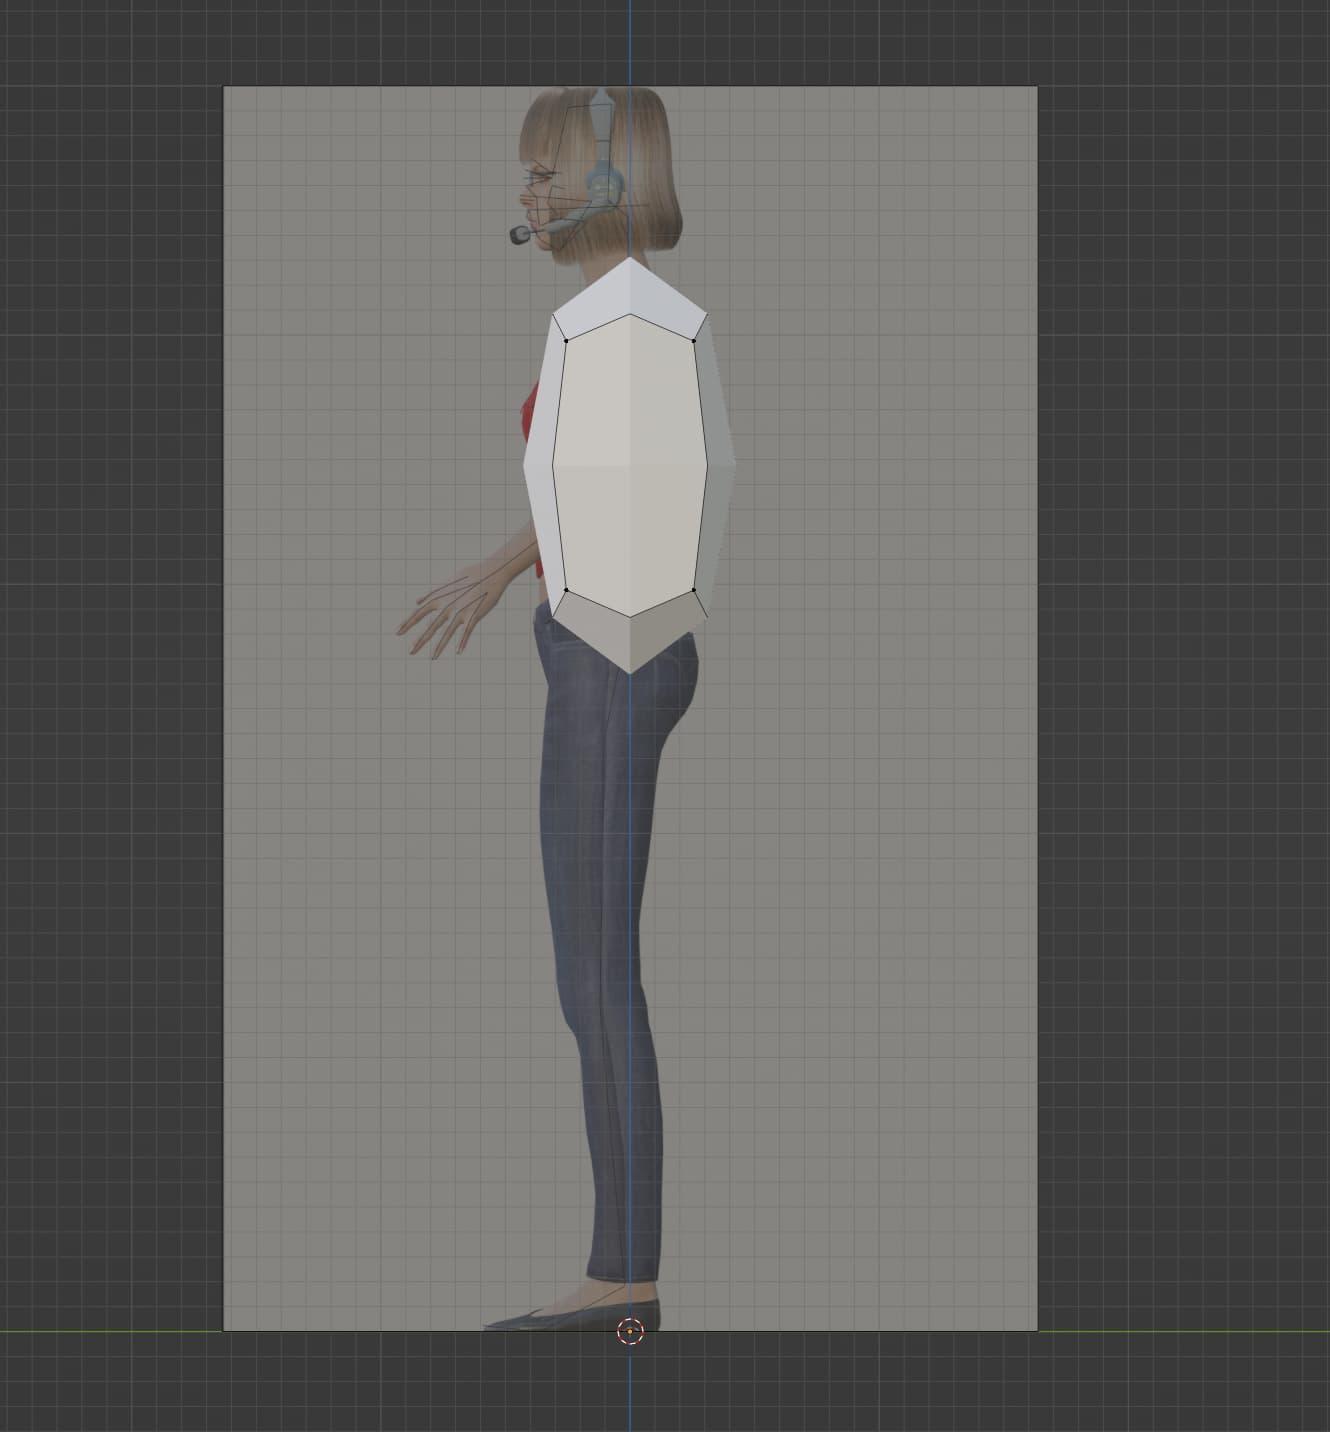
Front View
If you’re new to Blender, and you remember nothing else from this post, remember that G is for move, R is for rotate, and S is for scale. And you can press X, Y, or Z after any of those keys to move/rotate/scale only on a specific axis. In Blender, the X axis is generally left and right, Y is generally forward and backward, and Z is generally up and down. You’ll get a lot of mileage out of those keyboard shortcuts, trust me.
It might not look like much yet, but this is indeed the start of the body. Modelling the torso is generally where you would start with something like this, although I’ve seen some people start with the head, as well. Whatever works for you.
Anyway, after getting the very basic shape in place, I deleted one side of the shape, by selecting the vertices on the left side. Scratch the one thing I said to remember. Also remember that 1 is vertex select, 2 is edge select, and 3 is face select. And you have to be in Edit Mode, not Object Mode, to select vertices, edges, or faces. Otherwise you can only select whole objects. But anyway, why did I delete these vertices? You’ll soon find out (if you don’t already know).
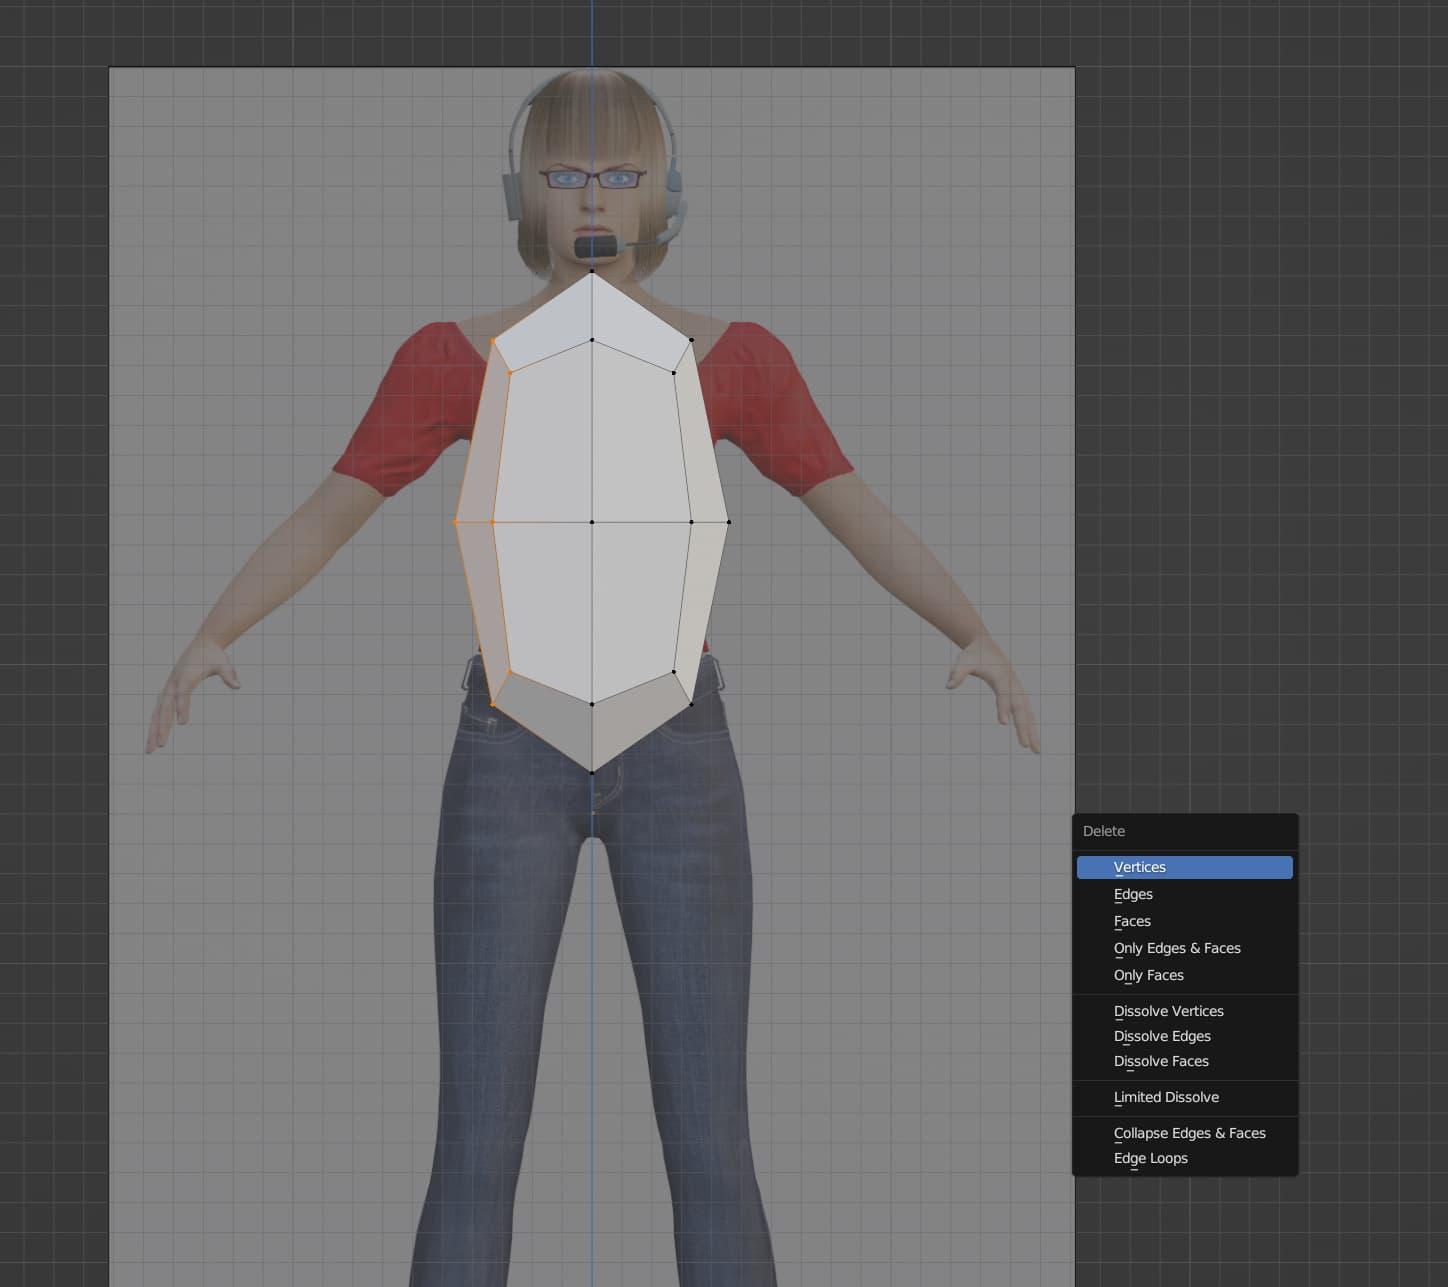
Deleting half of the "torso"
OK, the moment of truth. I deleted half of the body shape, so I could add a mirror modifier! Mirror modifiers are pretty great, because they allow you to create symmetrical objects without having to worry that every point is mirrored - because it’s done for you. Such a useful feature. And if you ever want to make asymmetrical objects, you can apply the mirror modifier in Object Mode. While you then lose the ability to have your actions mirrored, you can do whatever you want with the object after applying the modifier.
Anyway, I recommend enabling the built-in Auto Mirror add-on (and LoopTools, Align Tools, and Node Wrangler while you’re at it - you’ll thank me later).

Auto Mirror is awesome. Although you can apply a mirror modifier manually, the Auto Mirror add-on is super convenient
After mirroring the torso, I moved the points around in the front and side views. I also started adding loop cuts with CTRL+R. Loop cuts add extra geometry for you to work with, and they come in handy quite often.
This is the advantage (and in my opinion necessity) of using reference images. As long as you have enough geometry to work with (and you don’t usually need that much) it’s just a matter of moving points around so the resulting shapes start to make sense. Like I said above, you will often be toggling between the front orthographic view, the side orthographic view, sometimes the top orthographic view (NUMPAD 7), and rotating around the object by holding down the scroll wheel, to view it from different angles. It takes a bit of getting used to, but it becomes quite intuitive with a bit of practice.
Another thing, if you hold CTRL while selecting a view mode, you go to the opposite side. For instance, CTRL+NUMPAD 1 takes you to the back orthographic view, and so on. But I usually stick to the default front and side views until I’m nearly done, unless I need to make specific adjustments in a certain area.
Ah, and you can select a loop by holding ALT and left-clicking (if you have the LoopTools add-on enabled). This doesn’t always work, but it can make things a bit less tedious from time to time. For instance, I selected the loop around the neck, and scaled it down with S.
Some other tips of note, selecting one or more faces and pressing I allows you to inset faces. That’s really useful when you want to have, say, geometry for an arm on the side of the body, or geometry for eyes. But I’ll get to that. And pressing E allows you to extrude vertices, edges, or faces. Basically to make a connected copy of them that you can move elsewhere. You can move an extruded shape along just one axis with E+X, E+Y, or E+Z. One more tip for the moment, ALT+Z is X-Ray mode, which allows you to see through an object. I used it a lot to match up points with the reference image.
This might all seem a bit banal, but I guarantee that getting a good grasp of these concepts and keyboard shortcuts will open up many options for you. That’s why I’ve grown to like 3D modelling - it’s like a logic puzzle. Where you have a number of potential moves (adding shapes, adding loop cuts, moving vertices/edges/faces, rotation, scaling, insetting, extrusion, modifiers, filling shapes, deleting selected geometry, dissolving selected geometry, joining points, merging points, etc.). and you’re tasked with getting to an end product one logical step at a time. The more options you’re familiar (and comfortable) with, the better.
So, here are some screenshots from my process of refining the shape of the torso.
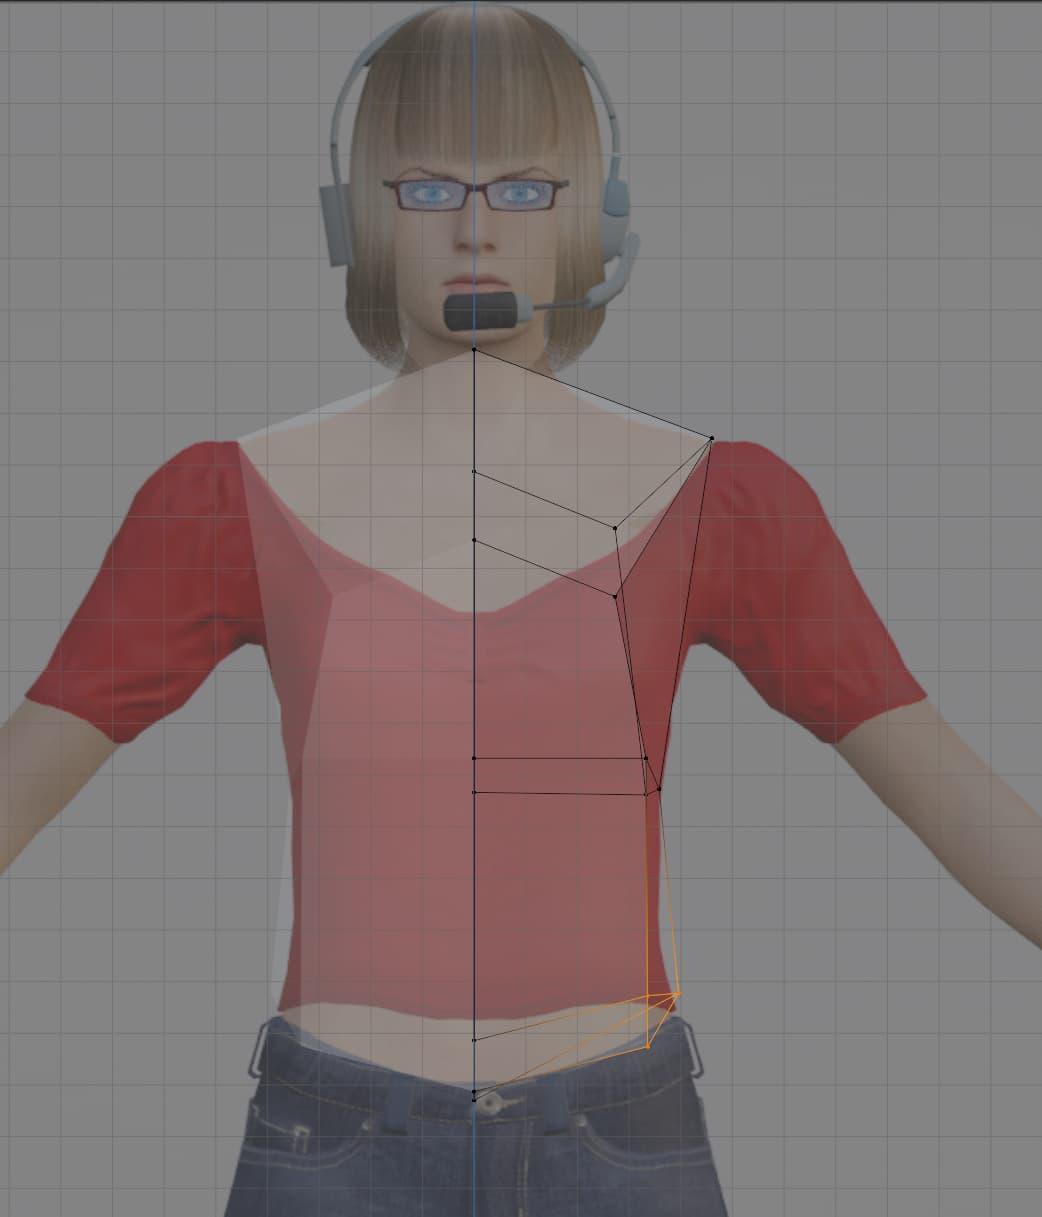
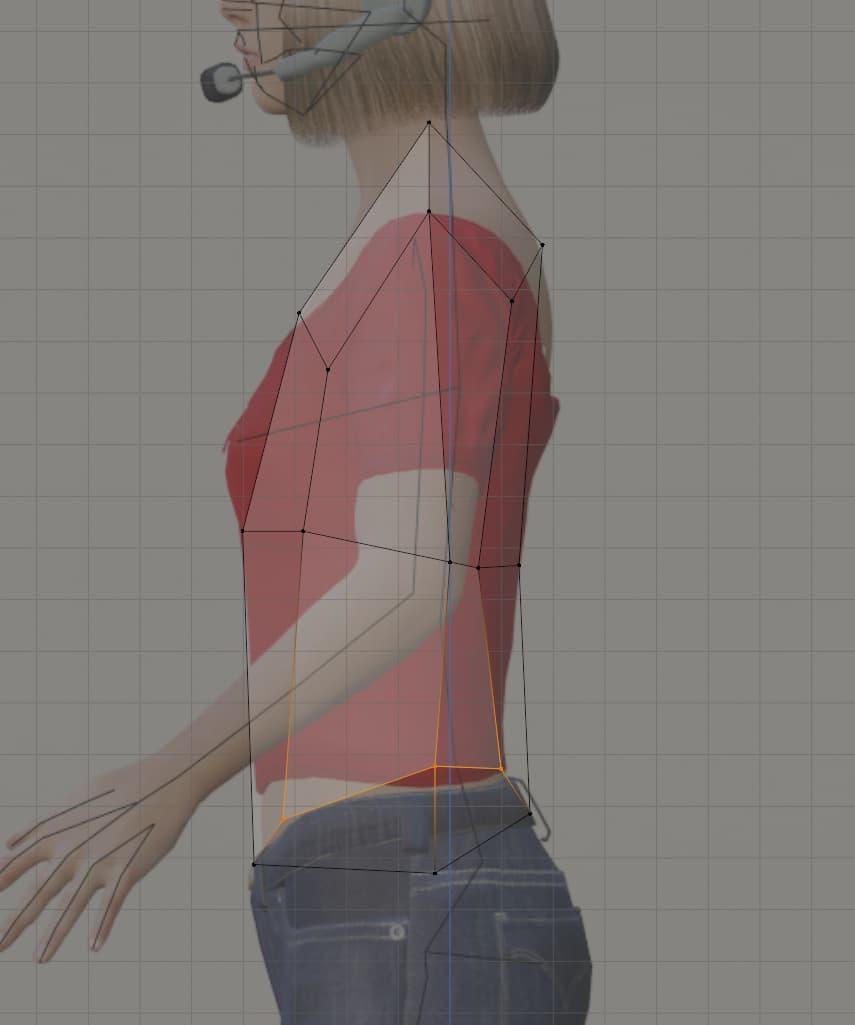

Lining up the points from the front view (I'm using X-Ray mode)
It was at this point that a dreaded beast first raised its ugly head.
OK, maybe that’s overreacting a bit. I personally don’t mind retopology all that much. Again, I treat it like a logic puzzle, where I have a number of potential options to move closer to my goal one step at a time. But it can definitely be a time-consuming, and sometimes quite frustrating experience.
Let me back up, though. What am I talking about, exactly? Well, let’s break it down, shall we? Topology is a whole mathematical field into and of itself, but retopology is basically the process of “cleaning up” a 3D model without affecting its overall shape. Because when you’re making a 3D model, it’s easy (and sometimes necessary) to take shortcuts, or experiment with different shapes or layouts of vertices. Because getting the shape is more important at first, than keeping everything super tidy from the start.
At the end of the day, any 3D model is just a collection of points joined together in a certain way. And these points ultimately are rendered by a computer as a group of triangles, or “tris” as they’re called in shorthand. The reasons are technical, but sufficed to say, it’s turtles triangles all the way down. Now, triangles are all fine and good, but they aren’t always the nicest to work with. Again, for reasons (some of which I don’t fully understand, and others that basically come down to tradition) “quads” (four-pointed shapes) are often easier to work with - when you’re making or animating a model.
These days, it’s usually considered good practice to keep your mesh all quads. (Or all triangles, but they’re harder to work with - and it’s easy to convert quads to tris). Blender gives you a lot of freedom in this regard. You can have floating disconnected points, lines, tris, quads, or even “n-gons” (a shorthand name for shapes with more than 4 sides). But, in most cases, quads are the way to go.
All that to say, sometimes you make a triangle or n-gon in the process of creating a 3D model. And if you care (which you don’t always have to, but I make a point to) you’ll do your best to convert all of them to quads. Yes, this can be as tricky as it probably sounds.
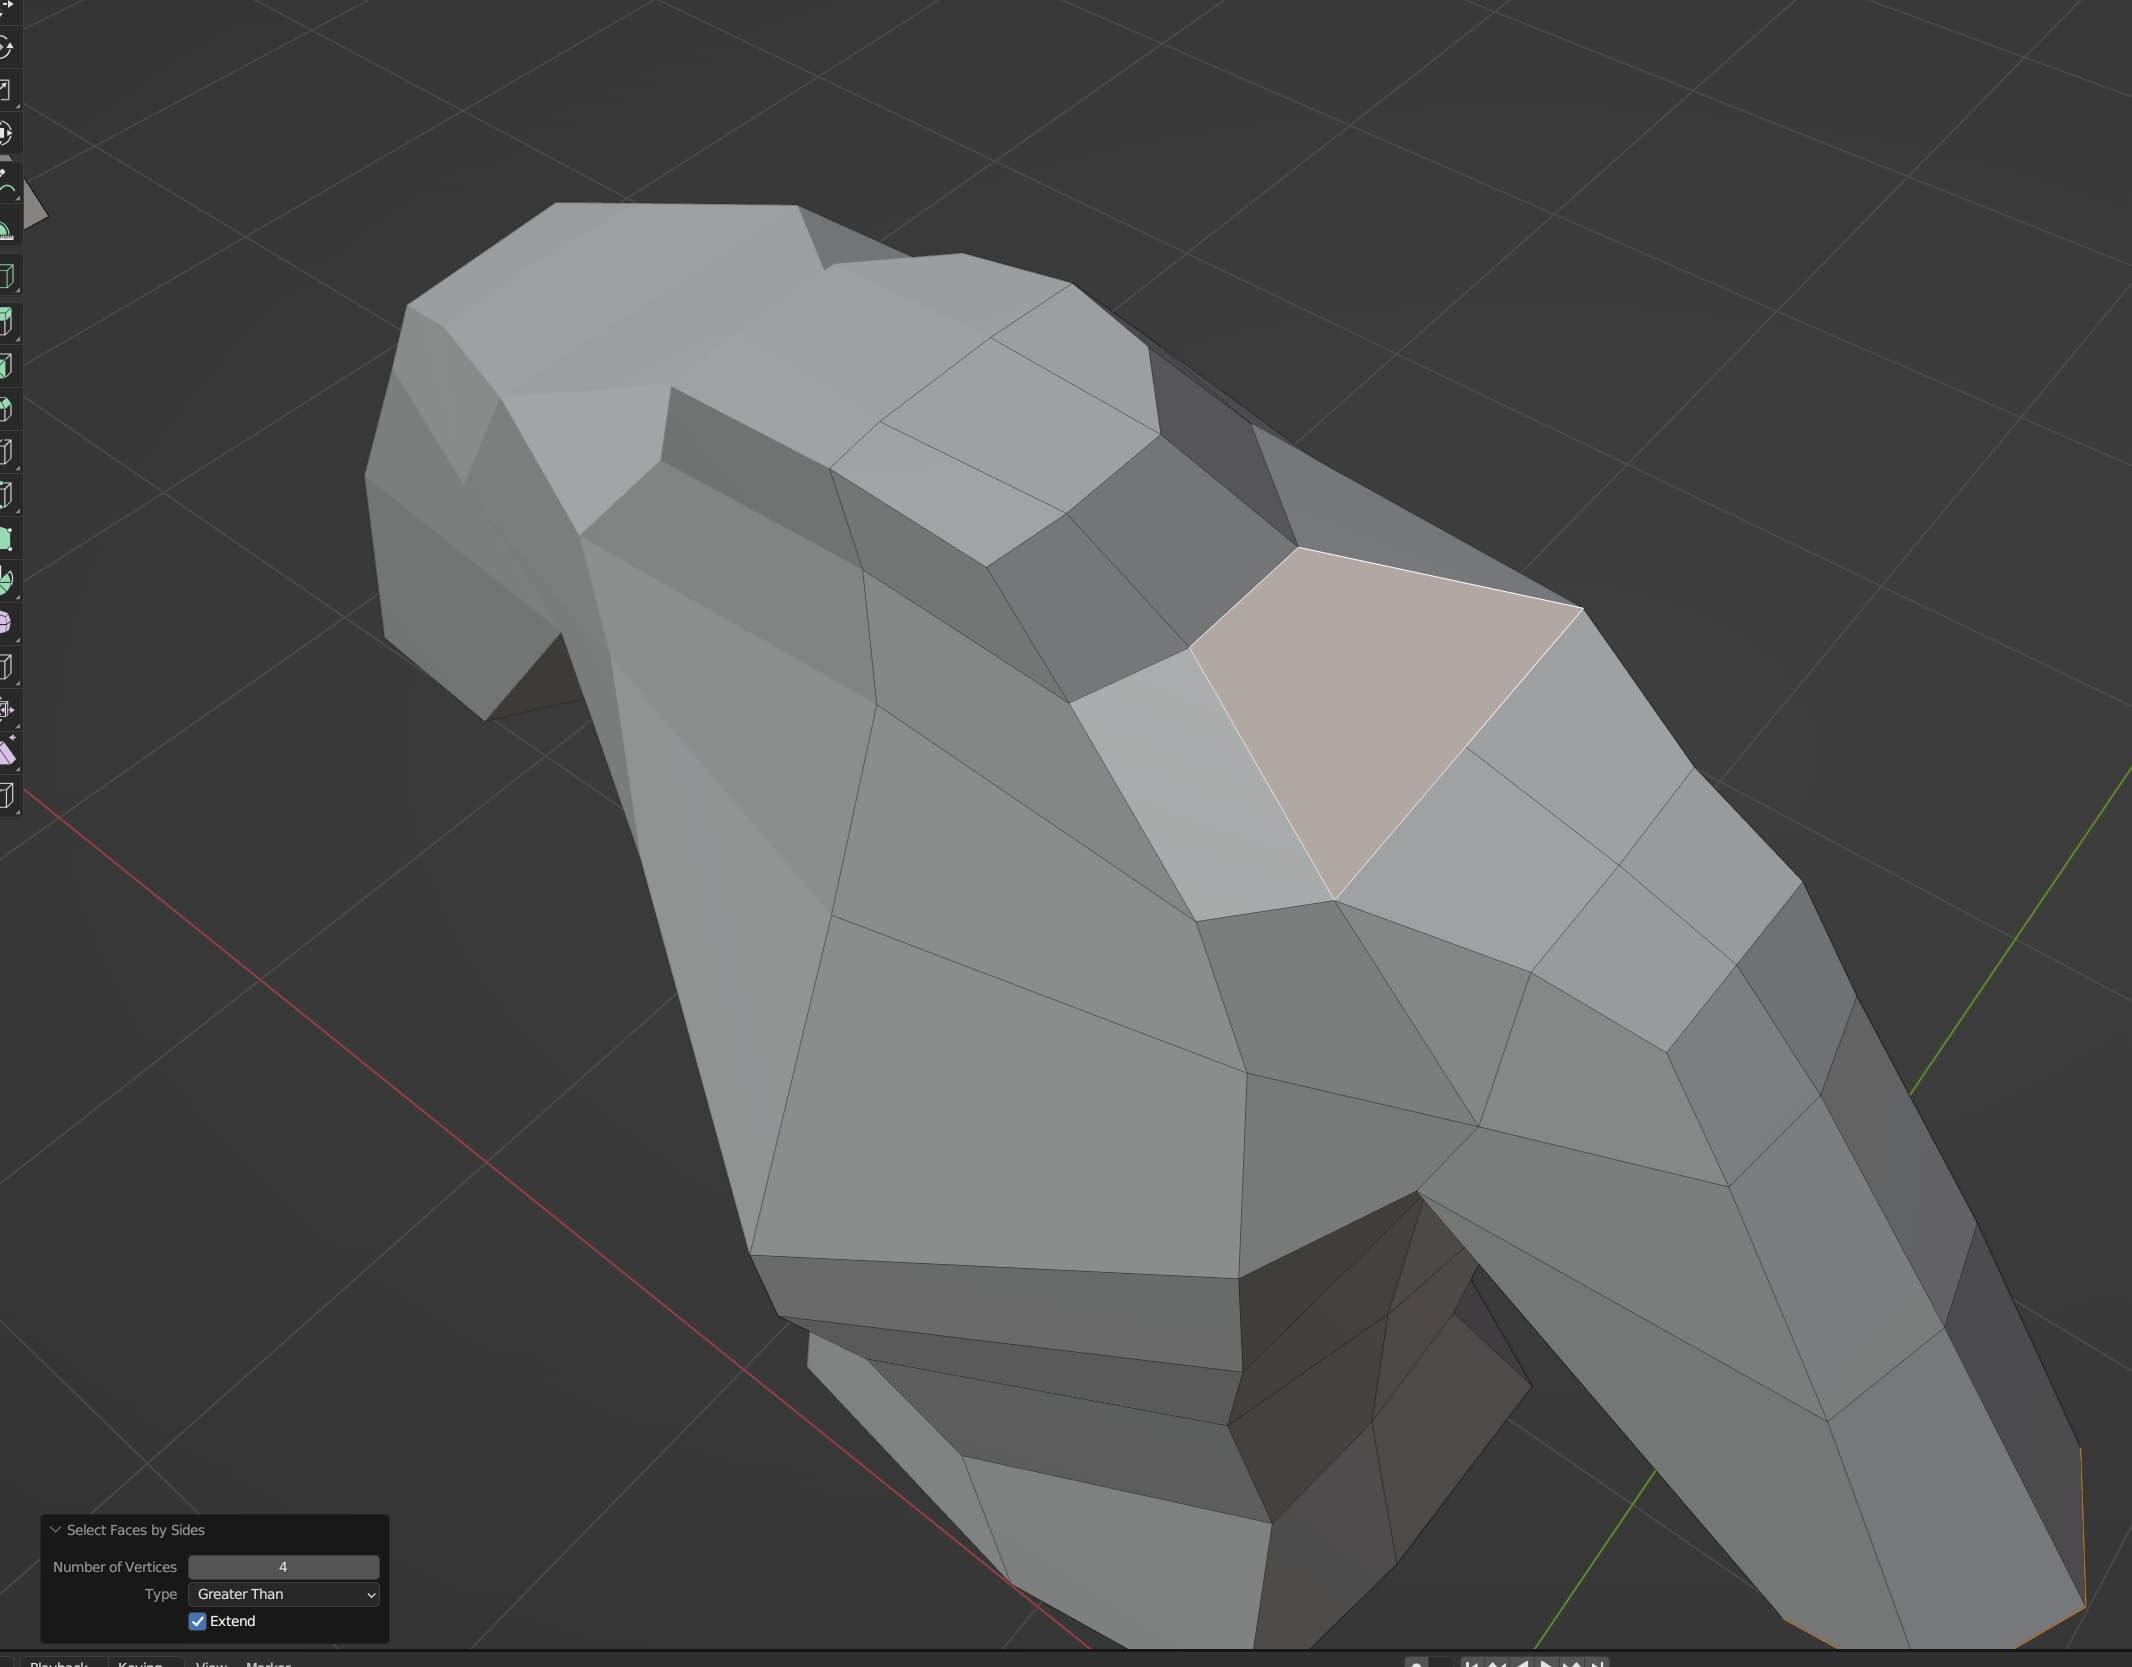
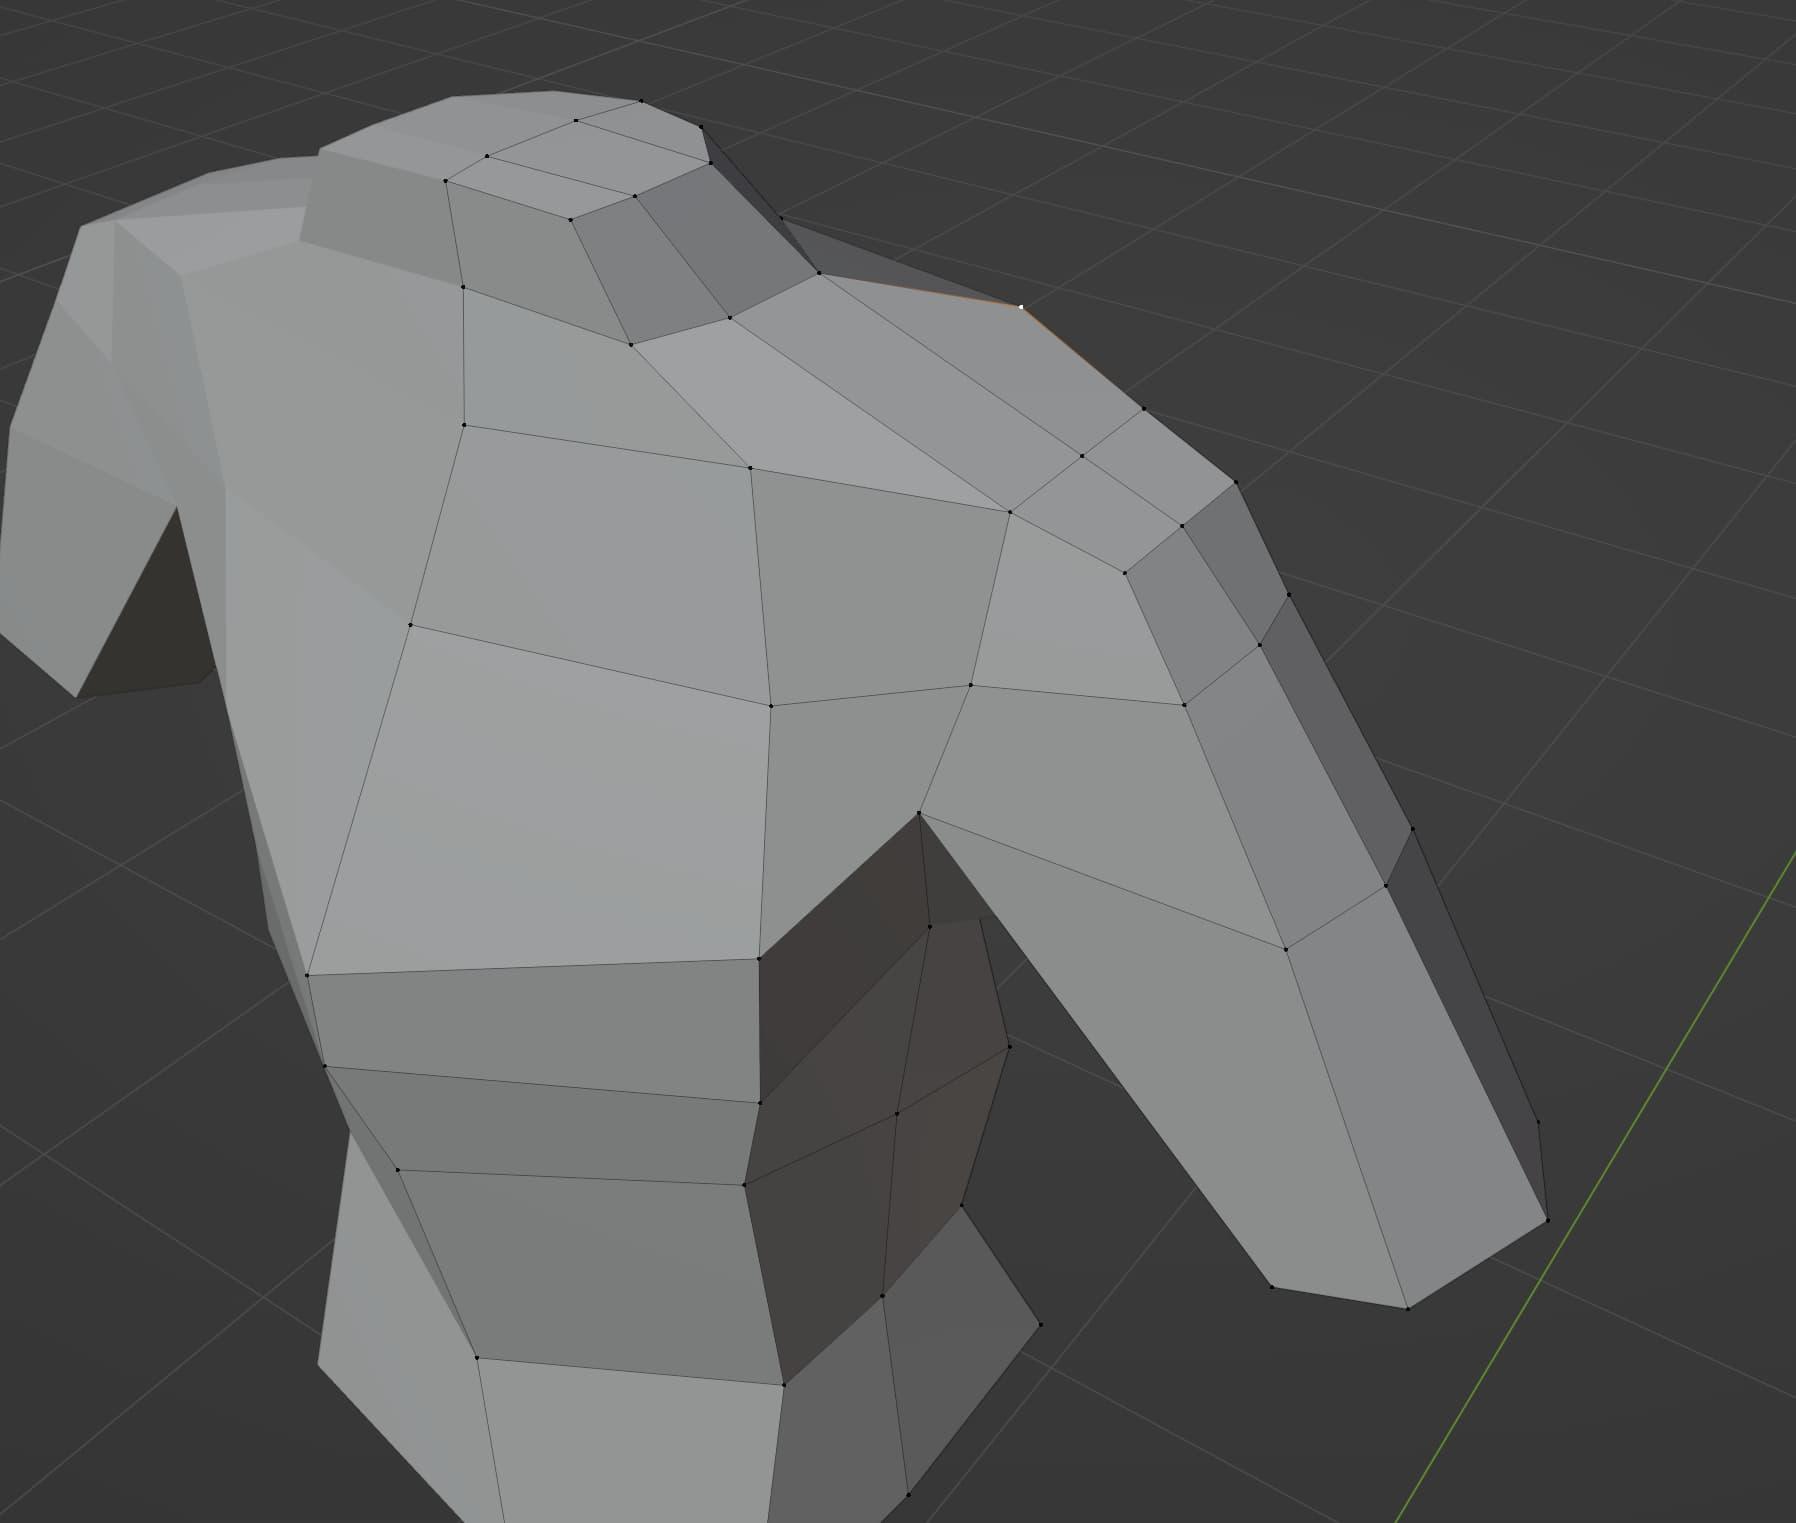
Luckily, there are many helpful tools to assist in this area. You can merge vertices with M, you can join vertices with J, you can fill shapes with F, and you can use the knife tool with K. You’ll be seeing a bit more of that in this post eventually. But for now, I noticed a triangle near the shoulder, and wanted to do something about it. I was probably premature, since I ended up doing a lot more modelling, and a round of retopology after this, but whatever. It illustrates the process pretty well, and I definitely do this kind of thing as a regular part of my workflow.
While I have yet to peruse all (or even most) of Blender’s various dialogs and menus, I have found the “Select > Select All by Trait > Faces by Sides” option to be quite useful in helping me identify undesirable tris and n-gons. Knowing is half the battle, and sometimes it’s hard to find them all without having them highlighted for you.
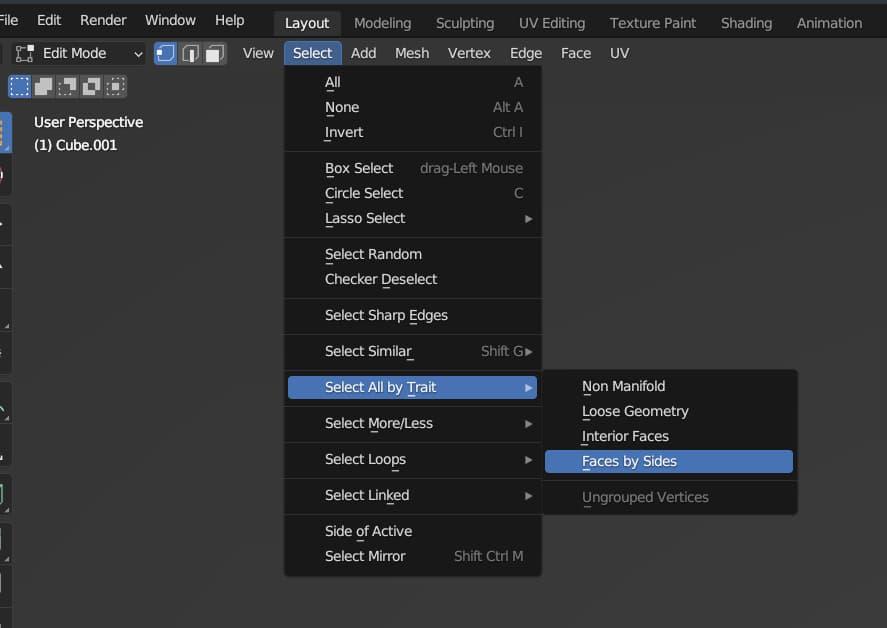
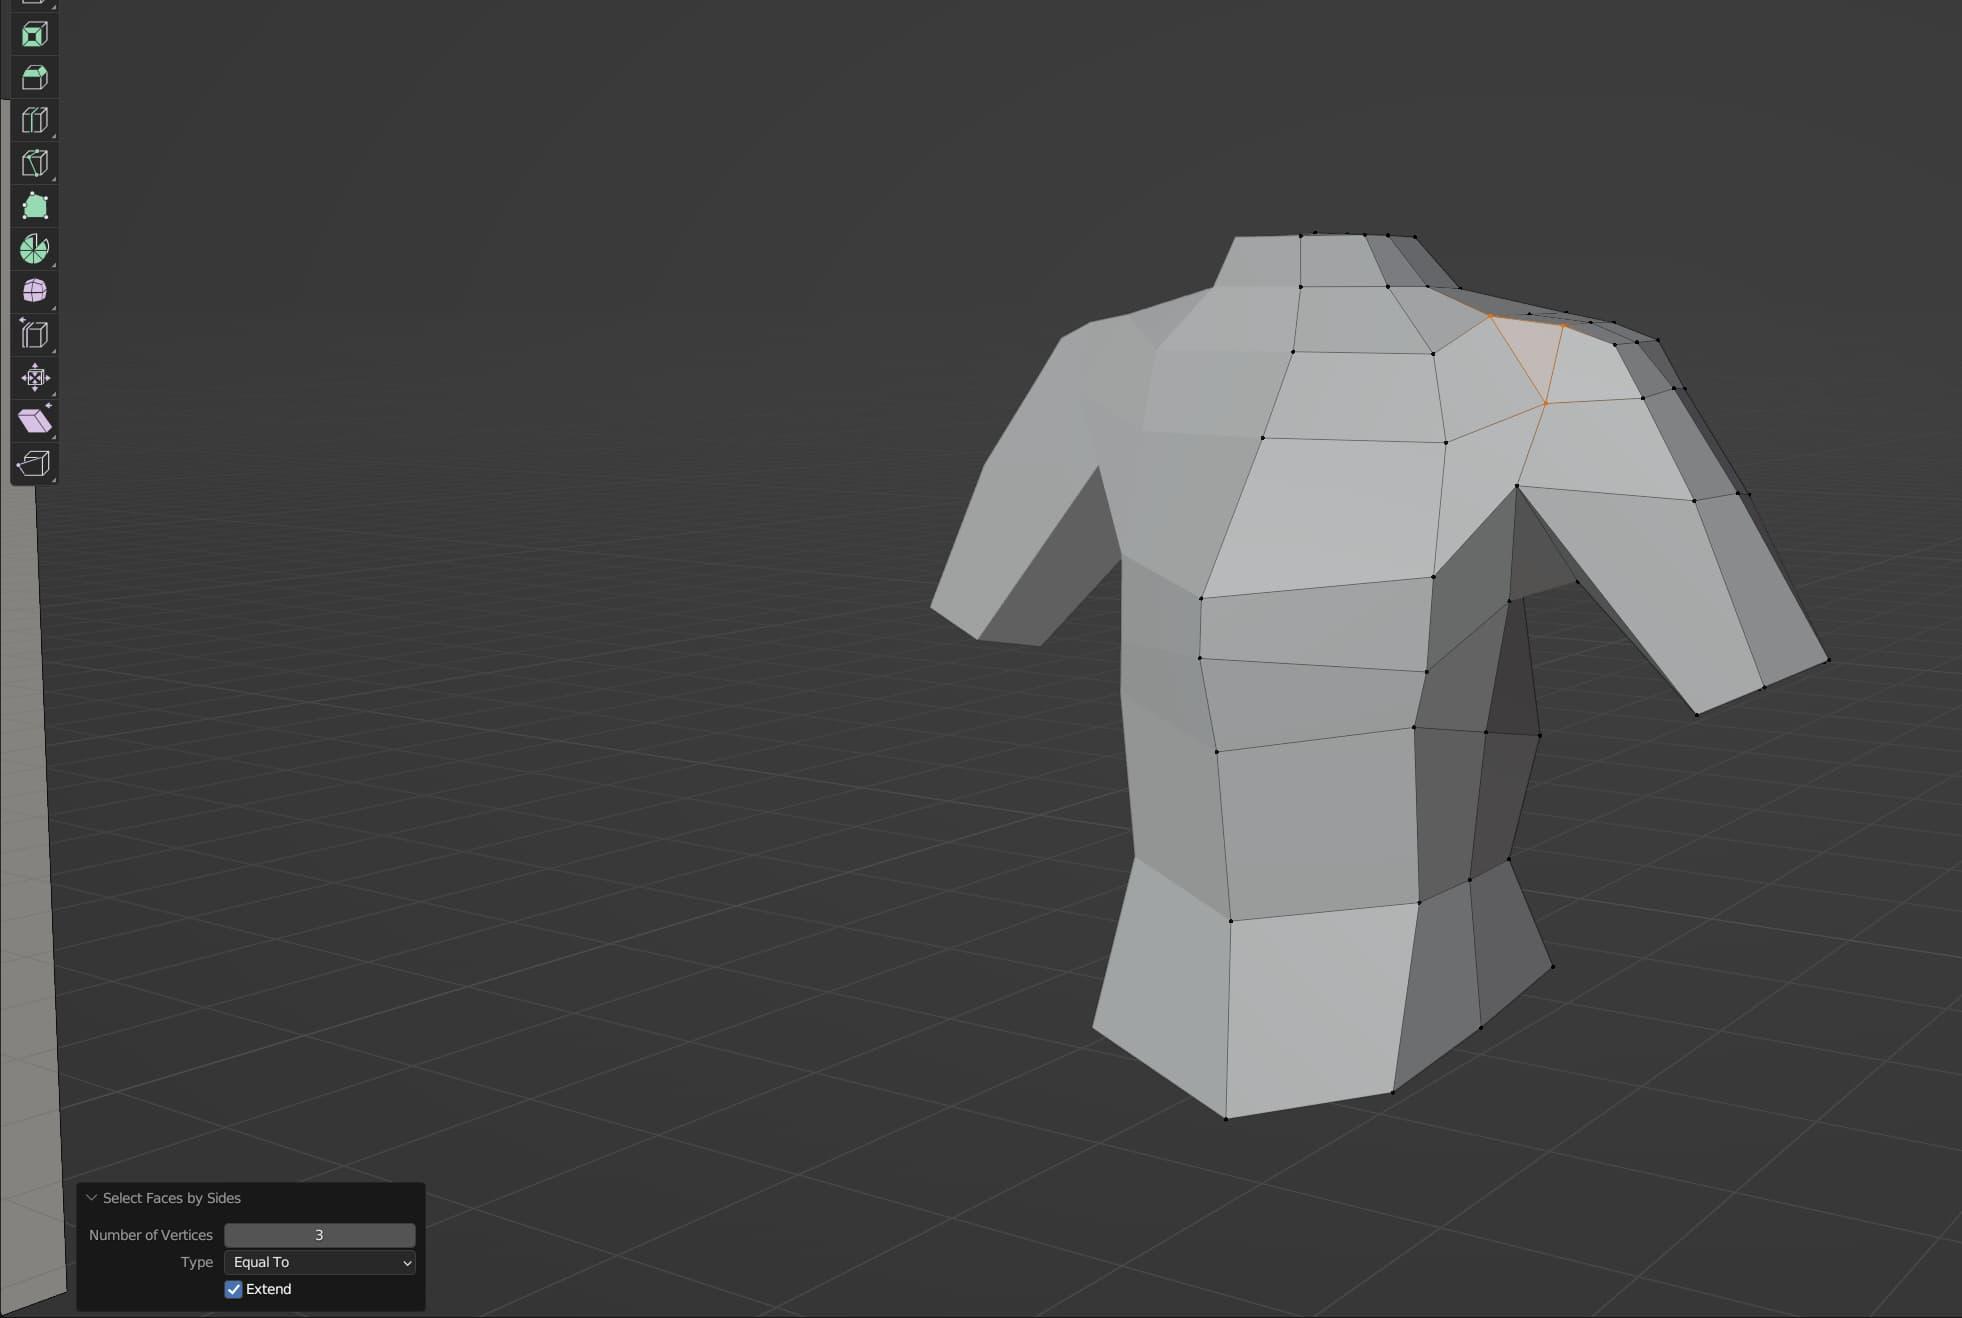
Menus. Menus Everywhere
It’s worth mentioning at this point that if you find Blender’s interface to be intimidating, you’re not alone. But I really don’t think you should worry about it - focus on what you want to do with Blender - you don’t need to know it inside and out. There are people who have built whole careers using software like Blender, and only use a fraction of their capability on a daily basis. That’s why I’ve made such a point to try to document the keyboard shortcuts and processes I make extensive use of with my workflow. Because when you break it down, you don’t have to learn much to start having fun with Blender.
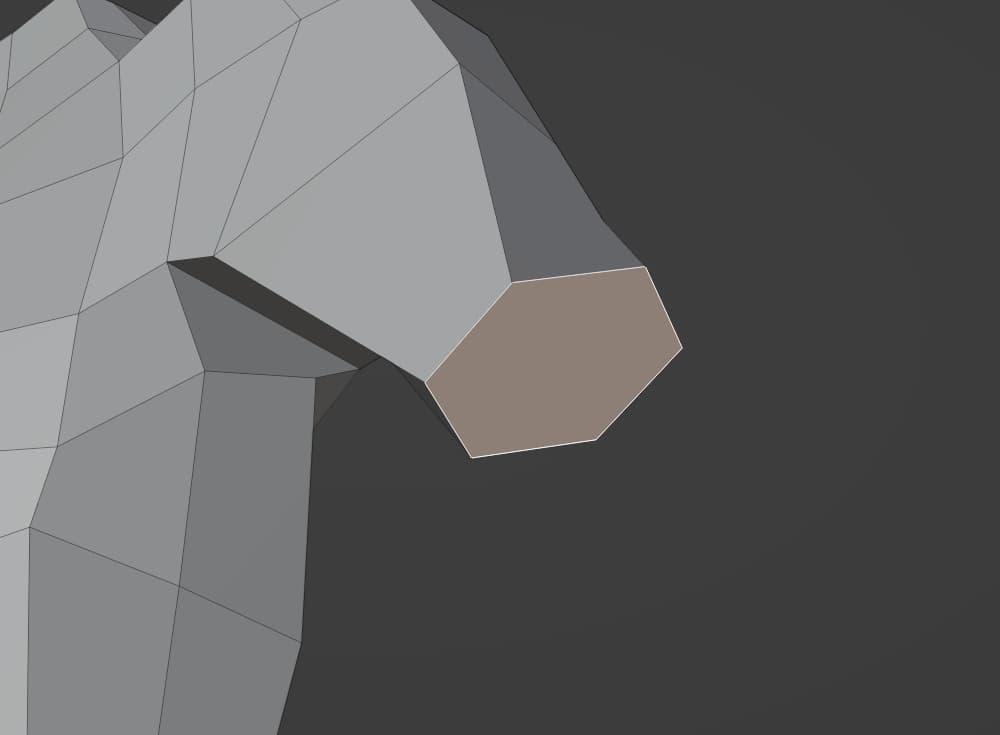
After that fiasco (although it wouldn’t be the last) I was able to make the arms. Having six sides was good, because anything less and it looks more like a stick than an arm. Again, I followed the reference images best I could. Extruding, scaling, and moving things around where applicable.
I was almost ready to start on the lower body and legs.
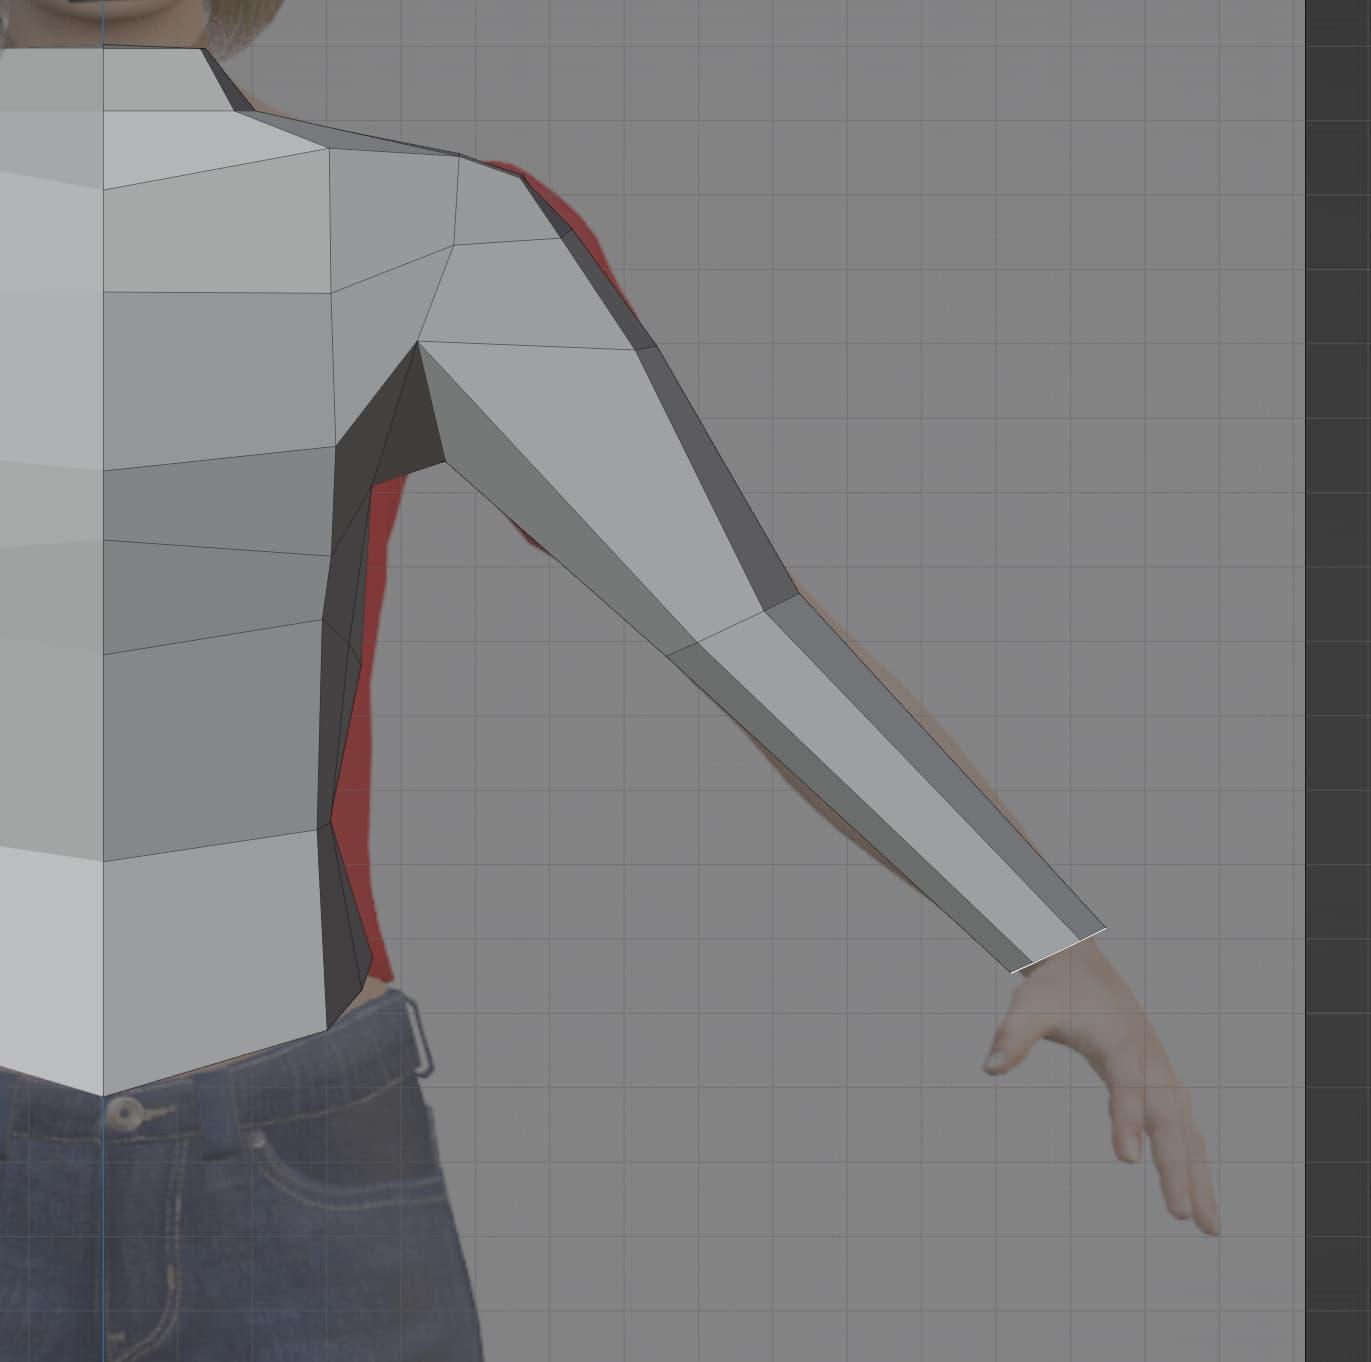
The arms are getting there
But before I started on the legs, I had to do something with the mirror modifier. See, there’s an option in the modifier for clipping. Normally, in my experience, you want this turned on. Otherwise you’d have a mess on your hands.
But sometimes, clipping can get in the way. So, you can turn it off. Although I’d advise keeping it on the rest of the time.
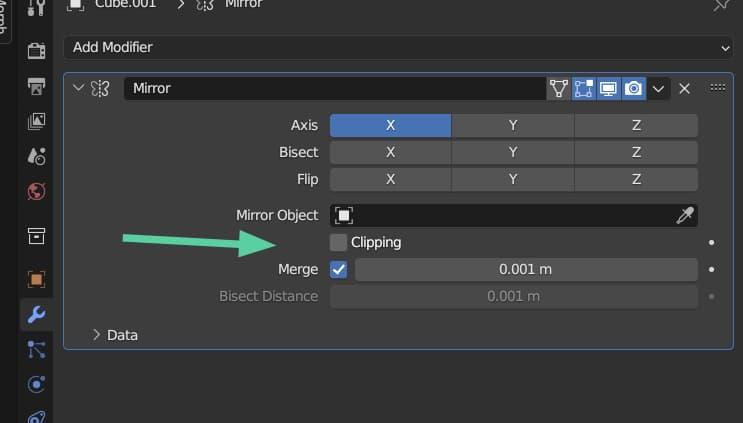
Temporarily disabling clipping in the mirror modifier
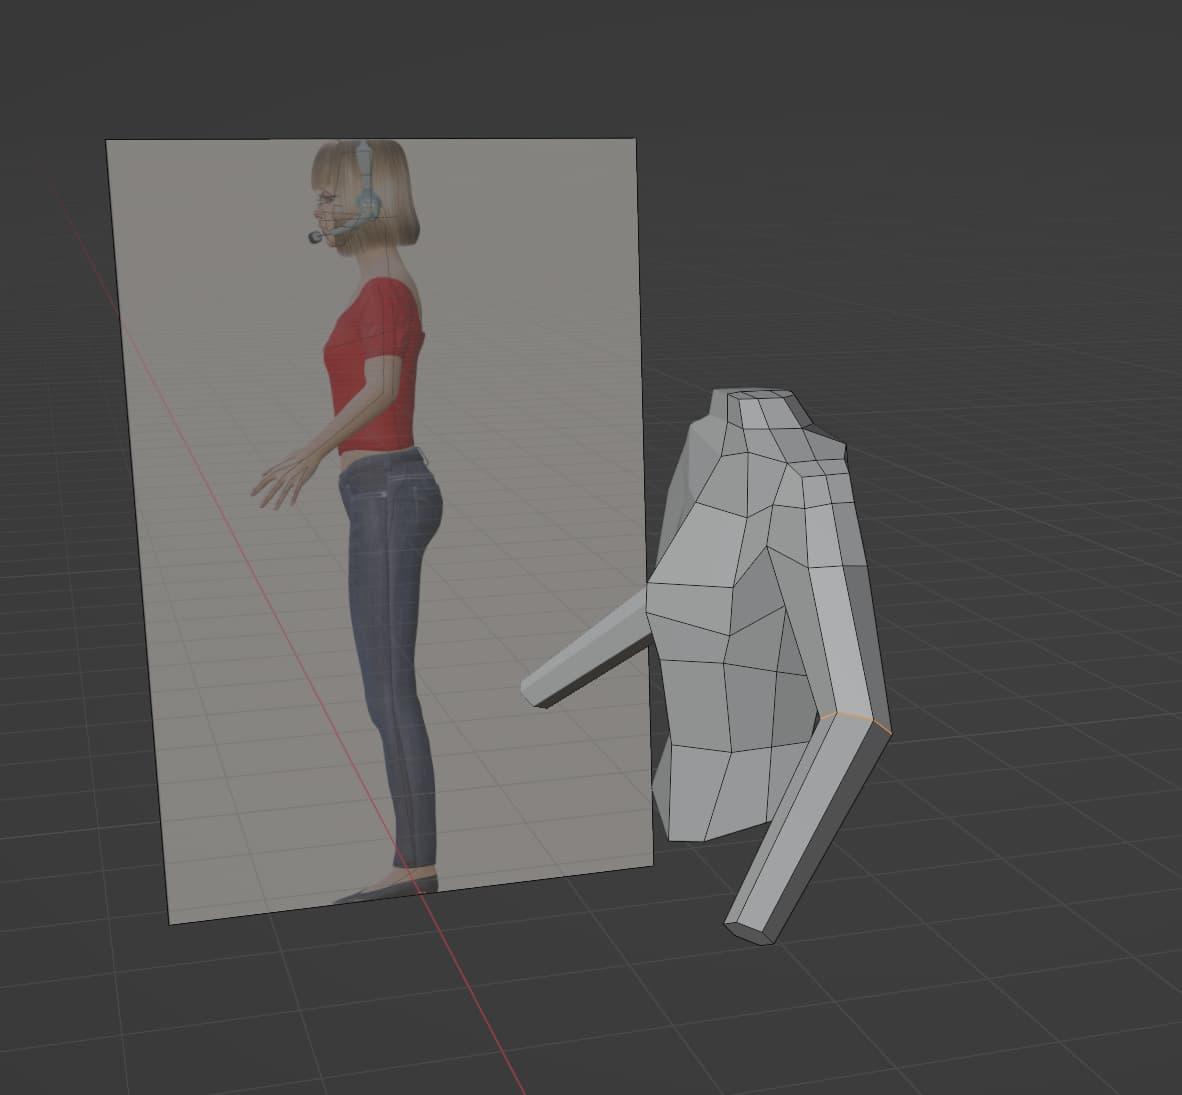
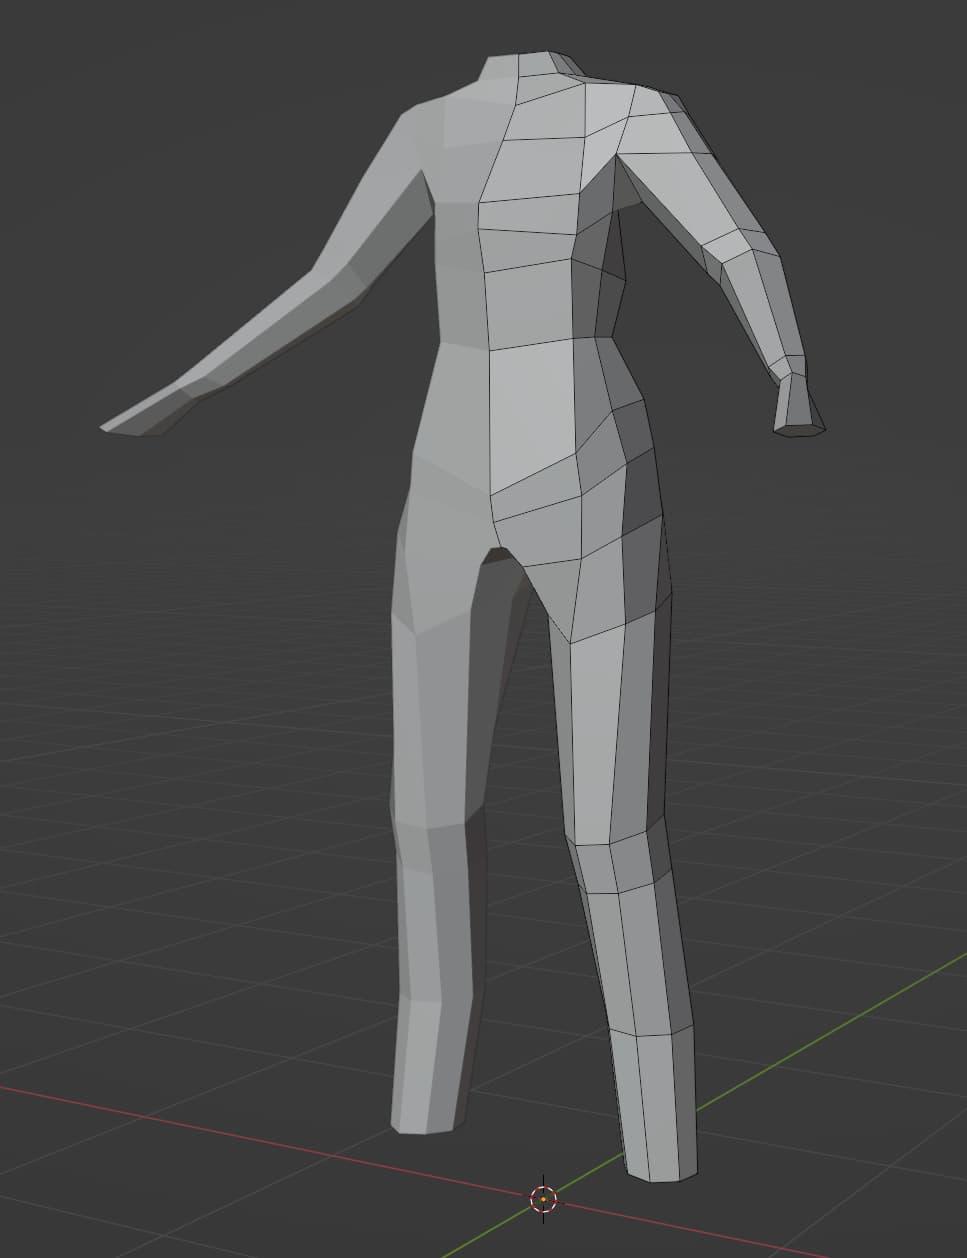
So what was the big deal about disabling clipping, then? Well, simple. I wanted to be able to separate the legs. After disabling clipping, I could simply extrude a shape downwards and to the side, and it would become two separate legs. Observe:
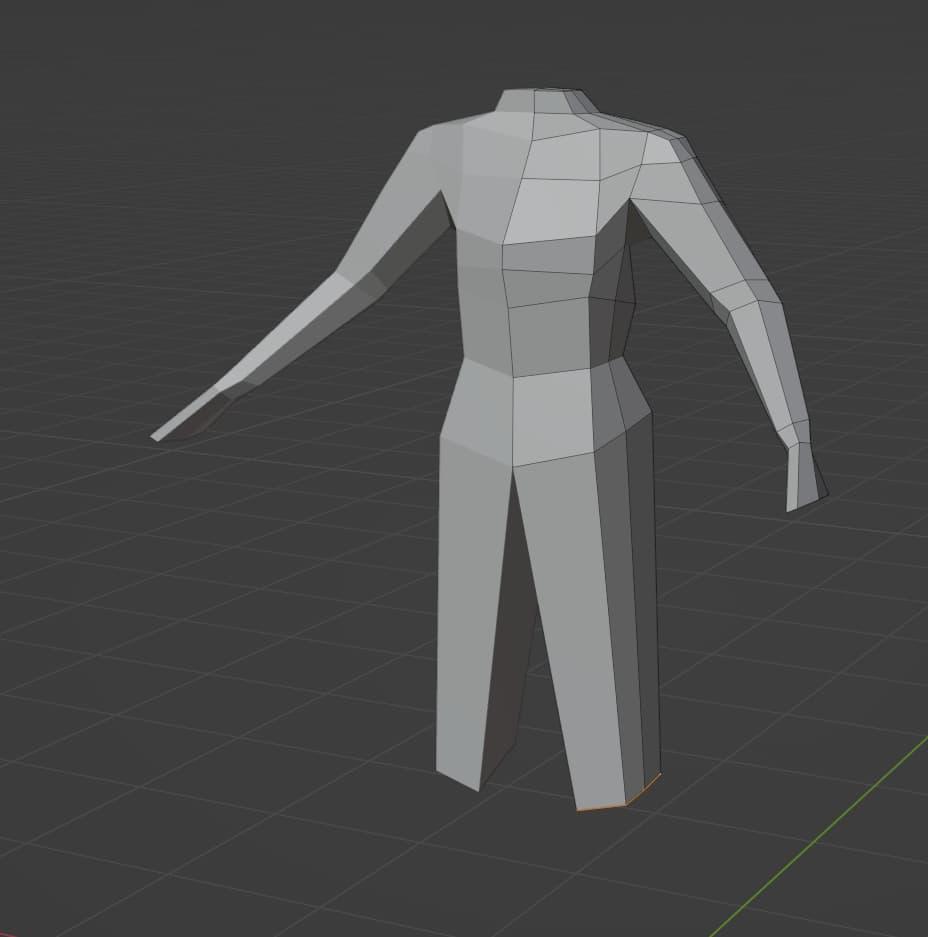
This almost looks like most of a body, now. Woo-hoo!
After extruding the legs, I made sure to re-enable clipping in the mirror modifier.
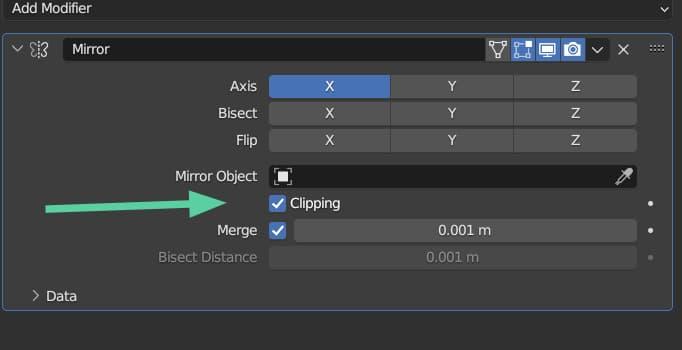
Check, check, double-check. Everywhere a check, check.
At this point, I added a few loop cuts to the legs (remember, extra geometry to make it easier to work with the shapes). But I also detached the tops of the legs from the torso. I had a plan in mind with this, but one thing at a time.
Using the techniques of scaling, rotating, and loop selection (again with ALT+Left Click on a loop after enabling the LoopTools add-on) I moved the geometry for the legs into place in both the front and side views.
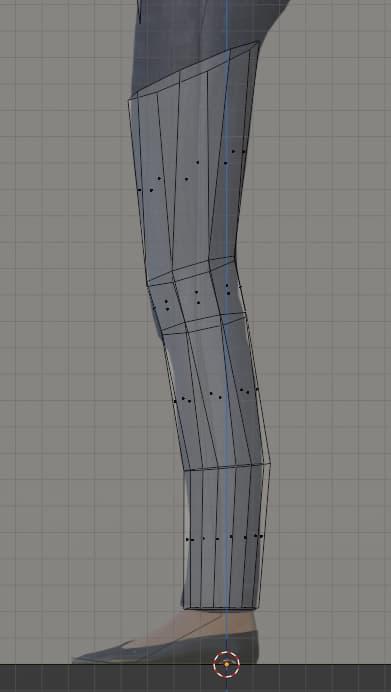
Side view of the legs (with X-ray mode turned on so I can follow the reference image)
At this point, I was about to do something fairly clever. Well, the Blender developers are the clever ones, I’m just following what I saw in a couple of great YouTube tutorials.
See, I wanted to join the legs to the torso. But the torso had fewer vertices than the legs. Since I wanted to keep everything using quads, and I wanted to use an underrated Blender feature to knit the legs and body together, I had to improvise.
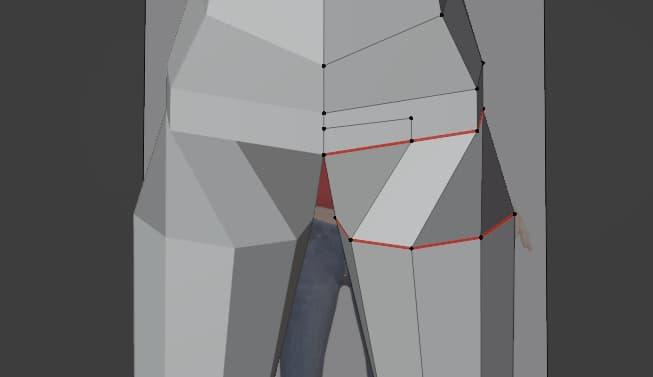
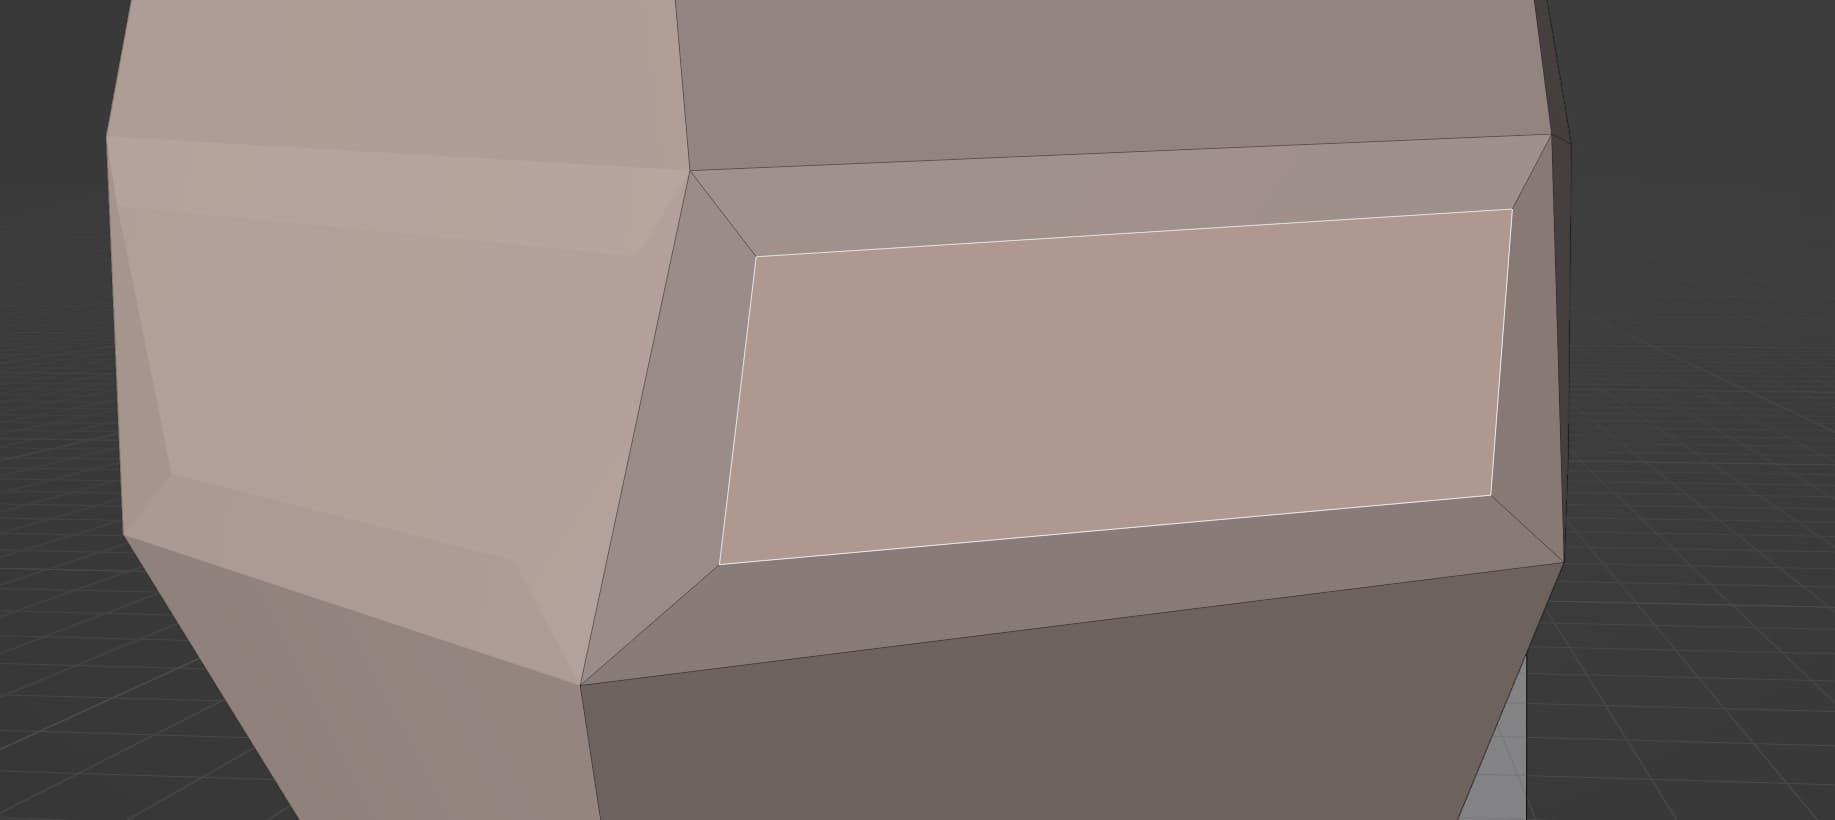
Luckily, this is where the knife tool comes into play. By pressing K, you have access to a very powerful tool, allowing you to draw lines across your geometry. When you press ENTER, those lines become edges, and cut your geometry up into smaller pieces. This can be super handy in certain situations, like this.
After adding two extra vertices at the bottom loop of the body via the knife tool, I was ready for something cool.
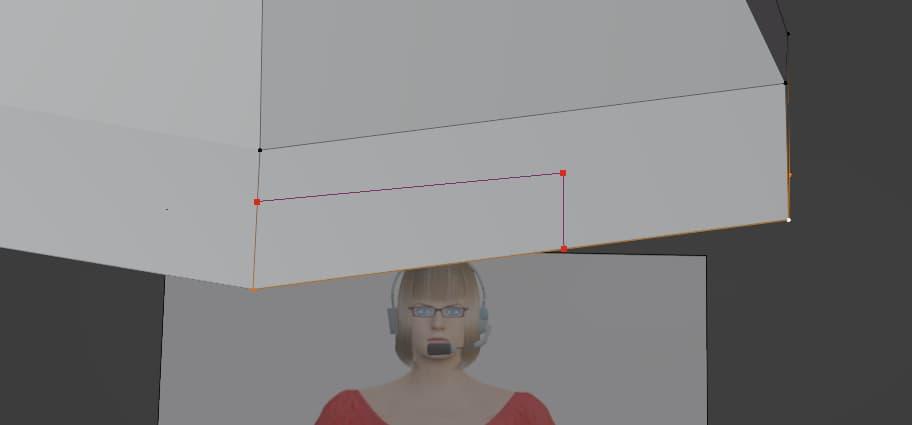
Here is my knife tool cut. I later joined the top-right vertices of the smaller and larger rectangle, to keep everything as quads. But for now I just needed another couple of points.
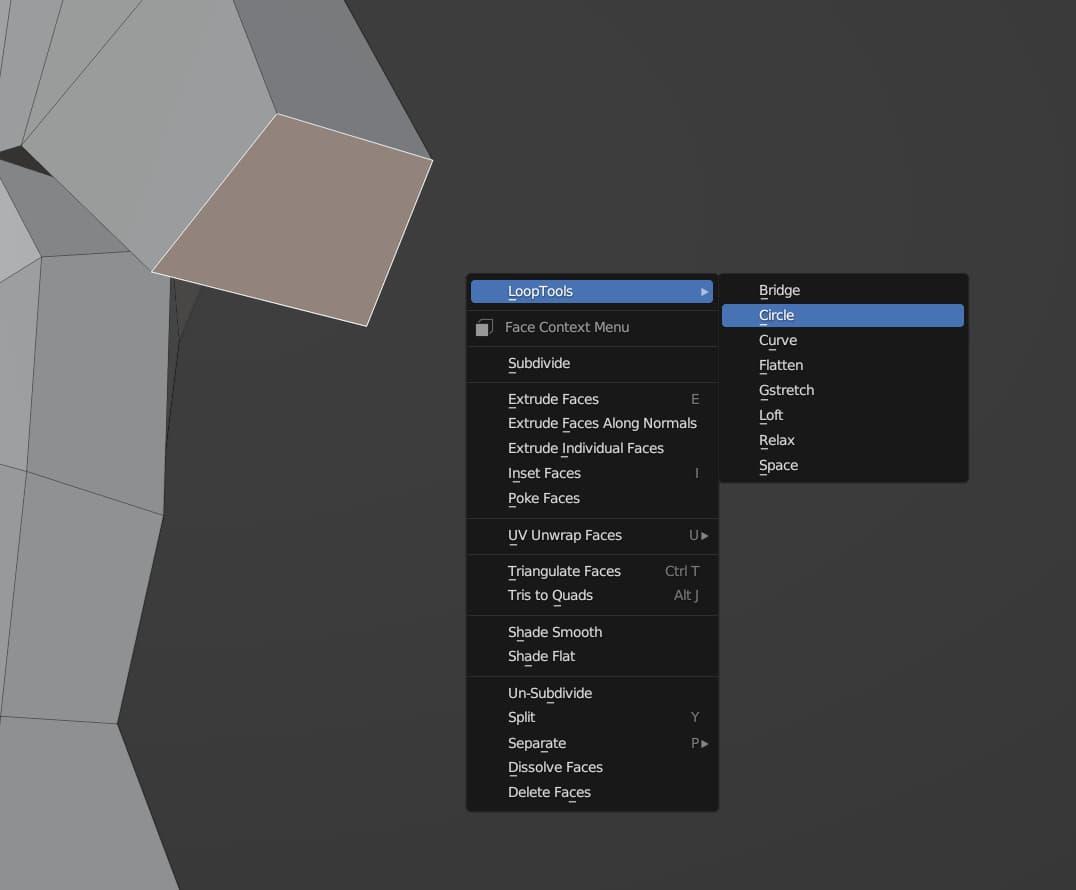
This is where the fun begins. I selected the loop at the top of the legs (with ALT+Left Click, thanks LoopTools) and the loop at the bottom of the body. Then I right-clicked, and did Bridge Edge Loops. The result wasn’t perfect right off the bat, but it saved me having to connect all of these vertices individually. Bridge Edge Loops isn’t something you’ll probably use too often, but it’s really handy when you do need it. It’s the underrated feature I was talking about.
The only caveat is that it doesn’t work too well unless you have the same number of vertices on the top and bottom of the shapes you want to bridge. Hence my effort with the knife tool. Anyway, check this out:
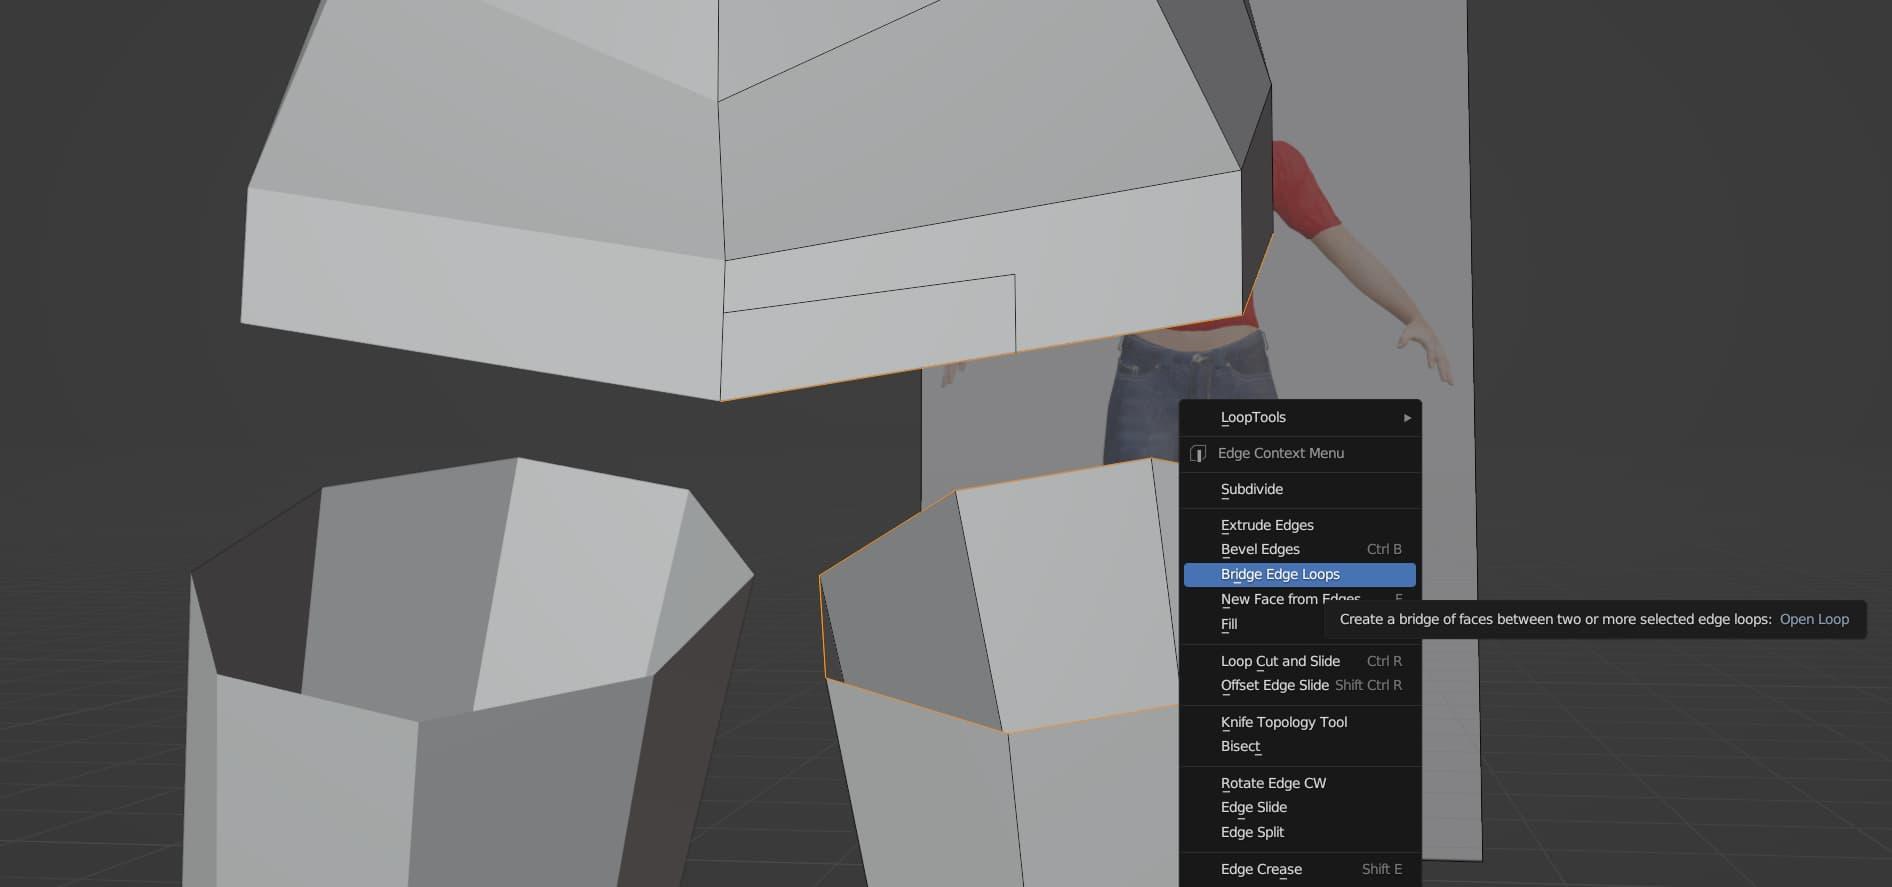
Bridging Edge Loops in 3...2...1
After joining everything together, I modelled the feet. I ended up revisiting them a bit later, but I just wanted to capture the basic shape for the time being. I’m glad I decided to go with these simple shoes, because they kept the foot modelling process simple.
For what it’s worth, I also ended up modelling some basic “mitten” hands. I still haven’t quite gotten the knack for making fingers yet.
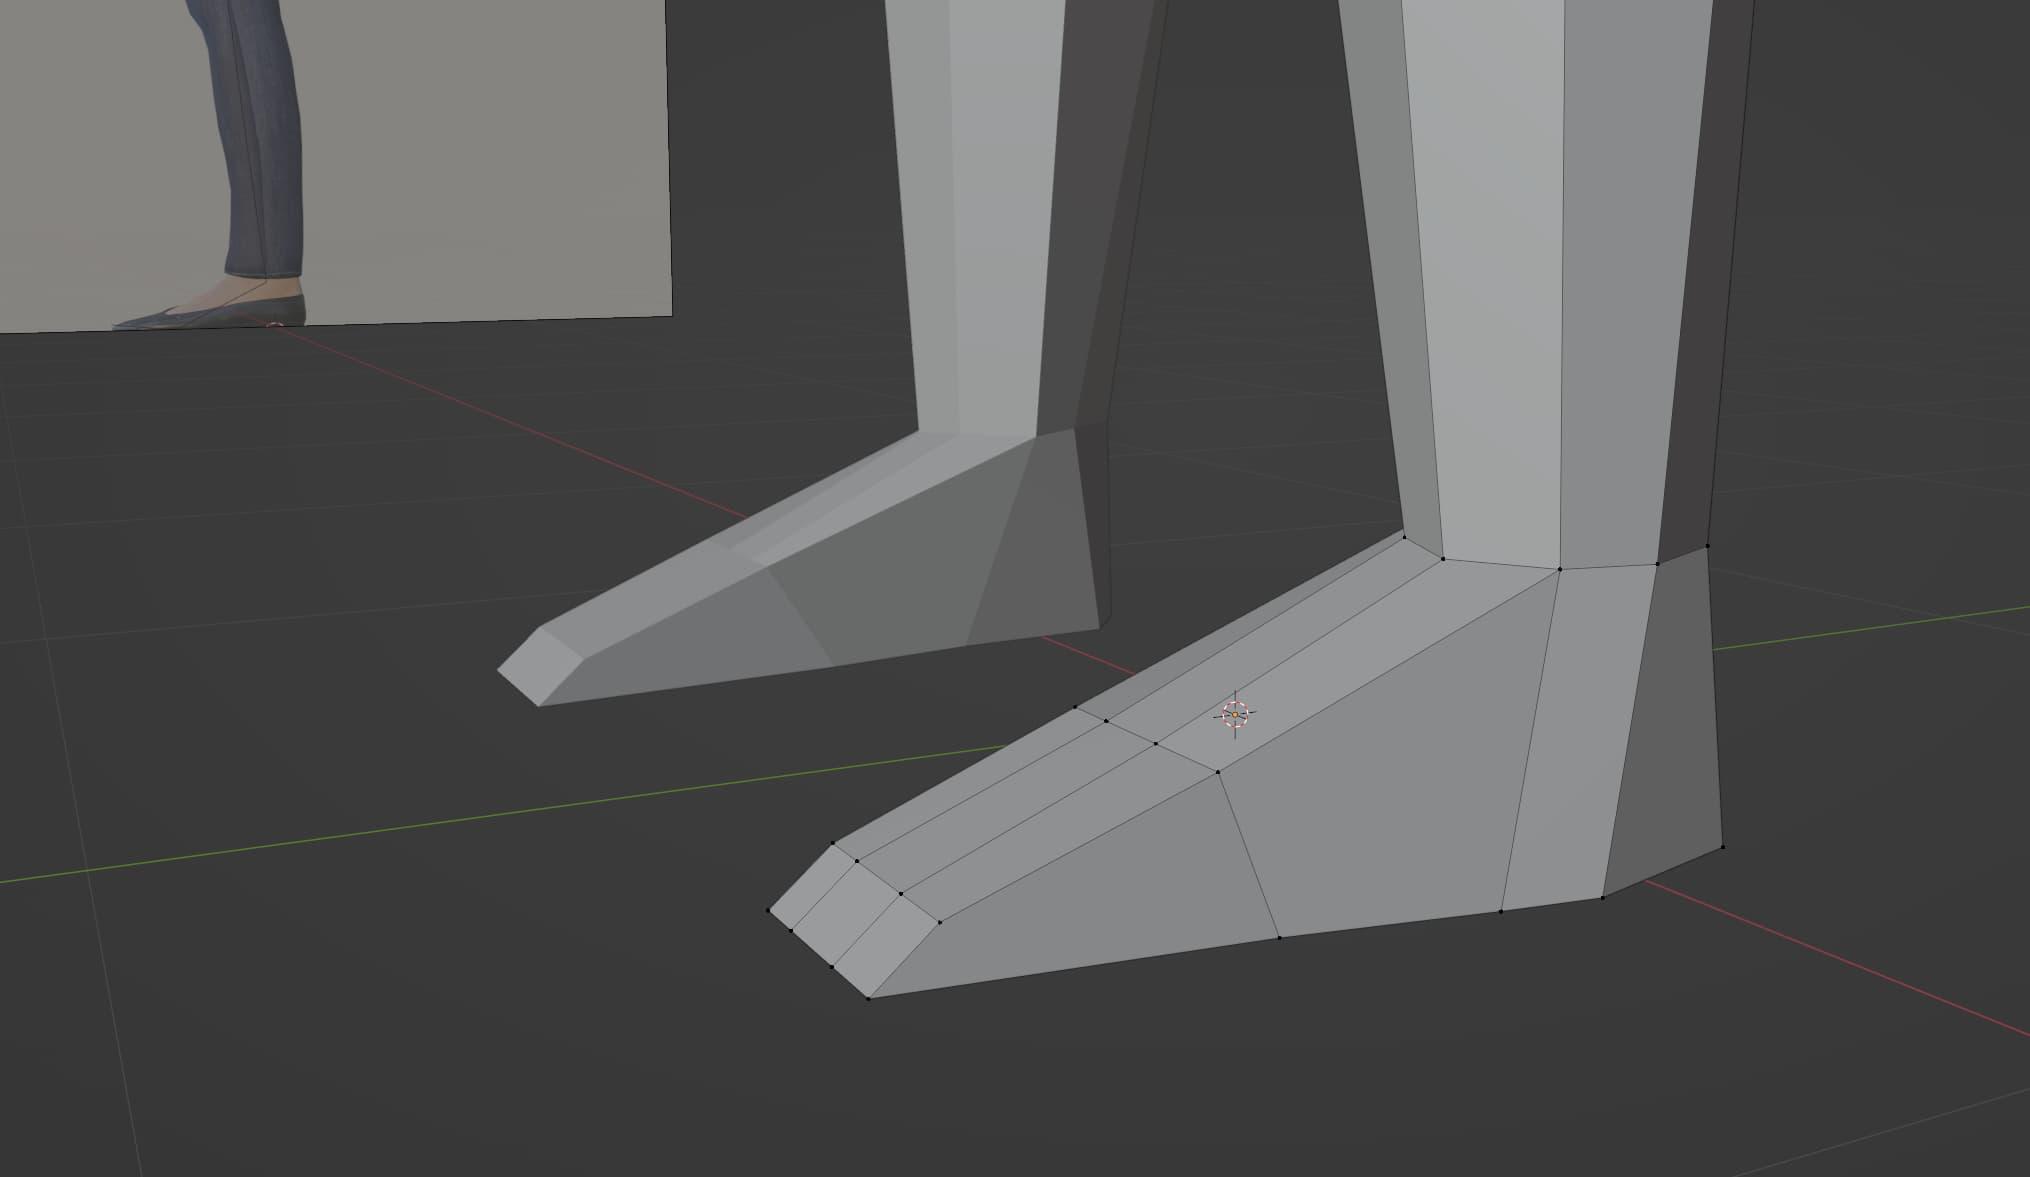
Defeat or Da Feet? You decide
After making the feet/shoes, I was almost ready to move on to the head. But I wanted to add some colour to spruce things up a bit, first.
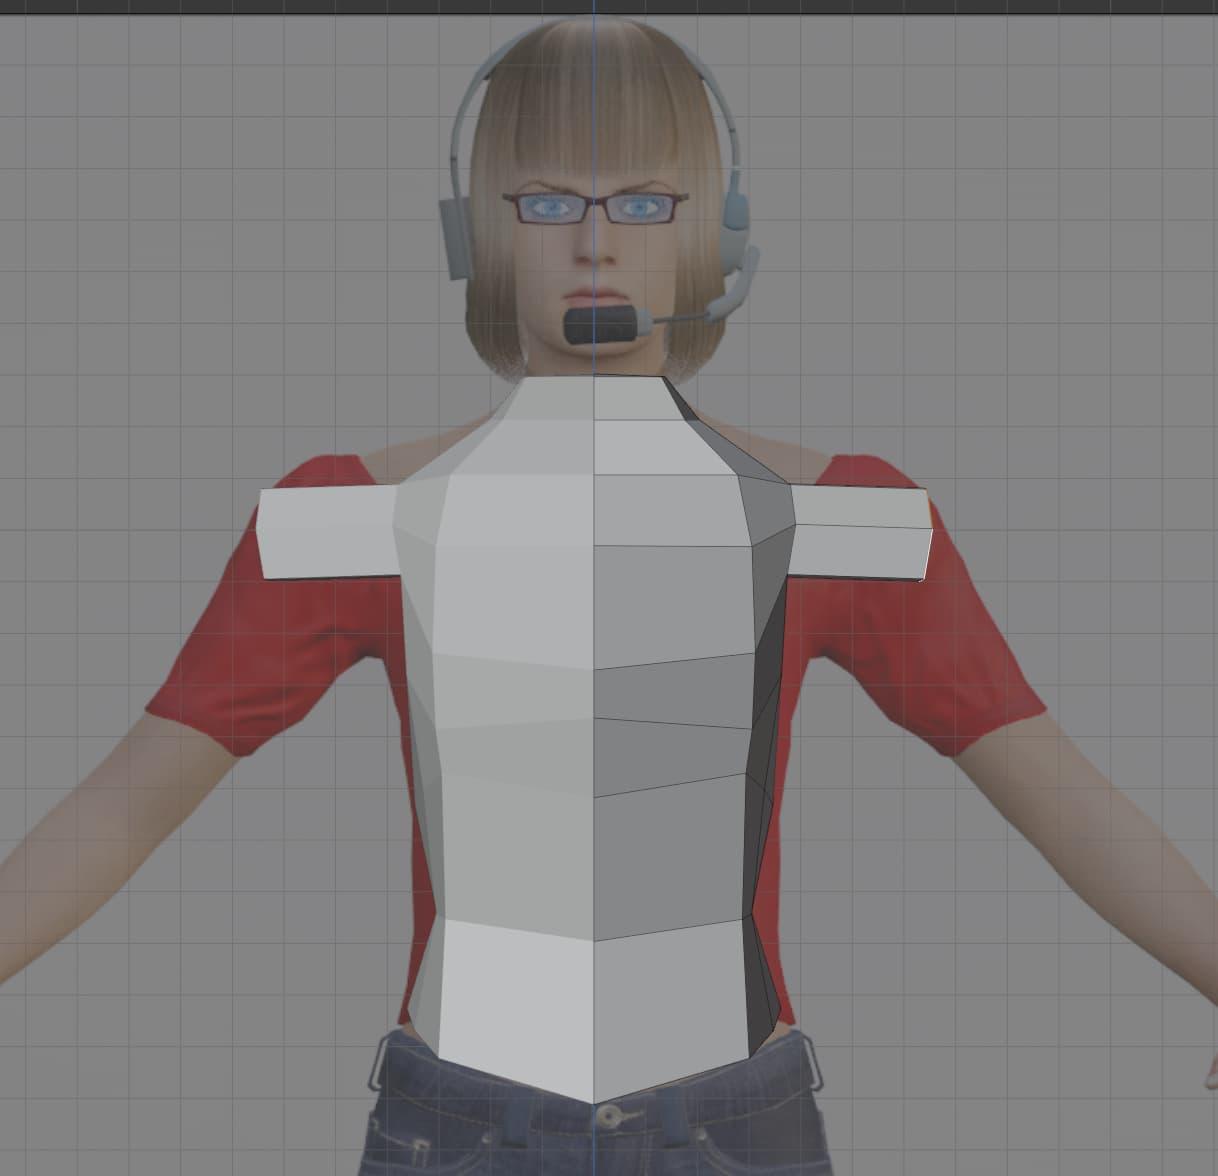
Now, like I said, this is post about my modelling workflow. So I’ll refrain from discussing texturing/shading in great detail here. Sufficed to say, though, it’s pretty simple to add some basic colours to your model. It’s mostly just a matter of selecting the faces you want to be a certain colour, adding a new Material, and giving the material a base colour. In this case, I went with a Viewport Display colour for simplicity. Although I went back and gave each material a matching Principled BSDF colour later. But I’m not going to focus on this process.
I think the model is starting to look a lot better with some colour.
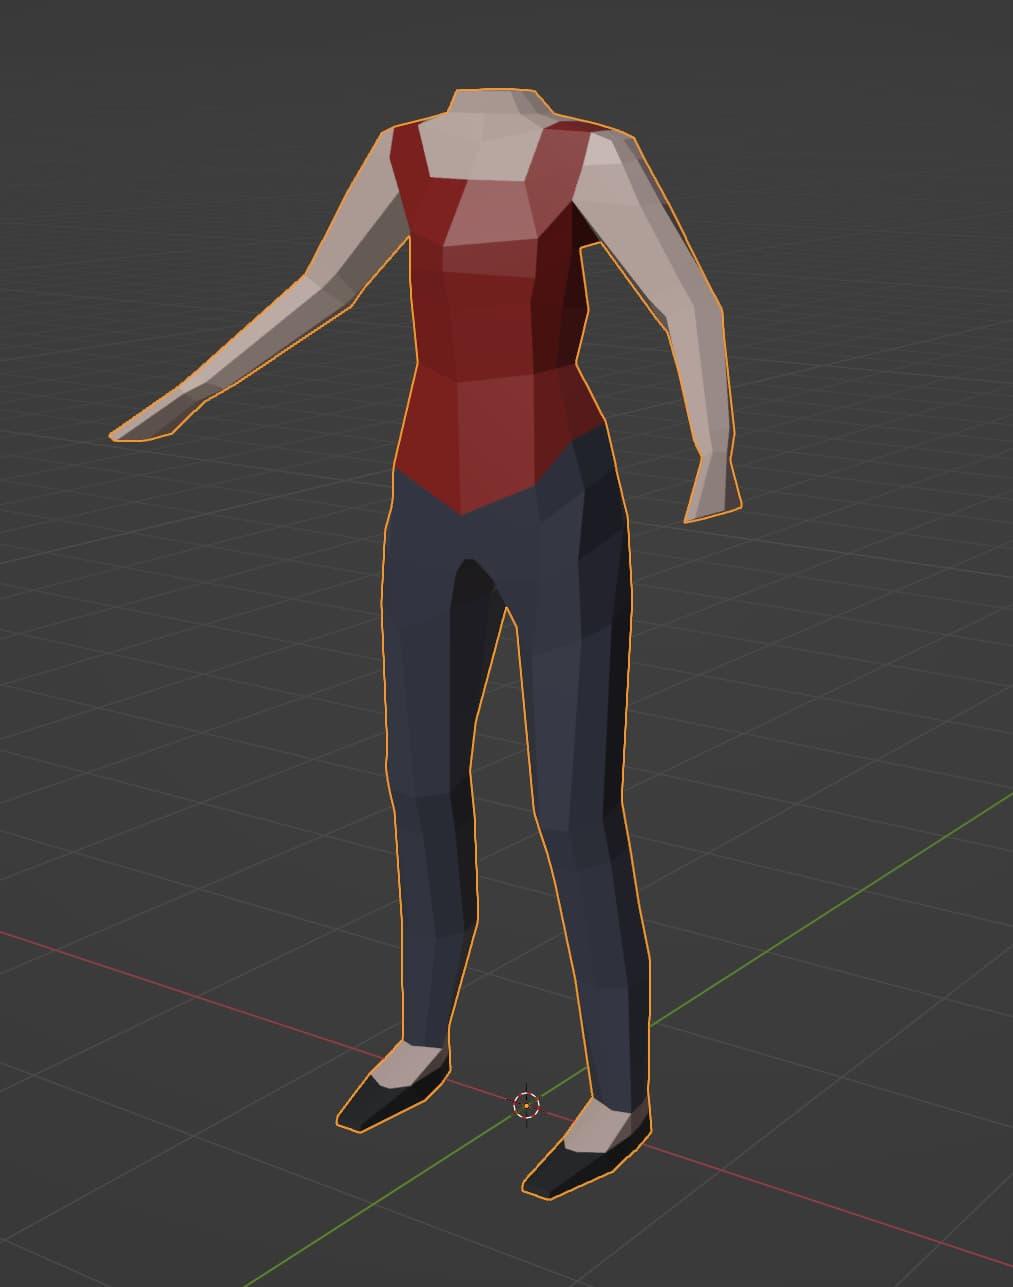
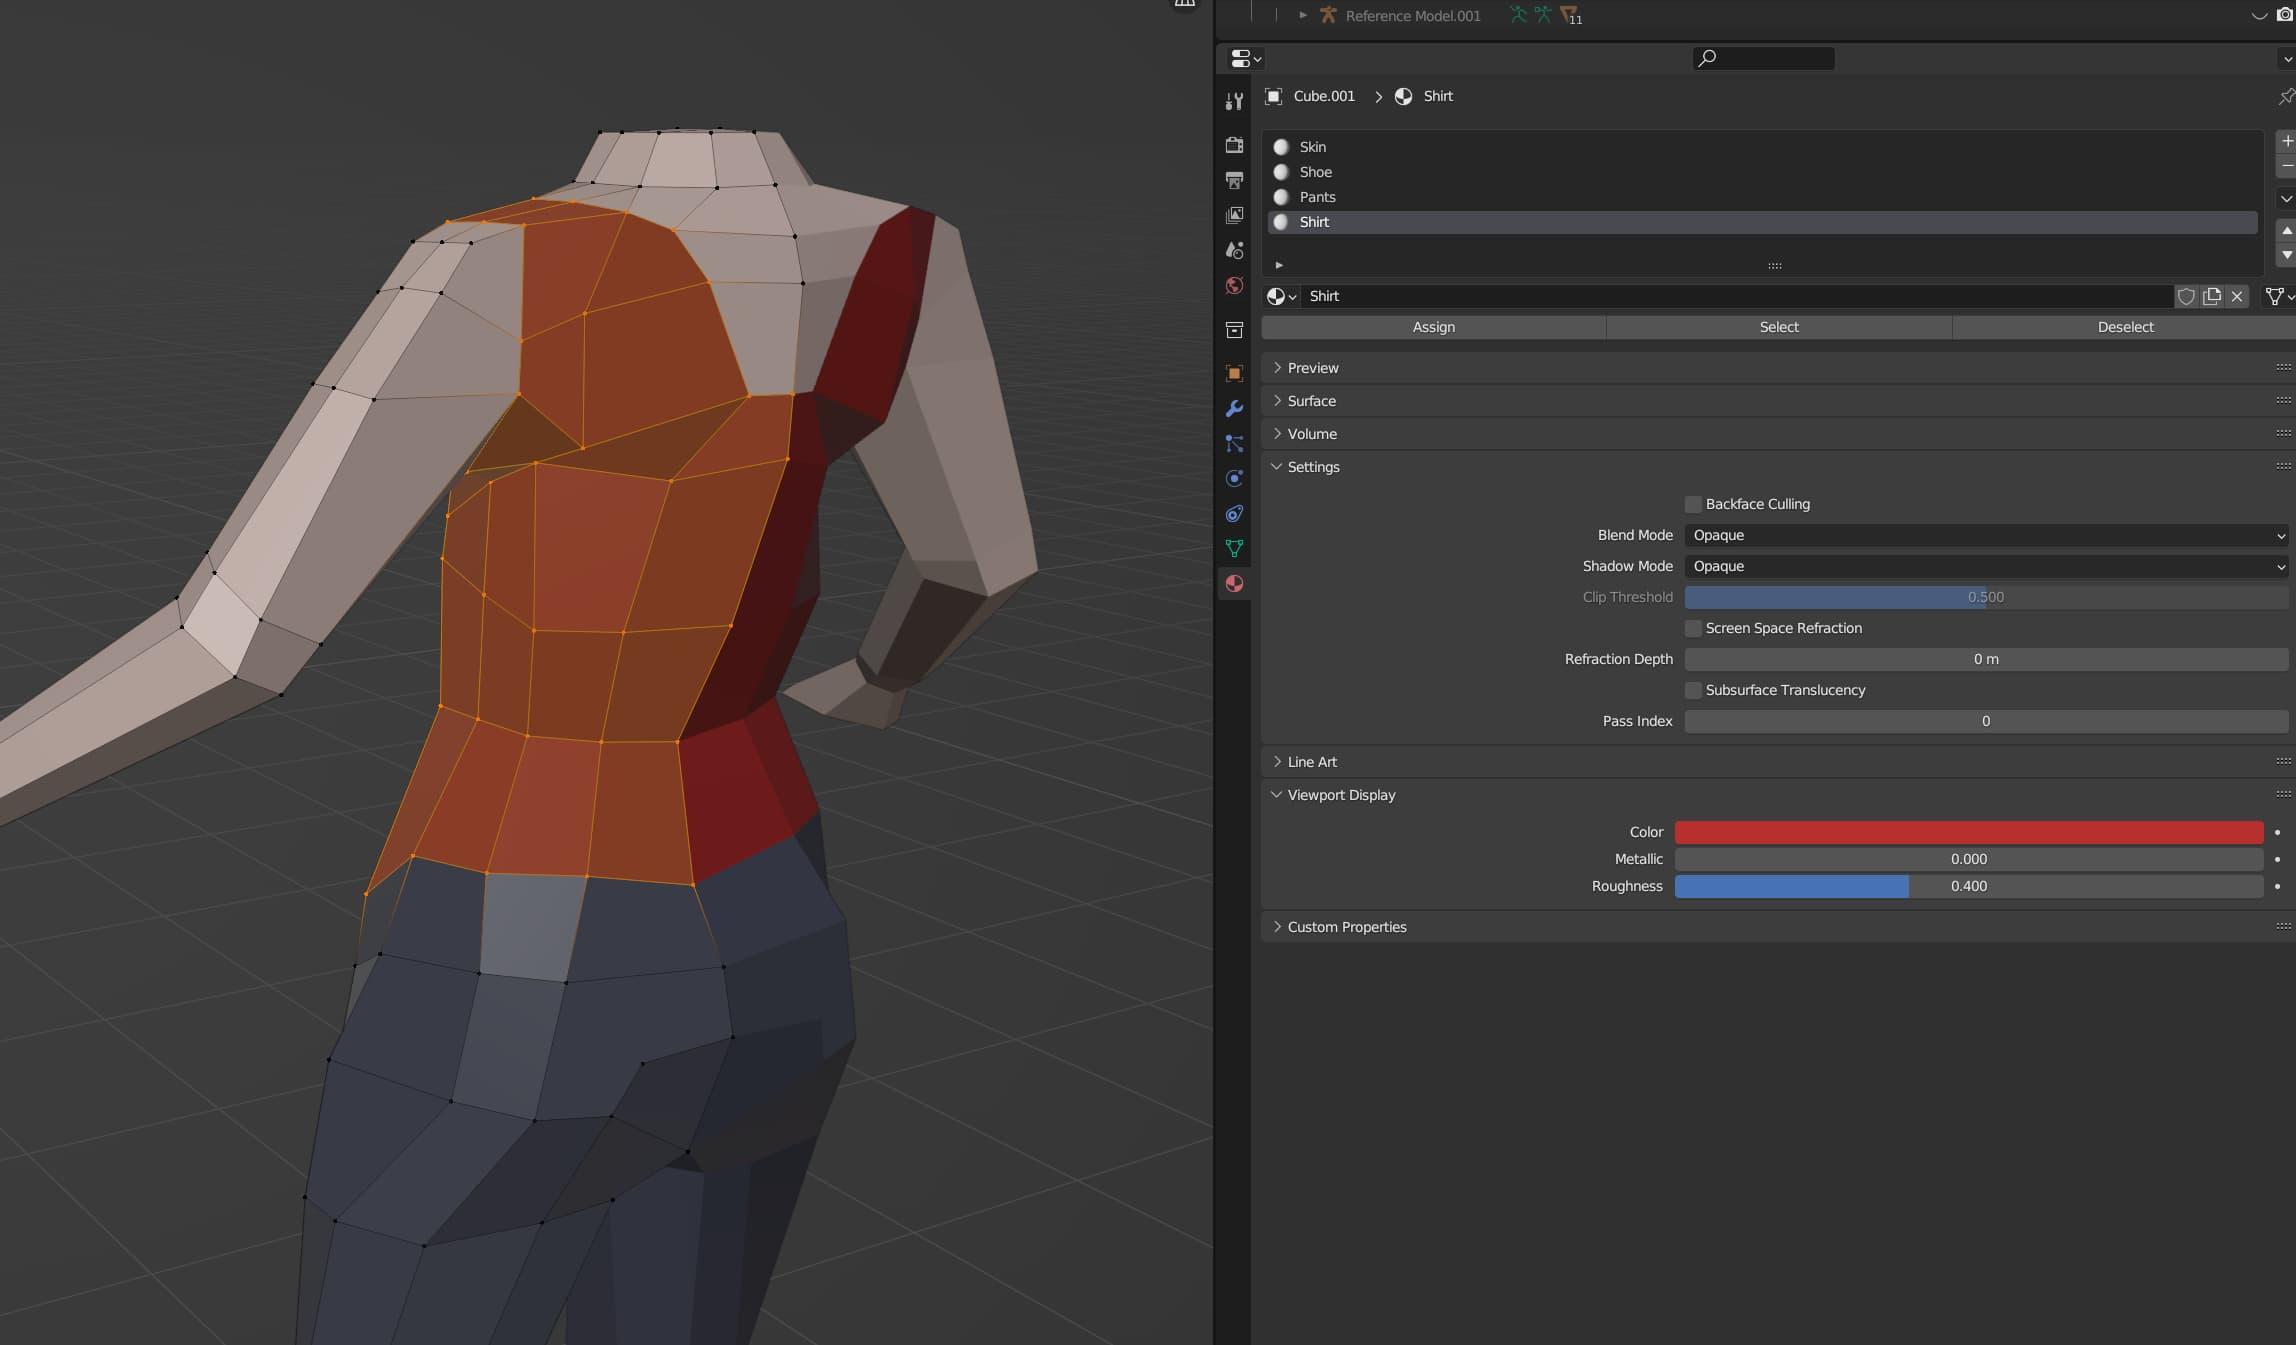
We're getting there
OK, almost done, right? Well, at this point I kind of went off the rails for a bit. Forgot how to start on the head. But this isn’t a learning experience or story post, so I’ll save you the trouble of my meandering process to get back on track.
But one goofy thing came out of the process, which I will share here. Sometimes you just have to embrace the absurdity of it all. It’s more fun that way.
Balloony, is that you?
Comedy aside, a sphere was the right choice. In my opinion it’s always the way to go when you’re starting to model a low-poly head. Although there are other ways of doing it. That’s the beauty of Blender, you can experiment with different workflows to see what works for you. It takes a bit of getting used to, but I’ll always prefer the freedom it offers, over a restricted set of options.
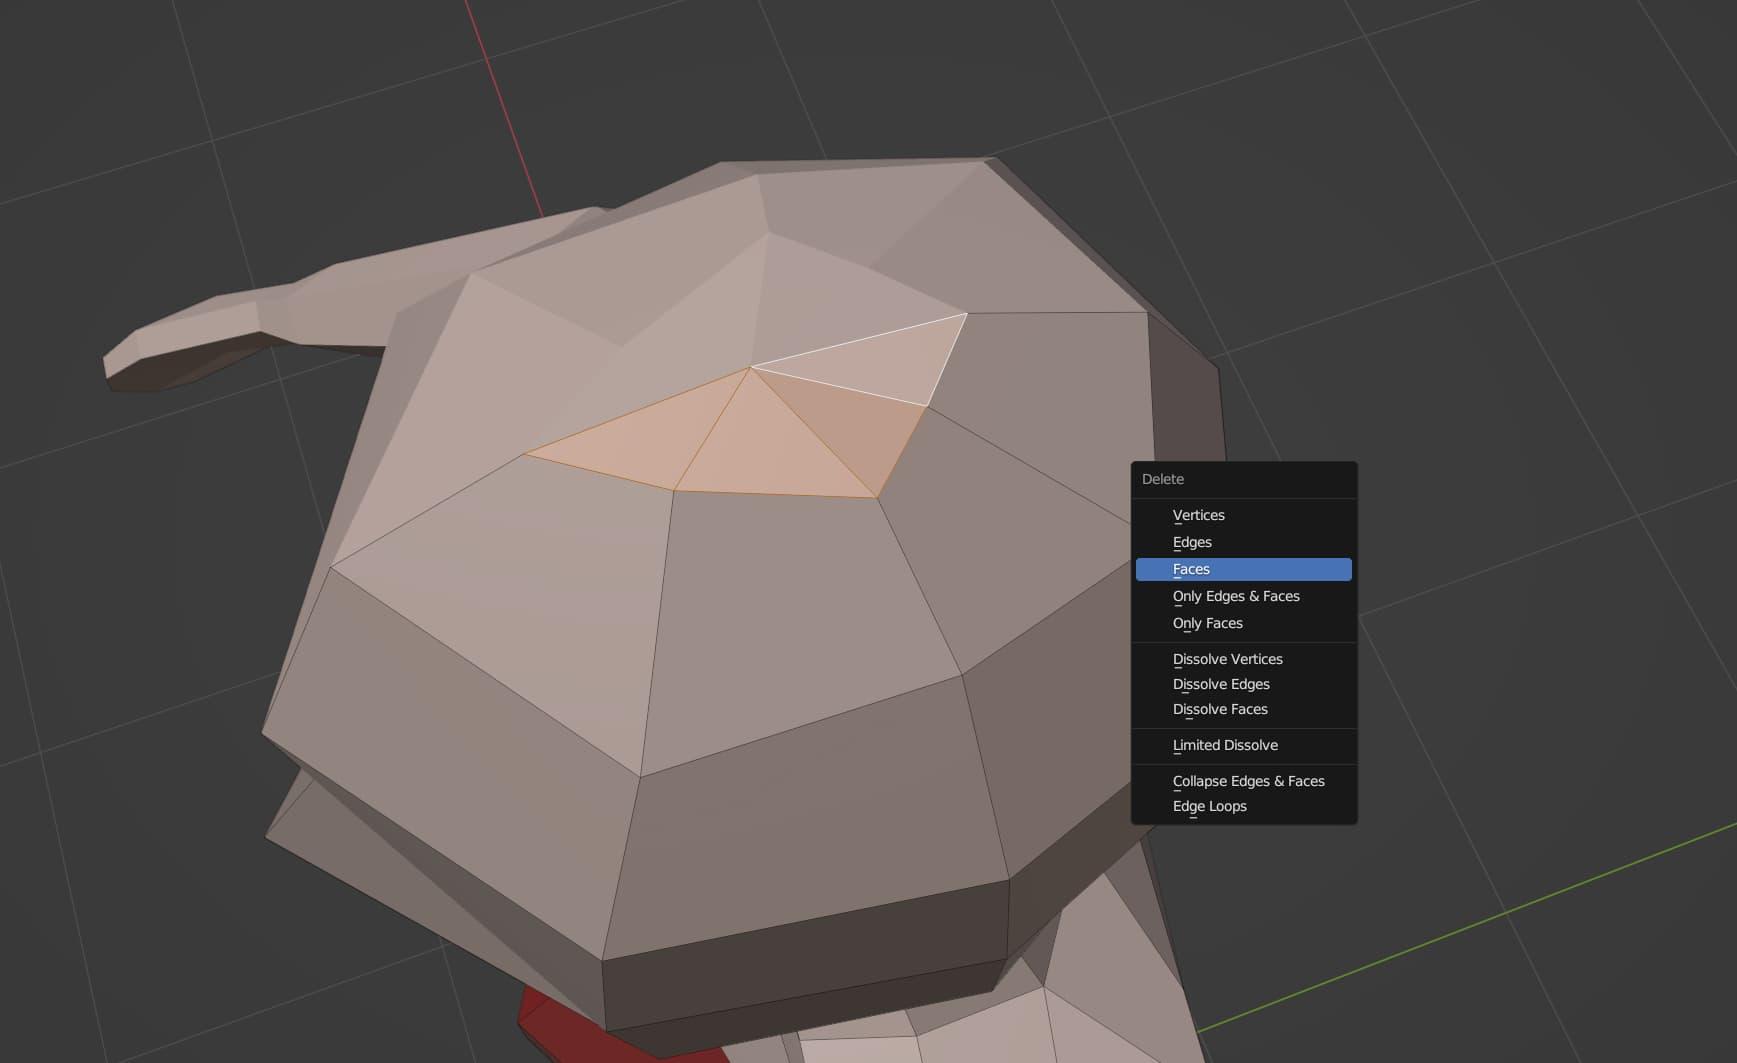
So I created a sphere (by using SHIFT+A, adding a UV sphere, and lowering its number of segments) and deleted the bottom vertex. I forget if I used Bridge Edge Loops, or if I merged the vertices (by using the M key). But either way, I then connected the head to the neck.
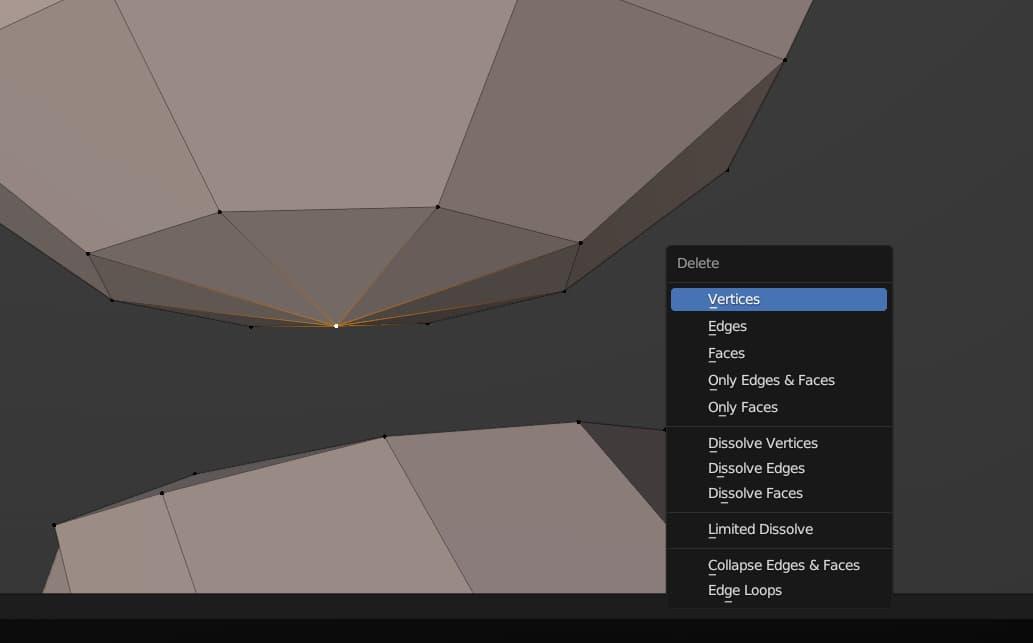
Deleting the bottom vertex of the head
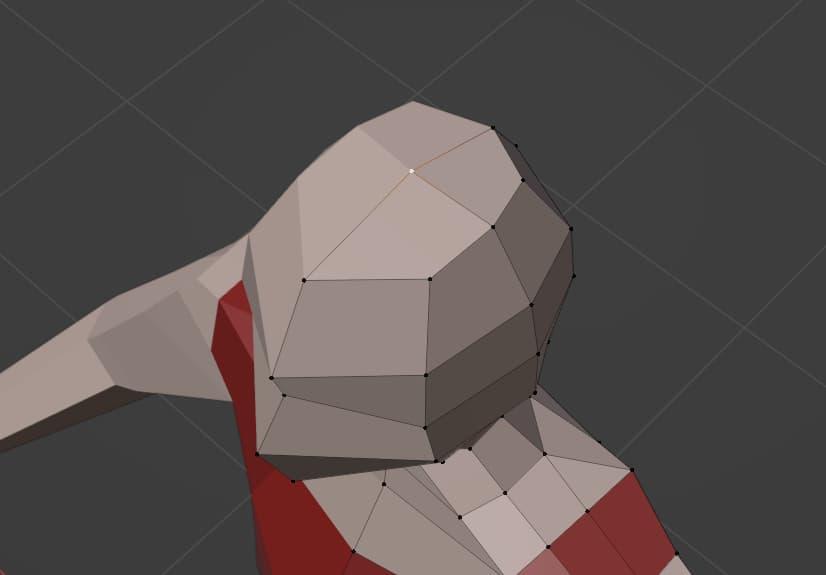
Guess I'm not out of the woods, yet, huh?
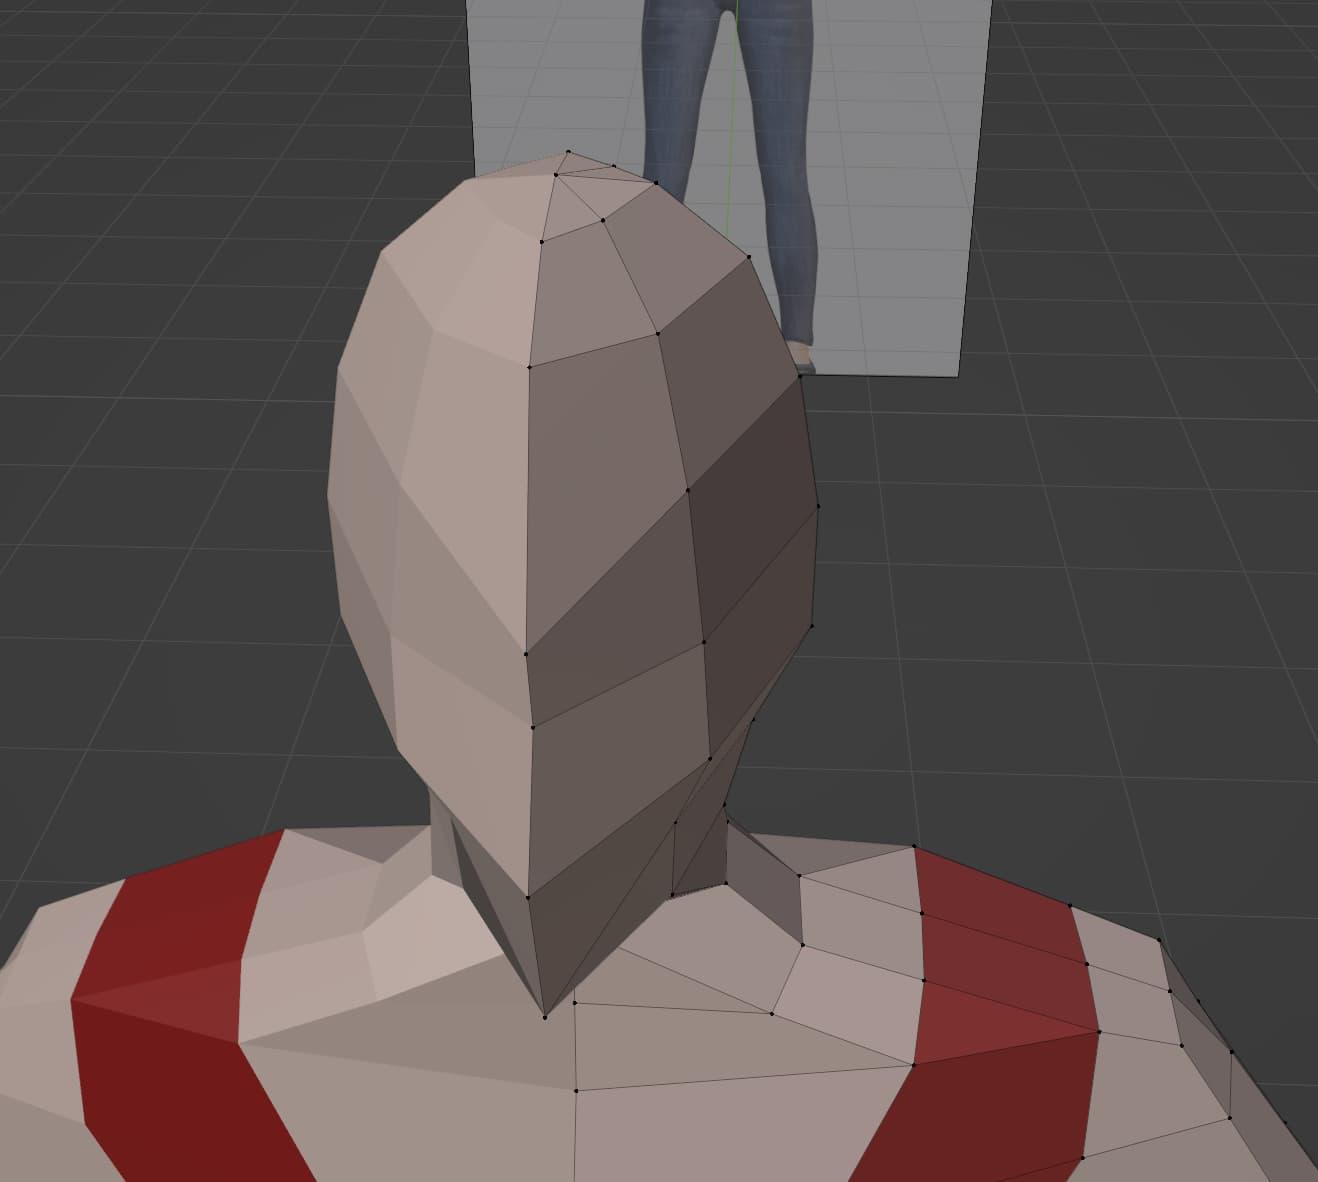
It took quite a bit of fiddling with the geometry, using both reference images, orbiting around the head in 3D to view it from many different angles, deleting vertices and faces here and there, and doing a bit of retopology. But eventually it started getting there, and I felt ready to start work on the face.
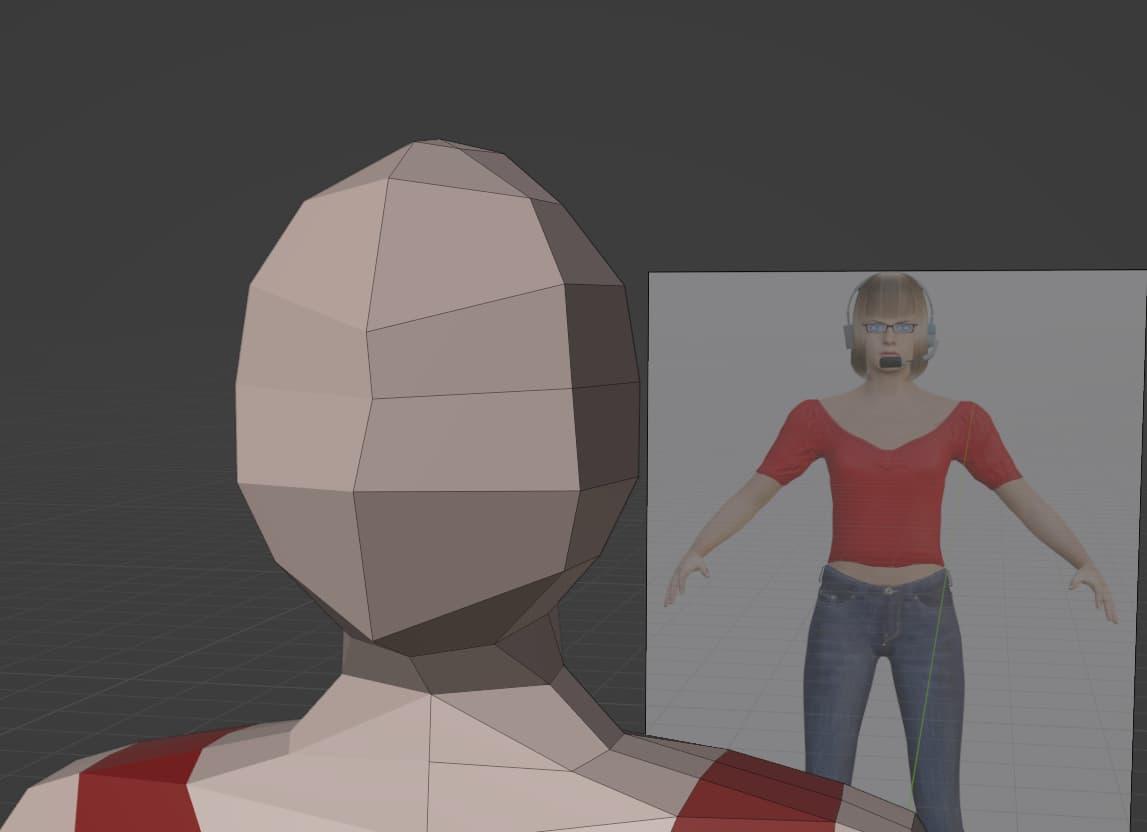
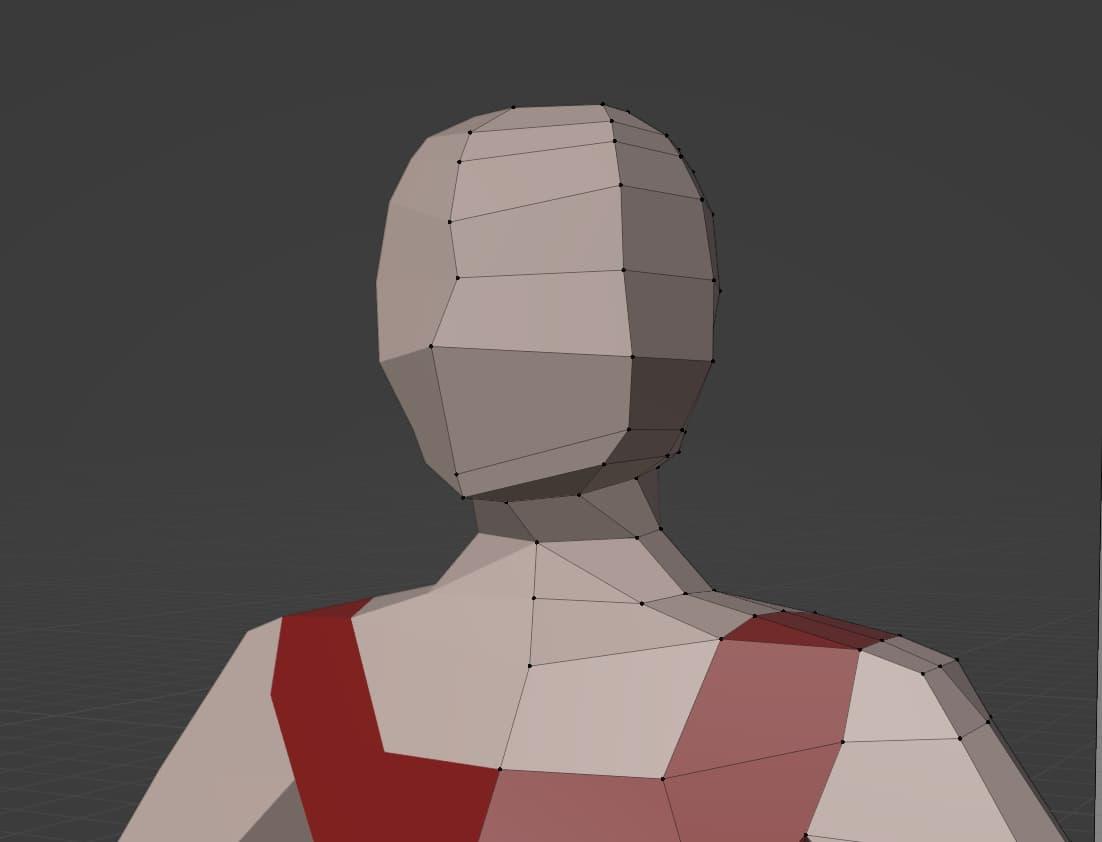
That's better
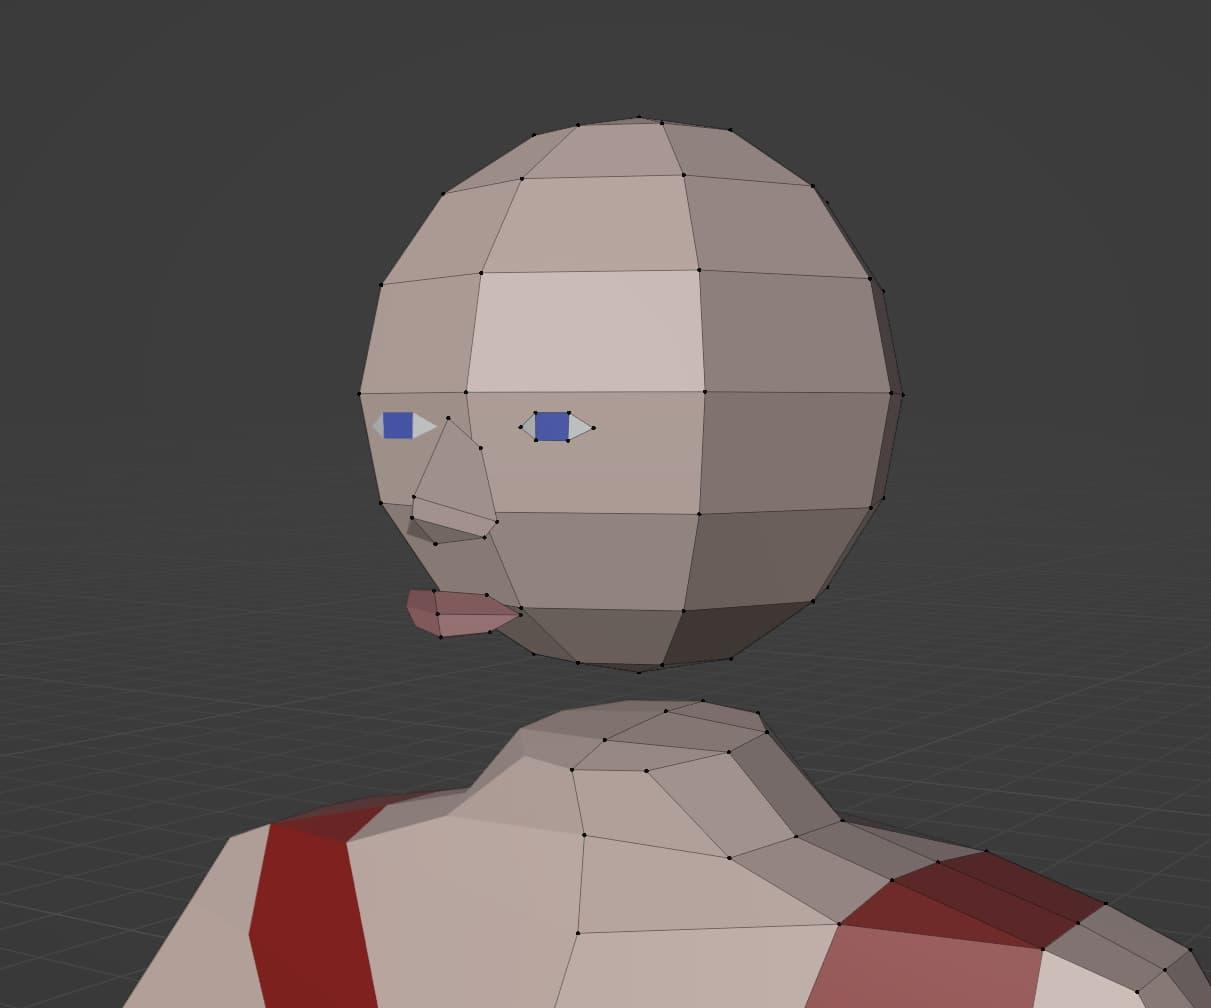
Now that the head was satisfactory, I wanted to add some eyes, a nose, and lips. Now, this is one of the areas where you should be careful - even in low-poly modelling. Because you can easily add more detail than you really need, and end up with a mess that’s too hard to retopologize. There’s no “right” or “wrong” way to do this, it’s all up to personal preference. But since I’m no artist, I wanted to keep things fairly simple. Fairly.
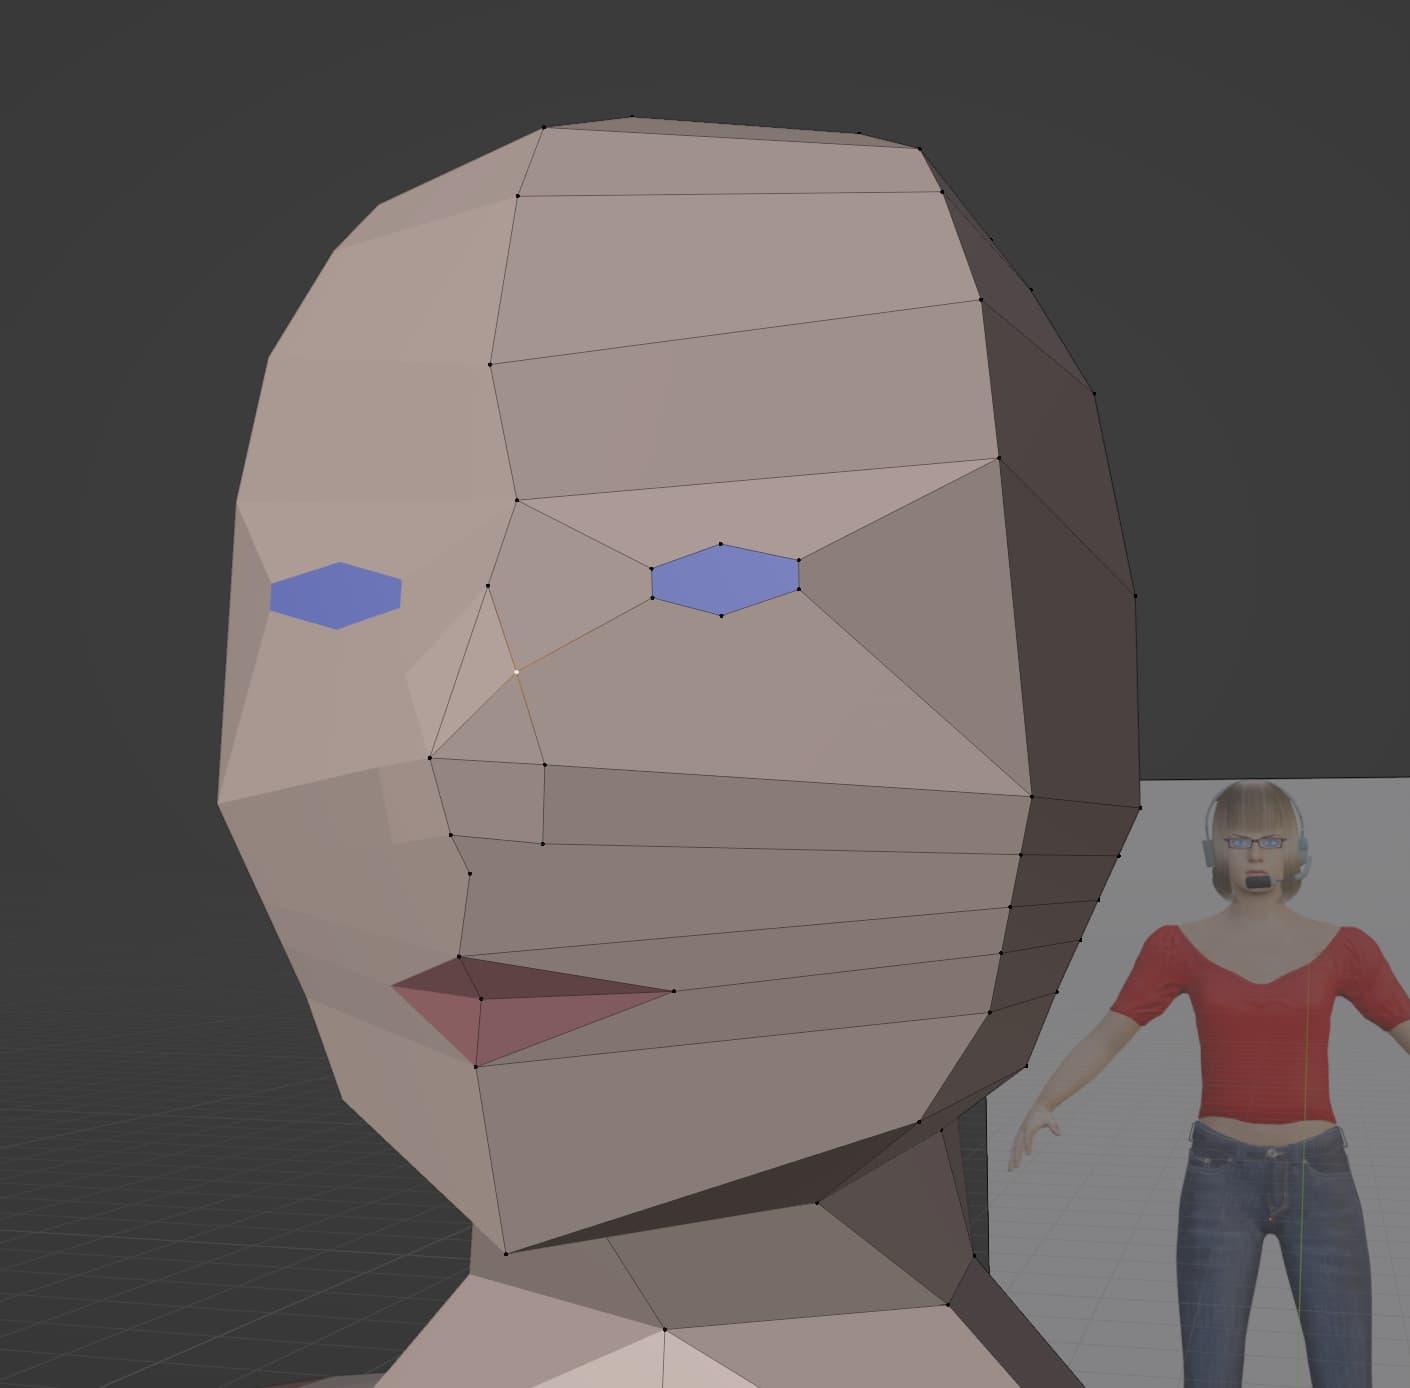
I started by insetting faces for the eyes.
No, I didn't make the eyes this big. Just wait.
I also added a nose and some lips, based off the reference images. I tried to keep things simple and all in quads wherever possible. But especially with the nose and lips, some triangles and n-gons were inevitable. I would fix them later, I thought.
For what it’s worth, I would actually fix them later. I don’t think it’s all that lazy to add a few triangles here and n-gons here and there, while you’re in the process of modelling. Just as long as you either don’t care about what types of shapes are in your model (which could be valid, depending on your application), or you make an effort to fix them after the fact. It’s not the easiest thing, but I’m starting to get used to the whole retopology process. It was quite a bit more difficult with the face, though. Because there’s a lot going on.
But here we go. Yeah, I know. 1992 called, they want their cutting-edge CGI back.
Does this look more like ReBoot or The Lawnmower Man? You decide.
At this point, I ended up going a bit overboard with some of the modelling. I added a bit too much geometry in places, although I would come back to fix that eventually.
But for now, I was ready to start modelling the last few things - the hair, the glasses, and the headset.
Something that really helped me when designing clothes/accessories is this four-step process:
Select the faces you want to add the accessory/article of clothing to
Press SHIFT+D to duplicate them
Right-click to stop the selection from moving when you move the mouse
Press P and Separate by Selection
Just like that, you now have a separate Object to start modelling your next part with. You’ll need to go out of Edit Mode and back into Object Mode, then select the new Object, then go back into Edit Mode.
It’s a bit of a process, but I think this is the easiest and best way to do something like this. Sure, you can also do everything on the model itself, but I like having separate objects. Sometimes I’ll go back and join objects with J, and maybe do things like merging vertices, or deleting faces that are covered up. But having separate objects, but not having to start completely from scratch, is pretty convenient.
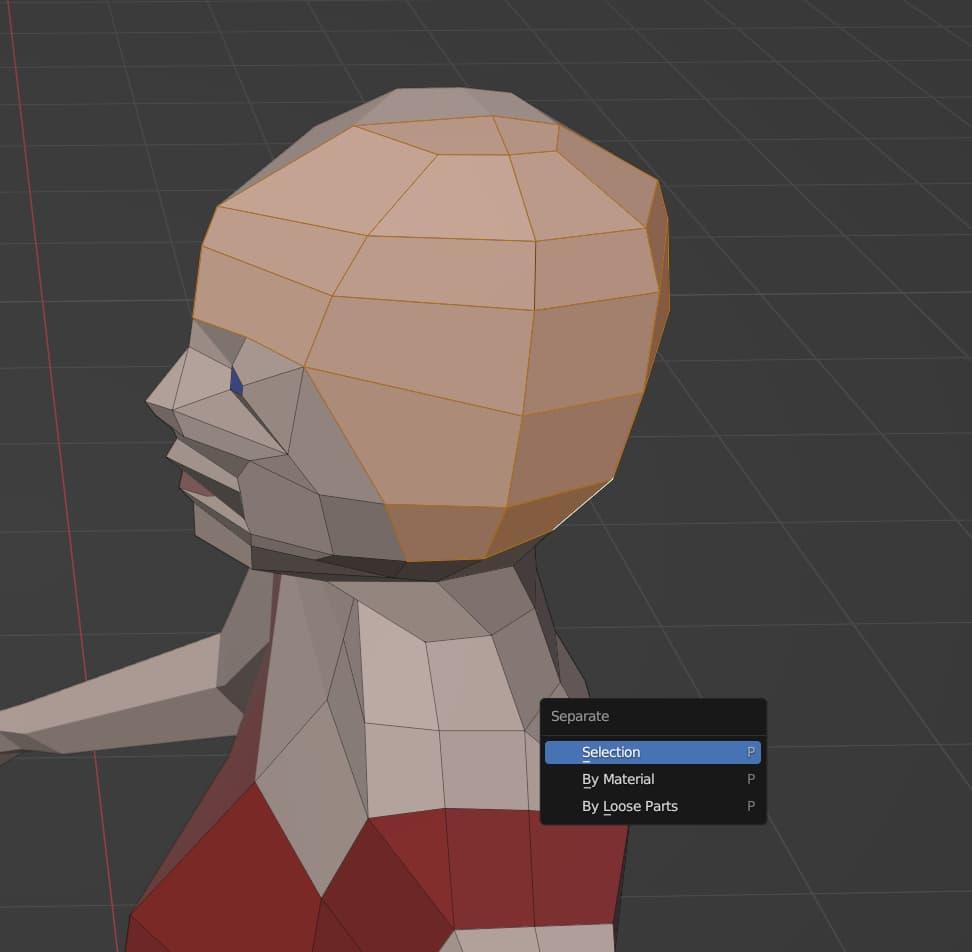
Creating a new object for the hair
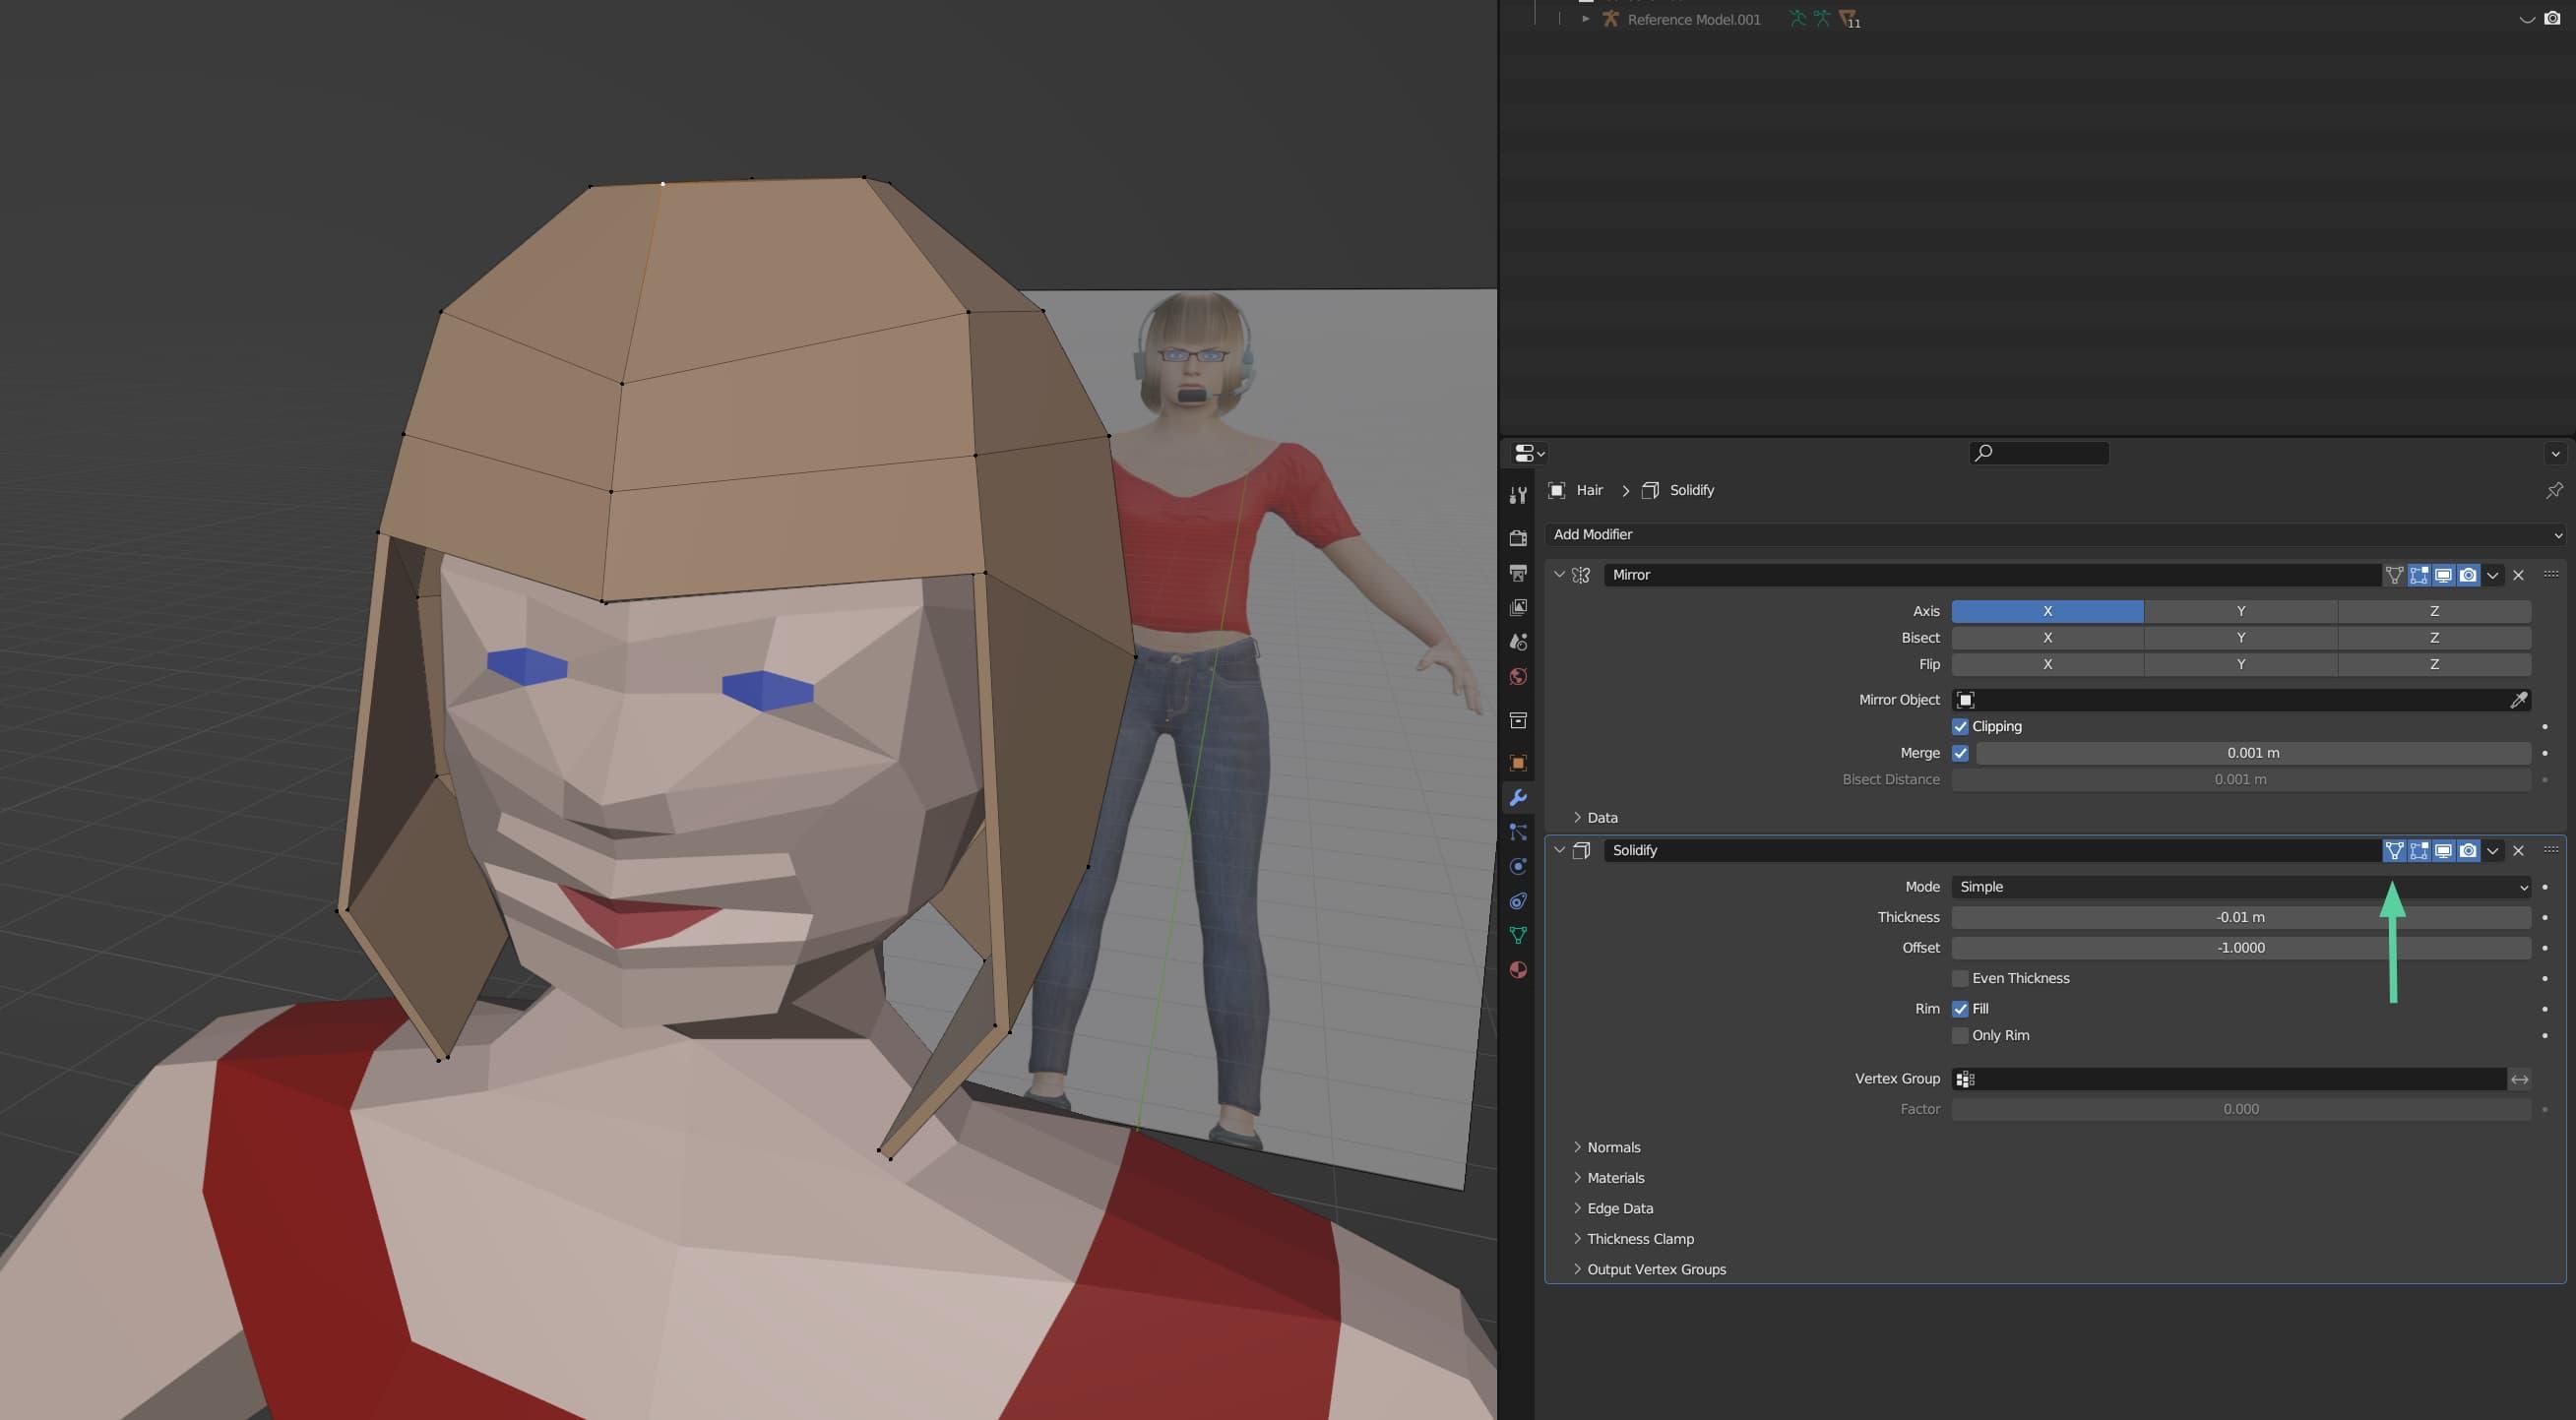
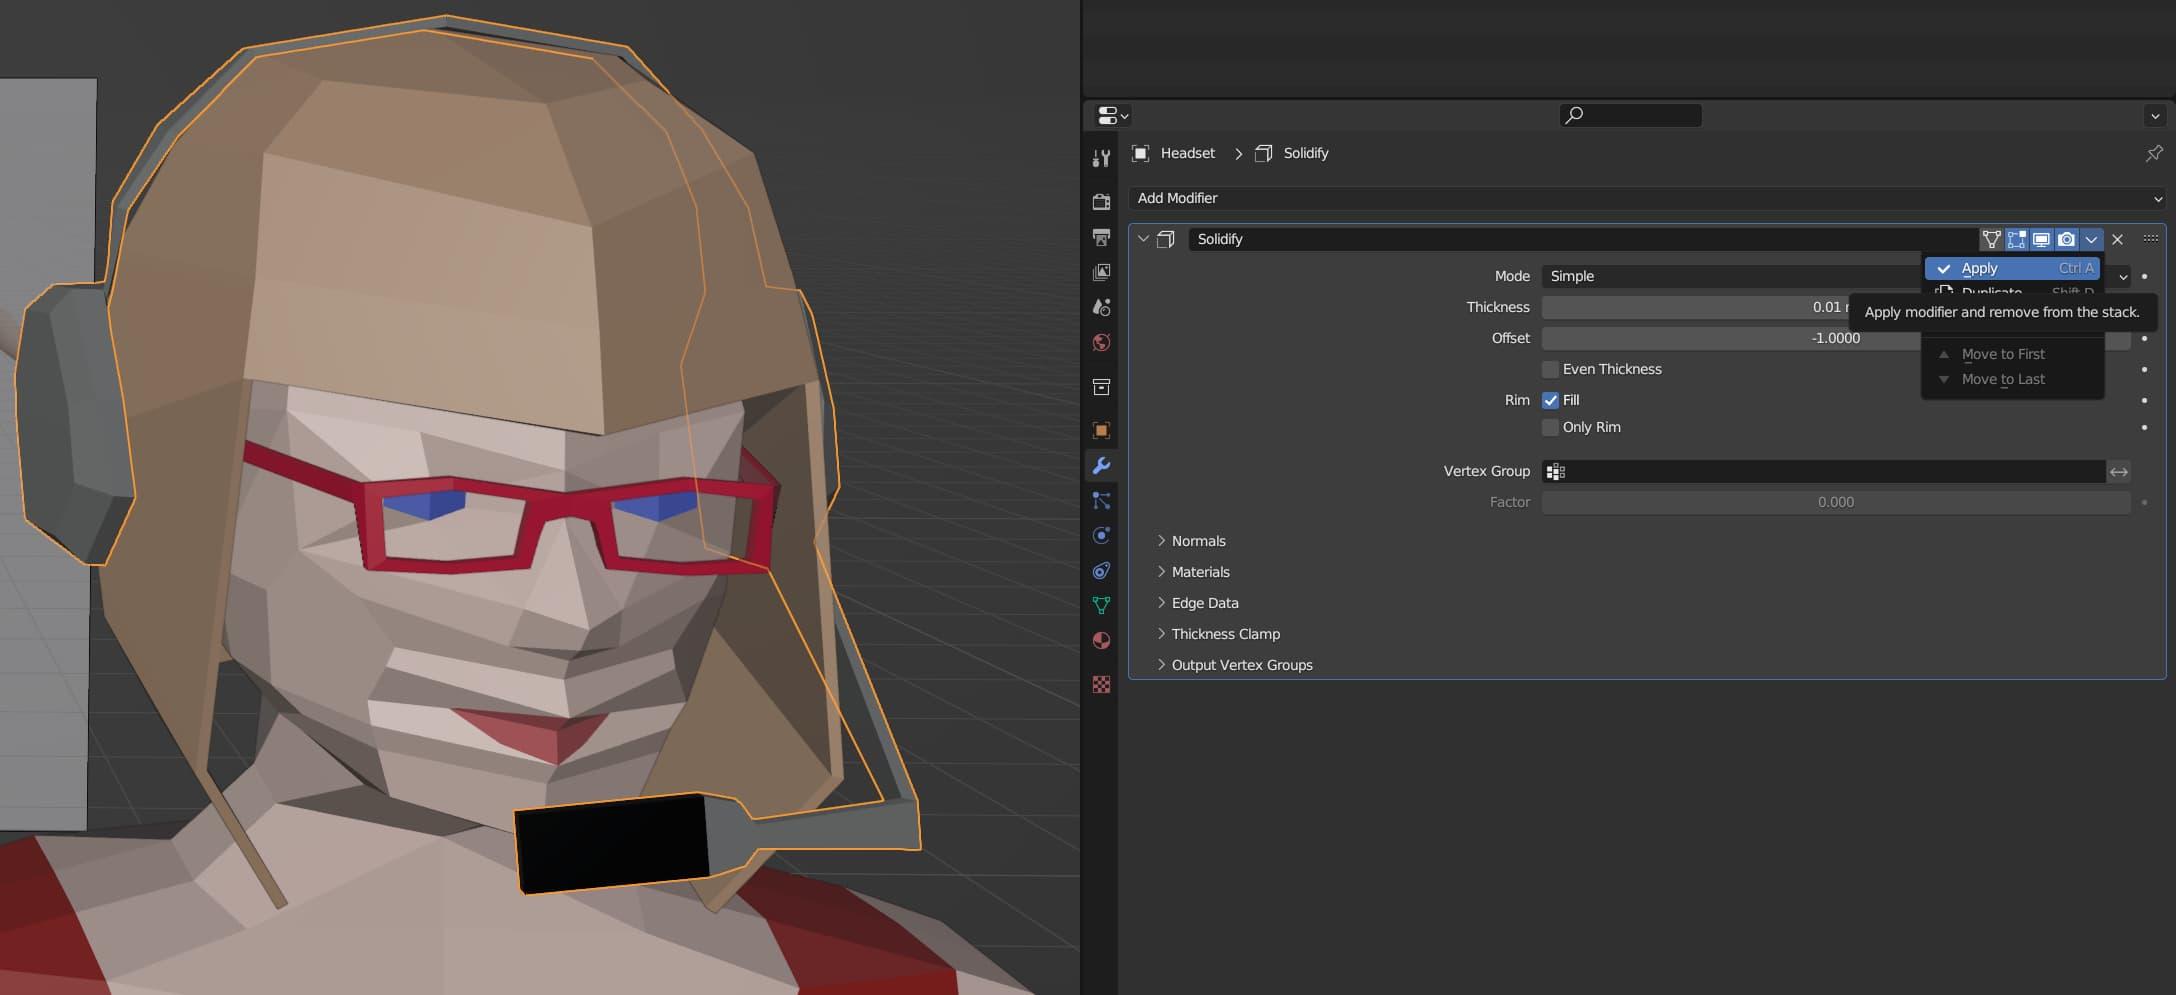
Modelling the hair was fairly simple. I used the solidify modifier to easily give it some depth. That comes in handy for modelling stuff like hair or clothing, because it just duplicates the geometry for you. In the last image above, you might notice the “cage” icon on the solidify modifier has been turned out. This allows you to manipulate the points as normal. It’s quite handy.
Anyway, I just moved the points around so they would match the reference images, and look decent from all angles.
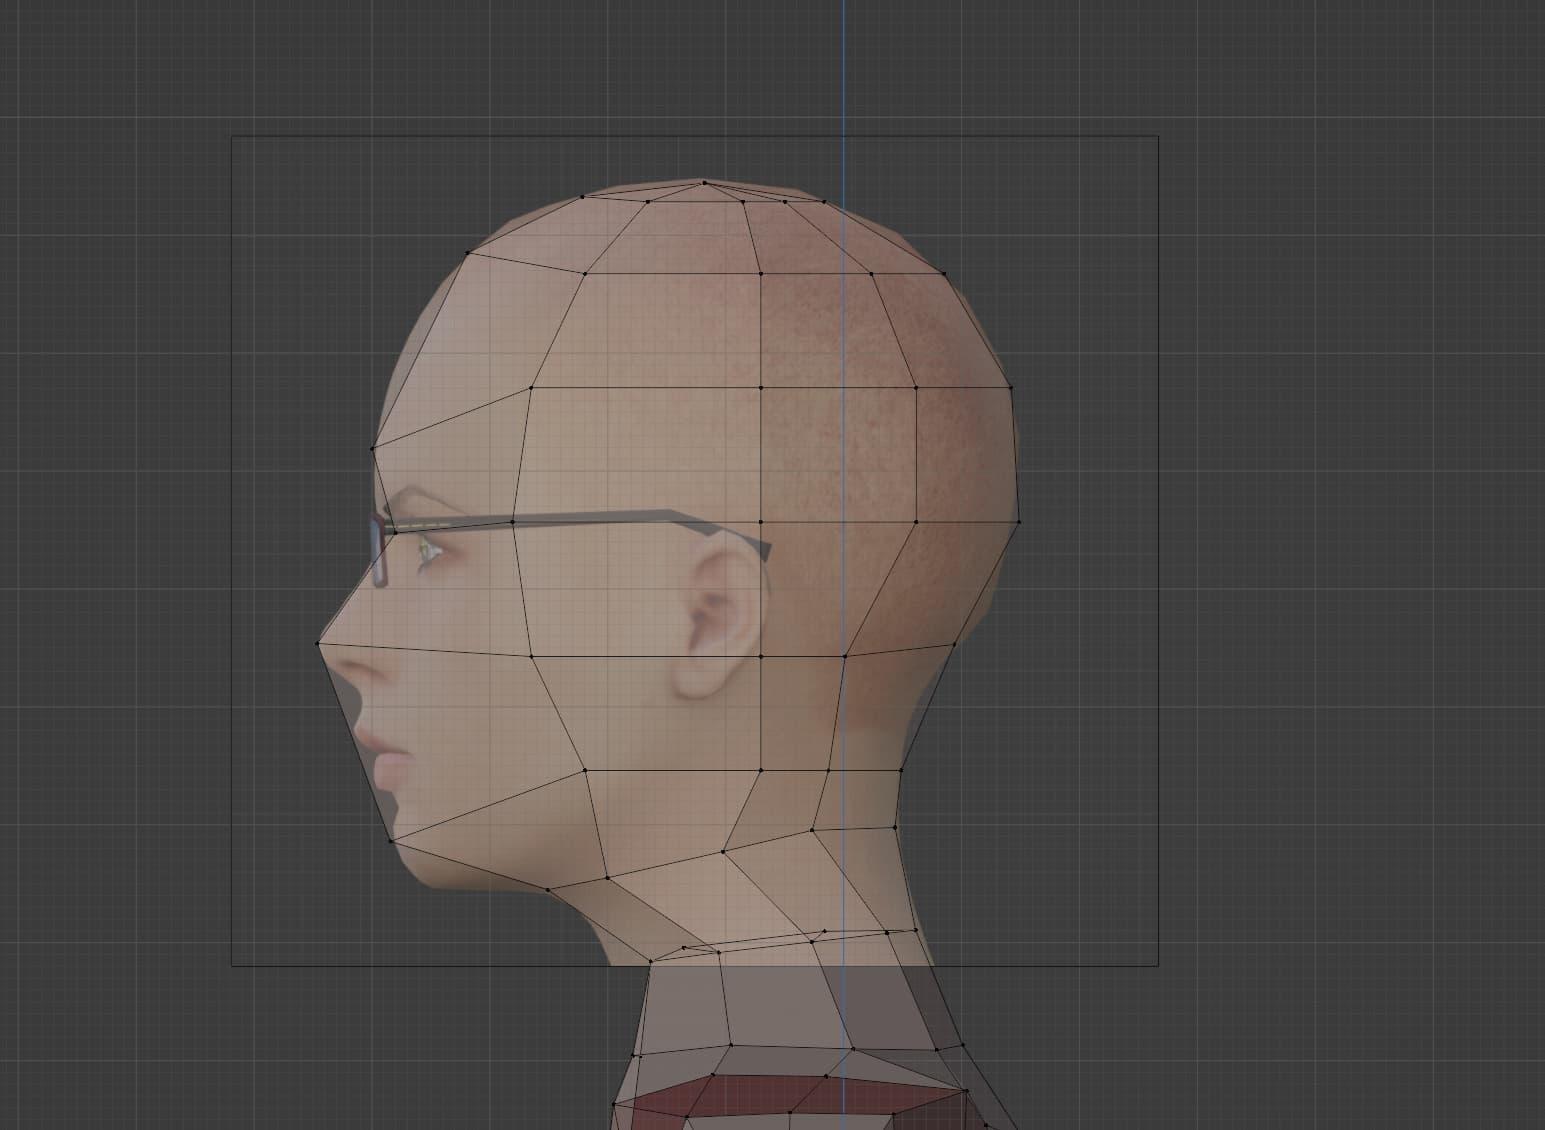
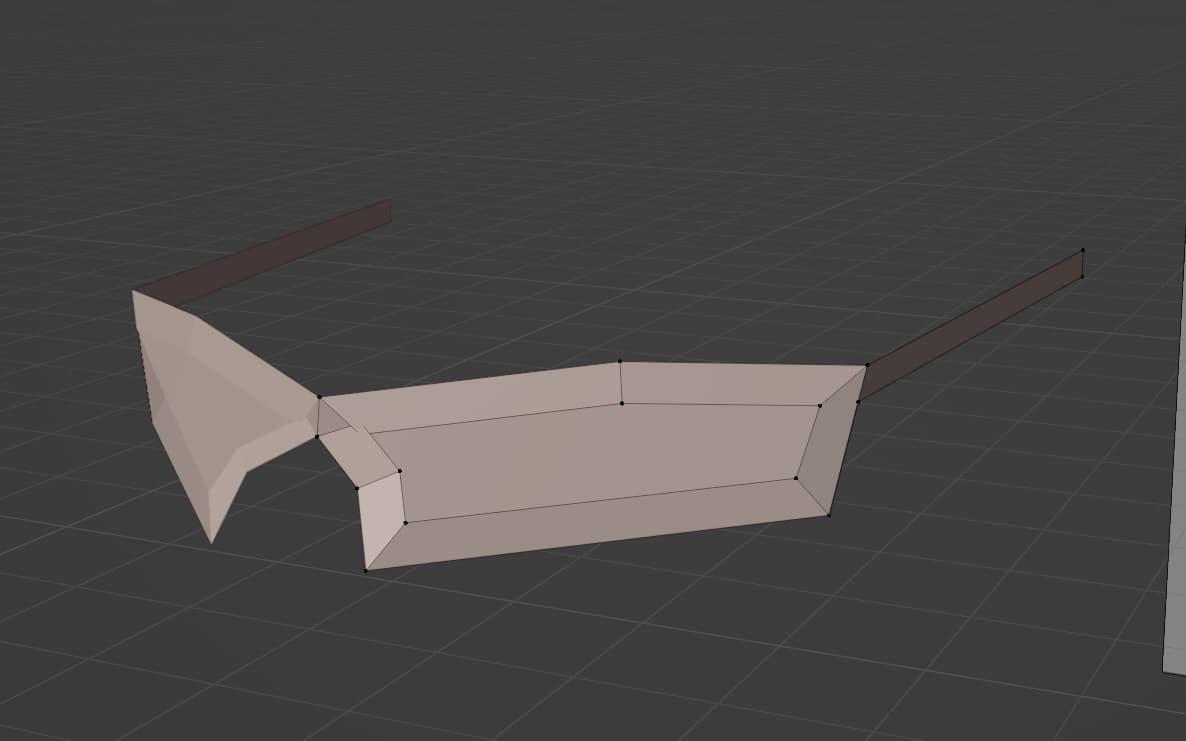
Now it was time for the glasses. I applied the same methodology - create a separate object, give it a solidify modifier, manipulate its geometry, and add a material to give it some colour.
Something to note, which I’ve used often, you can select a number of faces and press S then X (or Y, or Z depending on the axis) then 0. This will flatten the faces across the axis. I used it with the glasses, because I wanted them to be flat and not follow the contours of the face.
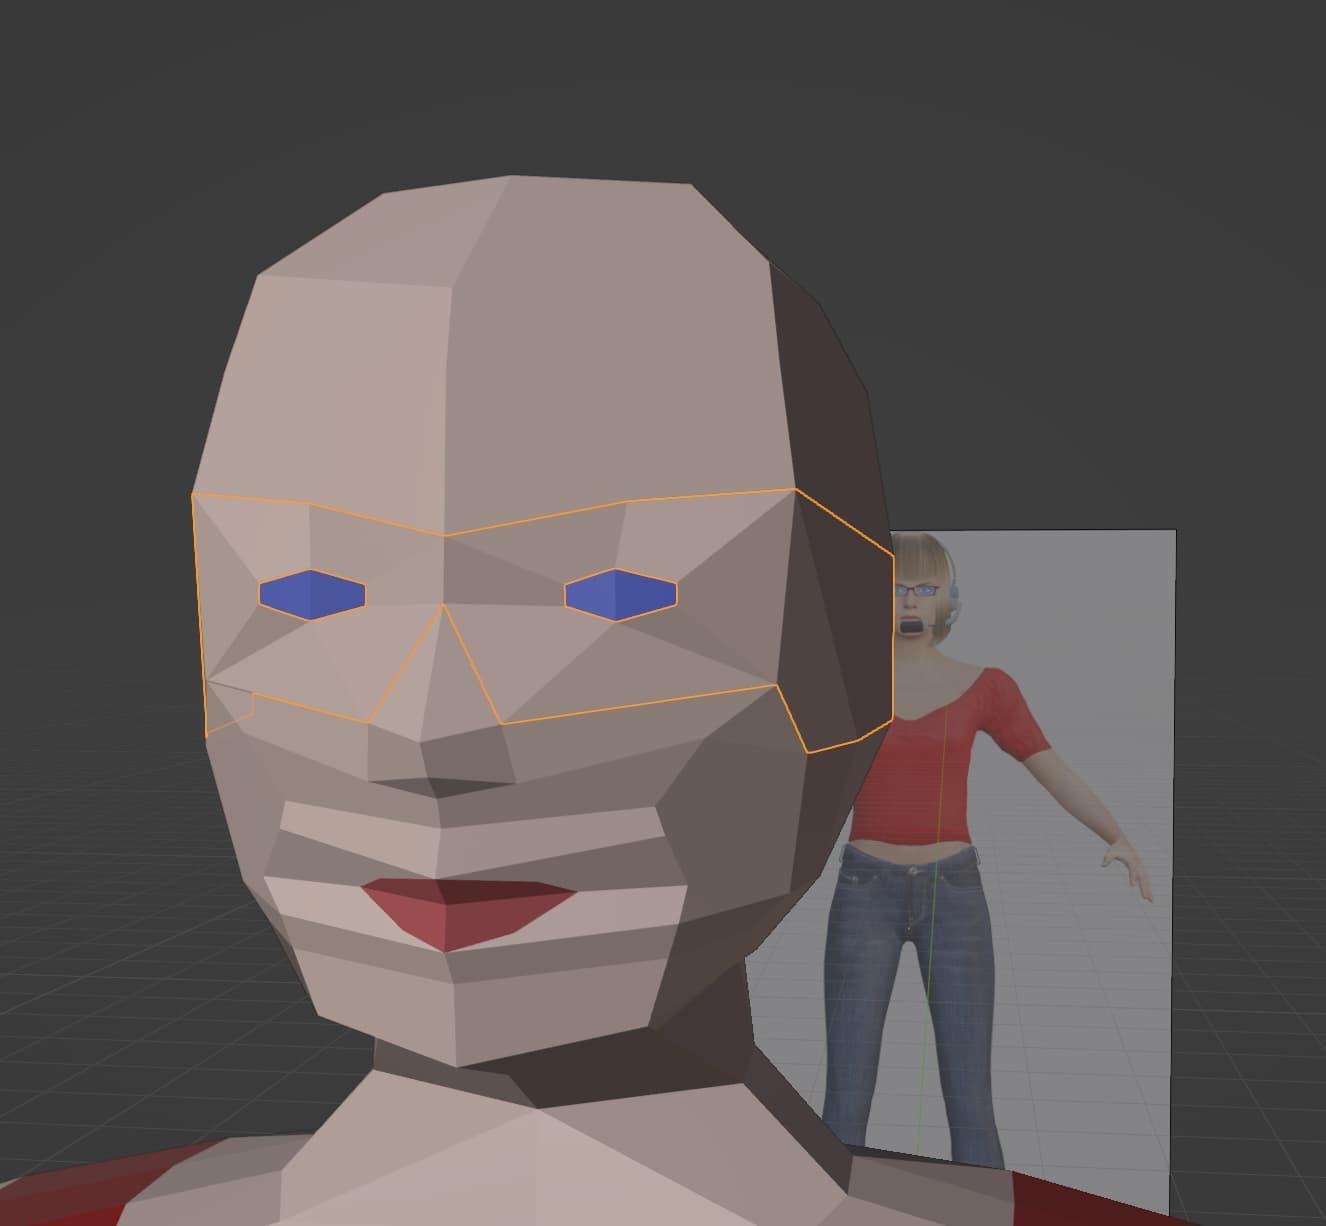

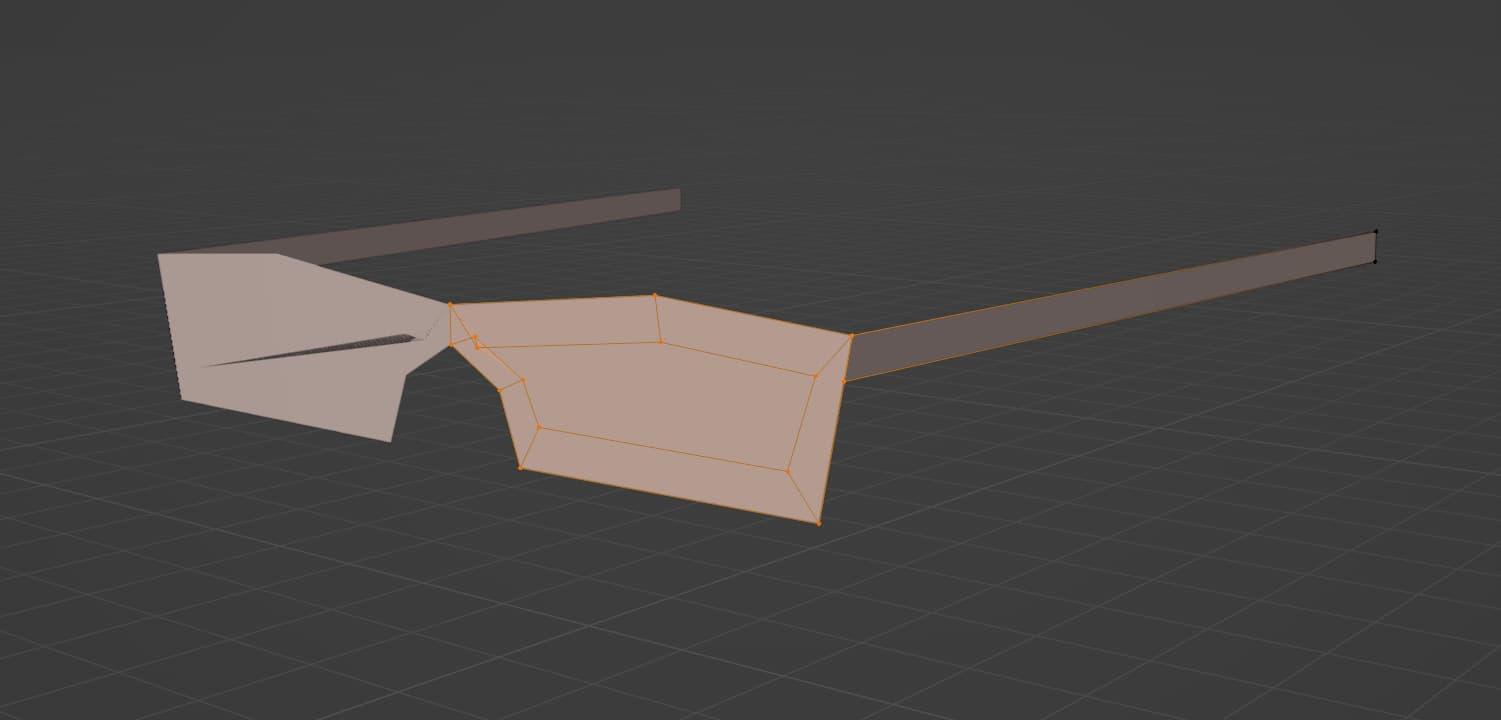
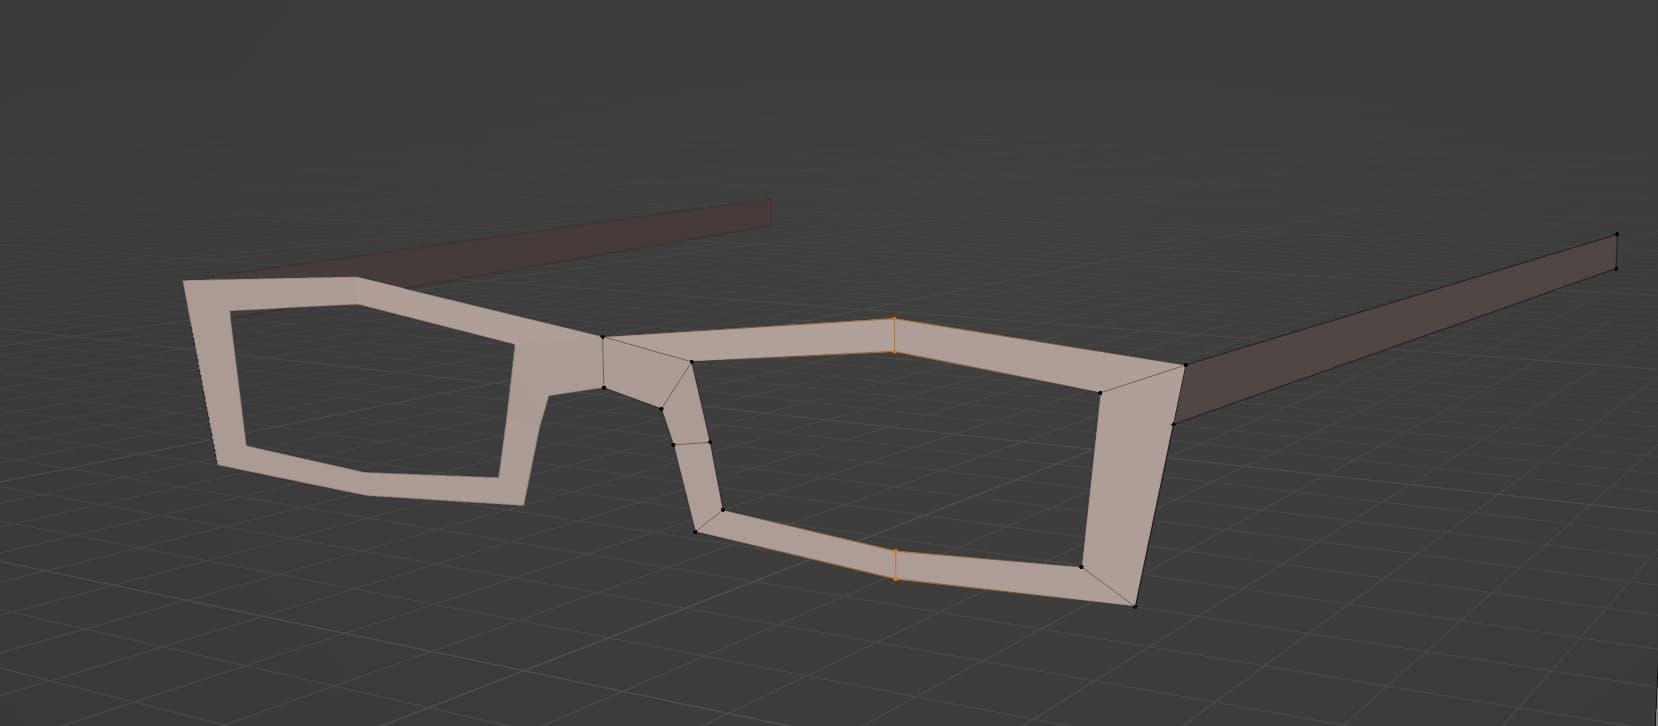
Creating a separate object for the glasses
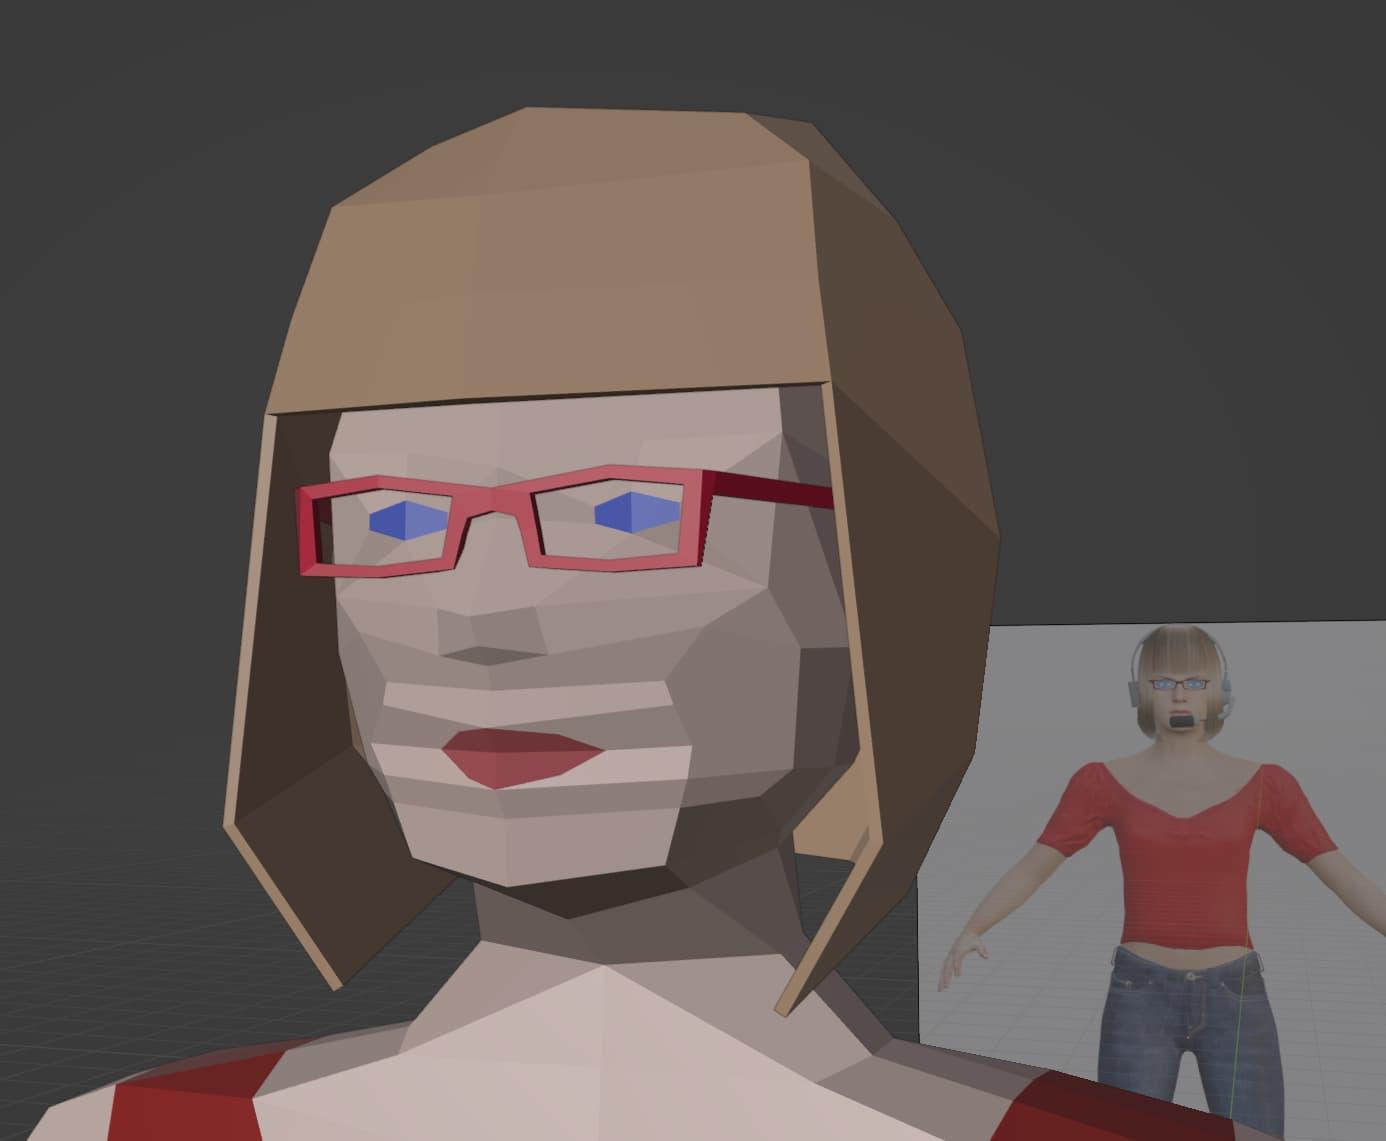
There was one last thing I wanted to model before I started the cleanup process - there’s always a cleanup process with these sorts of things. I wanted to model the headset.
Using the same methodology, I created a separate object for the headset, and started to refine its shape. But once I was happy with it, I had to apply the mirror modifier and add the asymmetrical part. Since I don’t think it makes much sense to have two microphones!
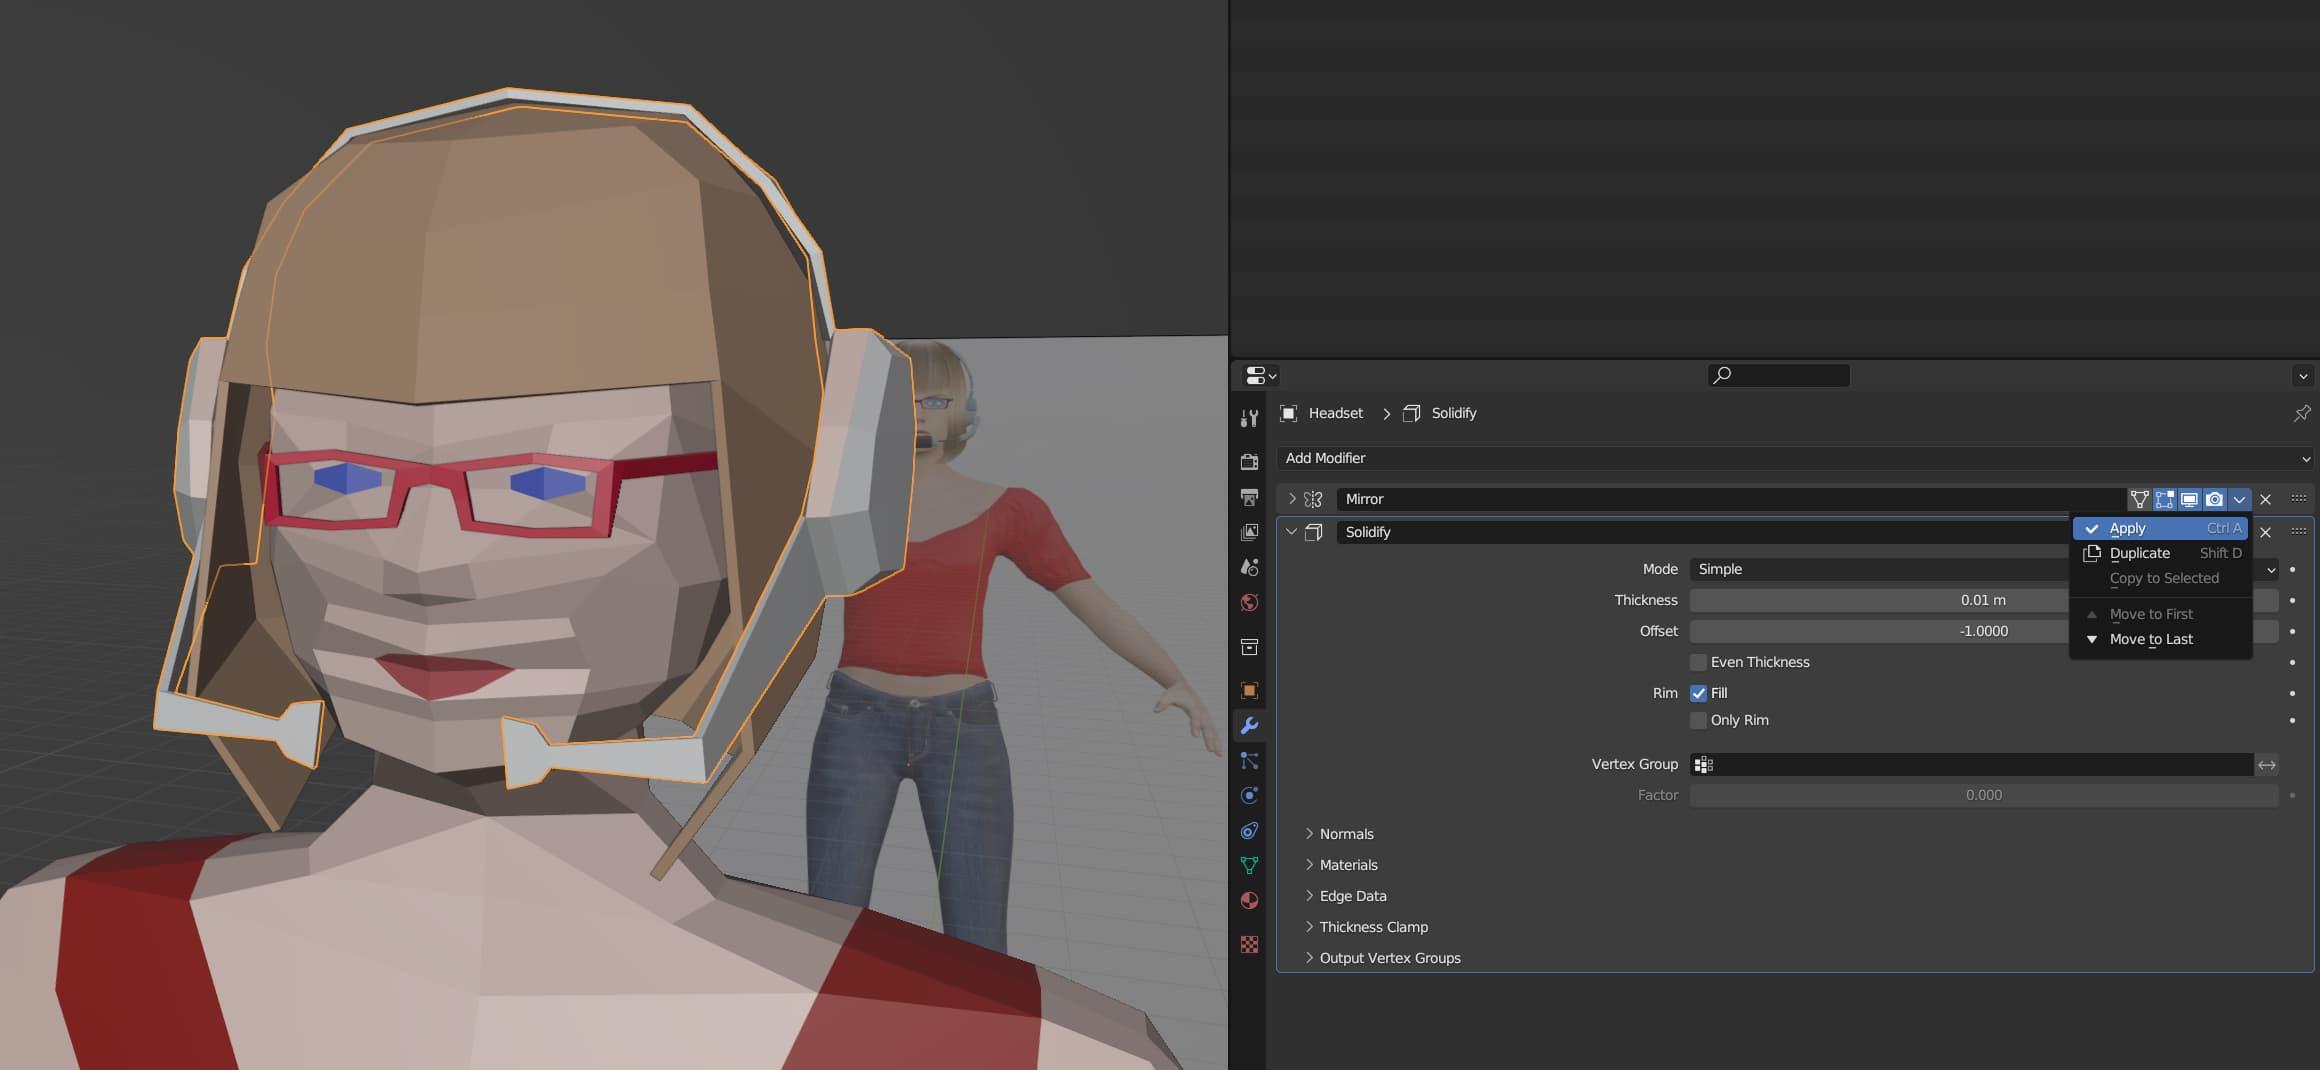
Gotta apply the mirror, before I can get rid of the second mic. This isn't supposed to look like orthodontic headgear
At this point, I set to work cleaning the model up. I added a bit more geometry in some places, and removed it in others. I did my best to simplify the geometry around the face, especially. It was quite tricky to fill in the face with quads, since I had to use several tris and n-gons during the initial phase of the modelling process.
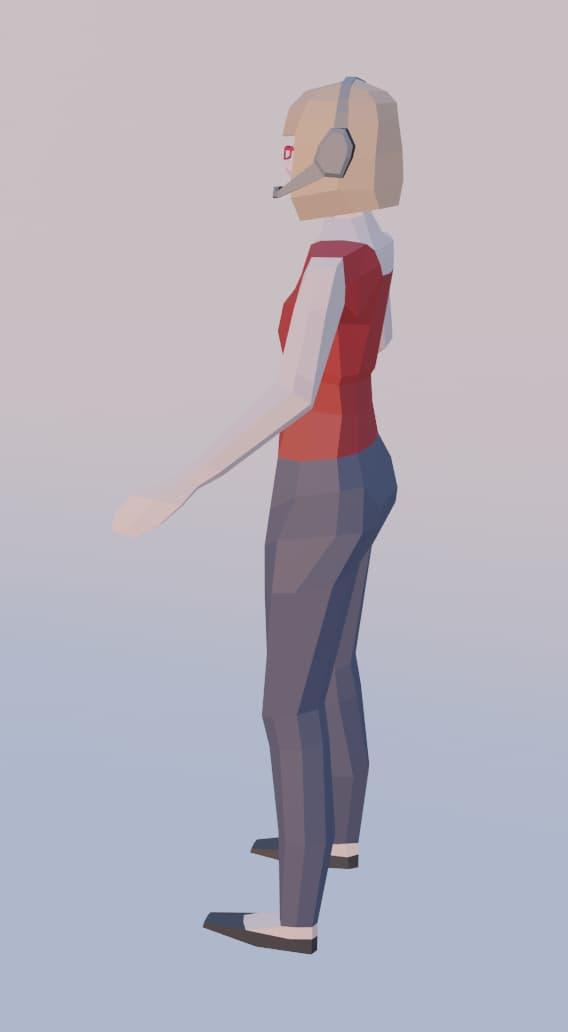
But the end result is something I’m quite satisfied with. Is it perfect? No. Is it finished? Well, not really. I’d add least like to rig it so it could be animated. And maybe add some textures, so there aren’t just flat colours. But I’m quite pleased with the modelling side of things. I think it’s more than serviceable, for some kind of game project. But in this case, the journey was just as important as the destination, if not a bit moreso. I just needed more practice, and I’m glad I was able to document this process. If only for my future self, but hopefully for the benefit of you, the reader, too.
Maybe this post got you interested in trying your hand at Blender. Or game development. Or CAD. Or any number of creative pursuits. Because contrary to how it may seem, I’m still very new and very inexperienced at this whole thing. And I feel like I lack the je ne sais quoi necessary to do anything much more complicated or interesting.
But I’ve found my groove with this workflow. And I think I’ll stick to it for a long time, because it works well for me. It just goes to show that with the right tools, the right help, and a bit of determination, doors tend to open.
While we’re at it, I would like to acknowledge this awesome tutorial from Imphenzia. I would highly recommend it to someone getting into Blender in general, or low-poly modellilng in particular. It took me quite a while to get through it, it’s a beefy tutorial, but it taught me the basics. And from there it helped me find my style.
There are many other great tutorials out there, for every conceivable facet of Blender’s extensive set of features. But I’ll leave you to discover them for yourself, it’s more fun that way. Once you have the basics down, it’s all a matter of finding your groove, just like I was able to.
So yeah, that’s about it for now. Like I said, keep an eye out for the continuation of this journey - there’s a lot more where this came from. And for this character, who will probably appear in future projects of mine.
I call her Proxy. And I’m releasing her model as CC0 (public domain dedication). So feel free to download it and use it in a project. Or open it up in Blender, to check out how I designed it. Or use it as a reference - maybe try giving her different accessories, or clothing, or whatever.
You can download Proxy’s model here from this Poly Pizza link, or check it out on its OpenGameArt page.
Or, through the magic of OverScore Nexus, you can view the 3D model right here in your browser!
It may not be much, but I think it’s more than a token. I just really appreciate all the work that’s gone into the tools I used to make this model, so I wanted to give back in some way. Hopefully someone can find this model, or this workflow, or just one good tip I’ve shared, to be helpful. Maybe that someone is you, in which case I’d be interested to hear from you.
Overall I’m satisfied with the result, I think it was well worth the effort.
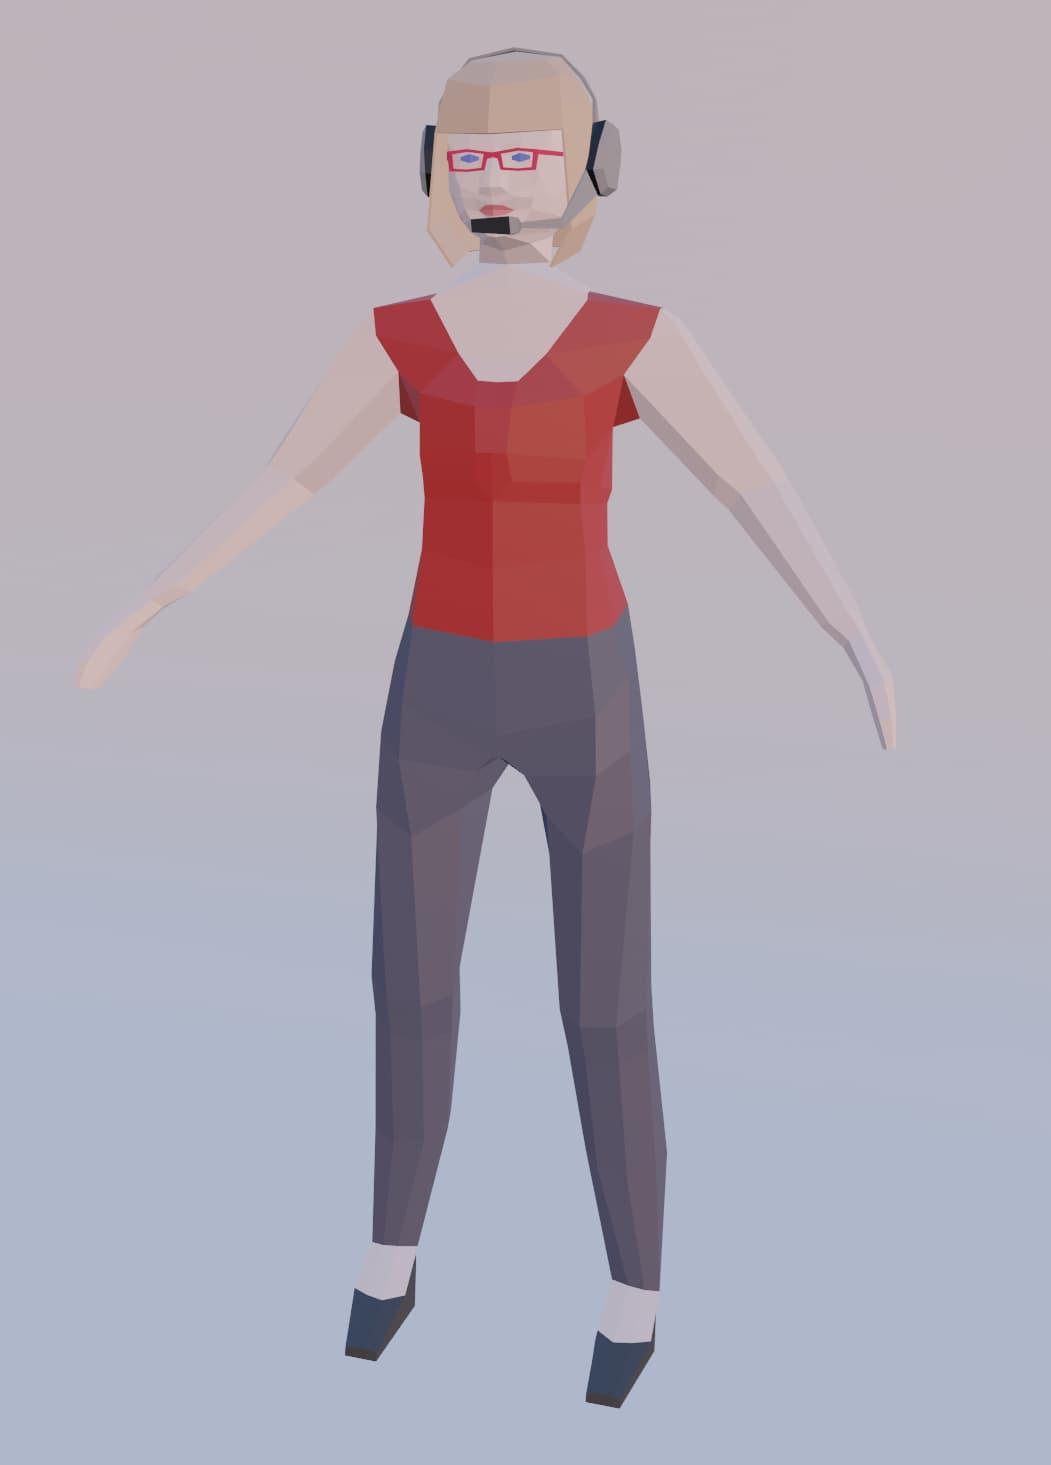
Front View
Until next time, this is Matthew Piercey, signing off. With the promise of more Blender-related shenanigans to come.

Thanks for Reading!